Introduction
FHIR (Fast Healthcare Interoperability Resources) is a new and emerging standard for interoperability in healthcare IT. Unlike the ancient HL7v2 standard, FHIR is open, extensible, and composable. It supports modern web standards like JSON, XML, HTTP(!), and Turtle. It also defines different data exchange methods like RESTful API, messaging, services, documents, and persistent storage. Best of all the FHIR documentation is outstanding: There is detail documentation for every type of resource, with lots of examples. Enough detail for anyone to create a compliant implementation. All of the data types like dates and times, terminologies, identifiers, references, numeric values, extensions are documented in detail, including how to read and write them. It’s probably one of the best documented and well thought out APIs I have worked with.
Epic made their FHIR APIs available on https://fhir.epic.com/. In this post, we will discuss using Epic’s FHIR APIs in Mule 4
Prerequisites
You will need an Epic developer account. You can get one for free by signing up here. I have used Anypoint Studio 7.7 for Mule app.
Configuration
Certificate setup for JWS
We will use SMART Backend Services approach described here which uses signed JWT to get the access token.
Generate a new public-private key pair, and get the certificate(s) in appropriate format
1
2
3
4
5
6
7
8
# generate a new public-private key pair openssl genrsa -out Anypoint_Mulesoft.pem 2048 # export the public key to a base64 encoded X.509 certificate openssl req -new -x509 -key Anypoint_Mulesoft.pem -out Anypoint_PublicKey.pem -subj '/CN=Anypoint' -days 365 # export the keystore in pkcs12 openssl pkcs12 -export -in Anypoint_PublicKey.pem -inkey Anypoint_Mulesoft.pem -out Anypoint_Keystore.p12
Create an app in Epic
Login to https://fhir.epic.com/ and click on ‘Build Apps’

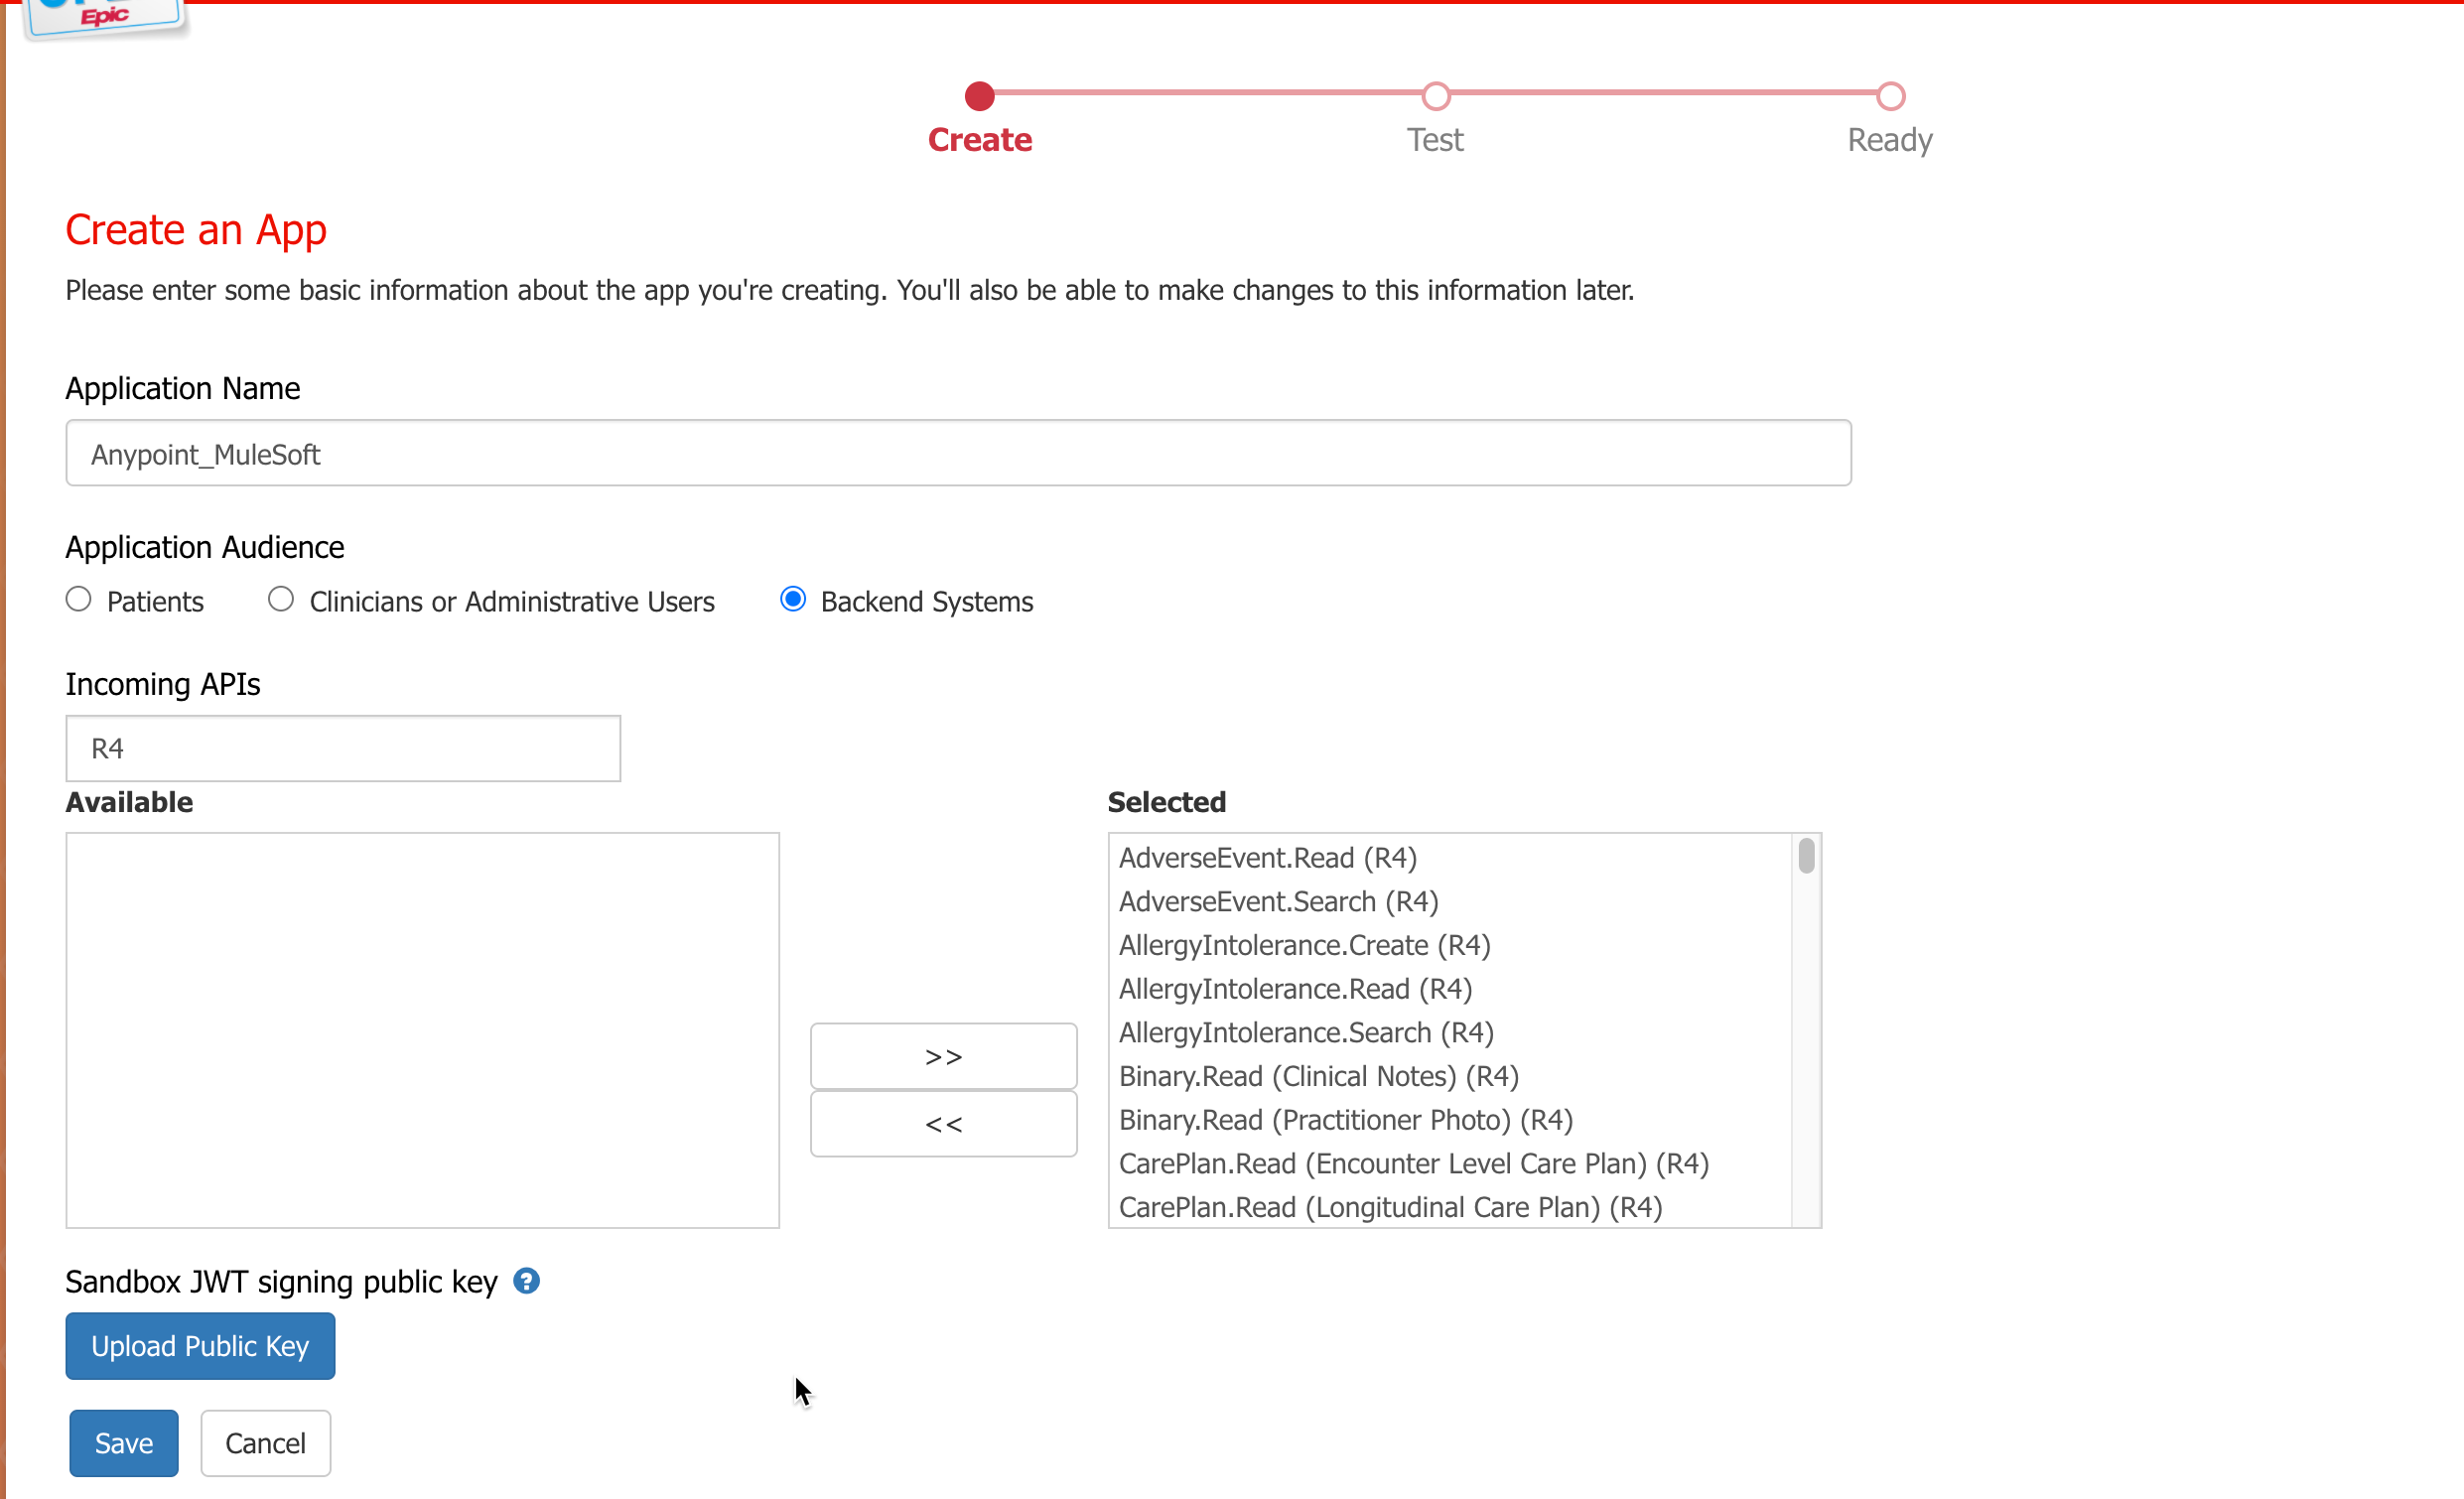
Click on ‘Create’ and enter your app details as follows. Make sure to select the Application Audience as ‘Backend Systems’. For Sandbox JWT signing public key, upload the public key store (Anypoint_PublicKey.pem) file generated in the previous step. Click on save.
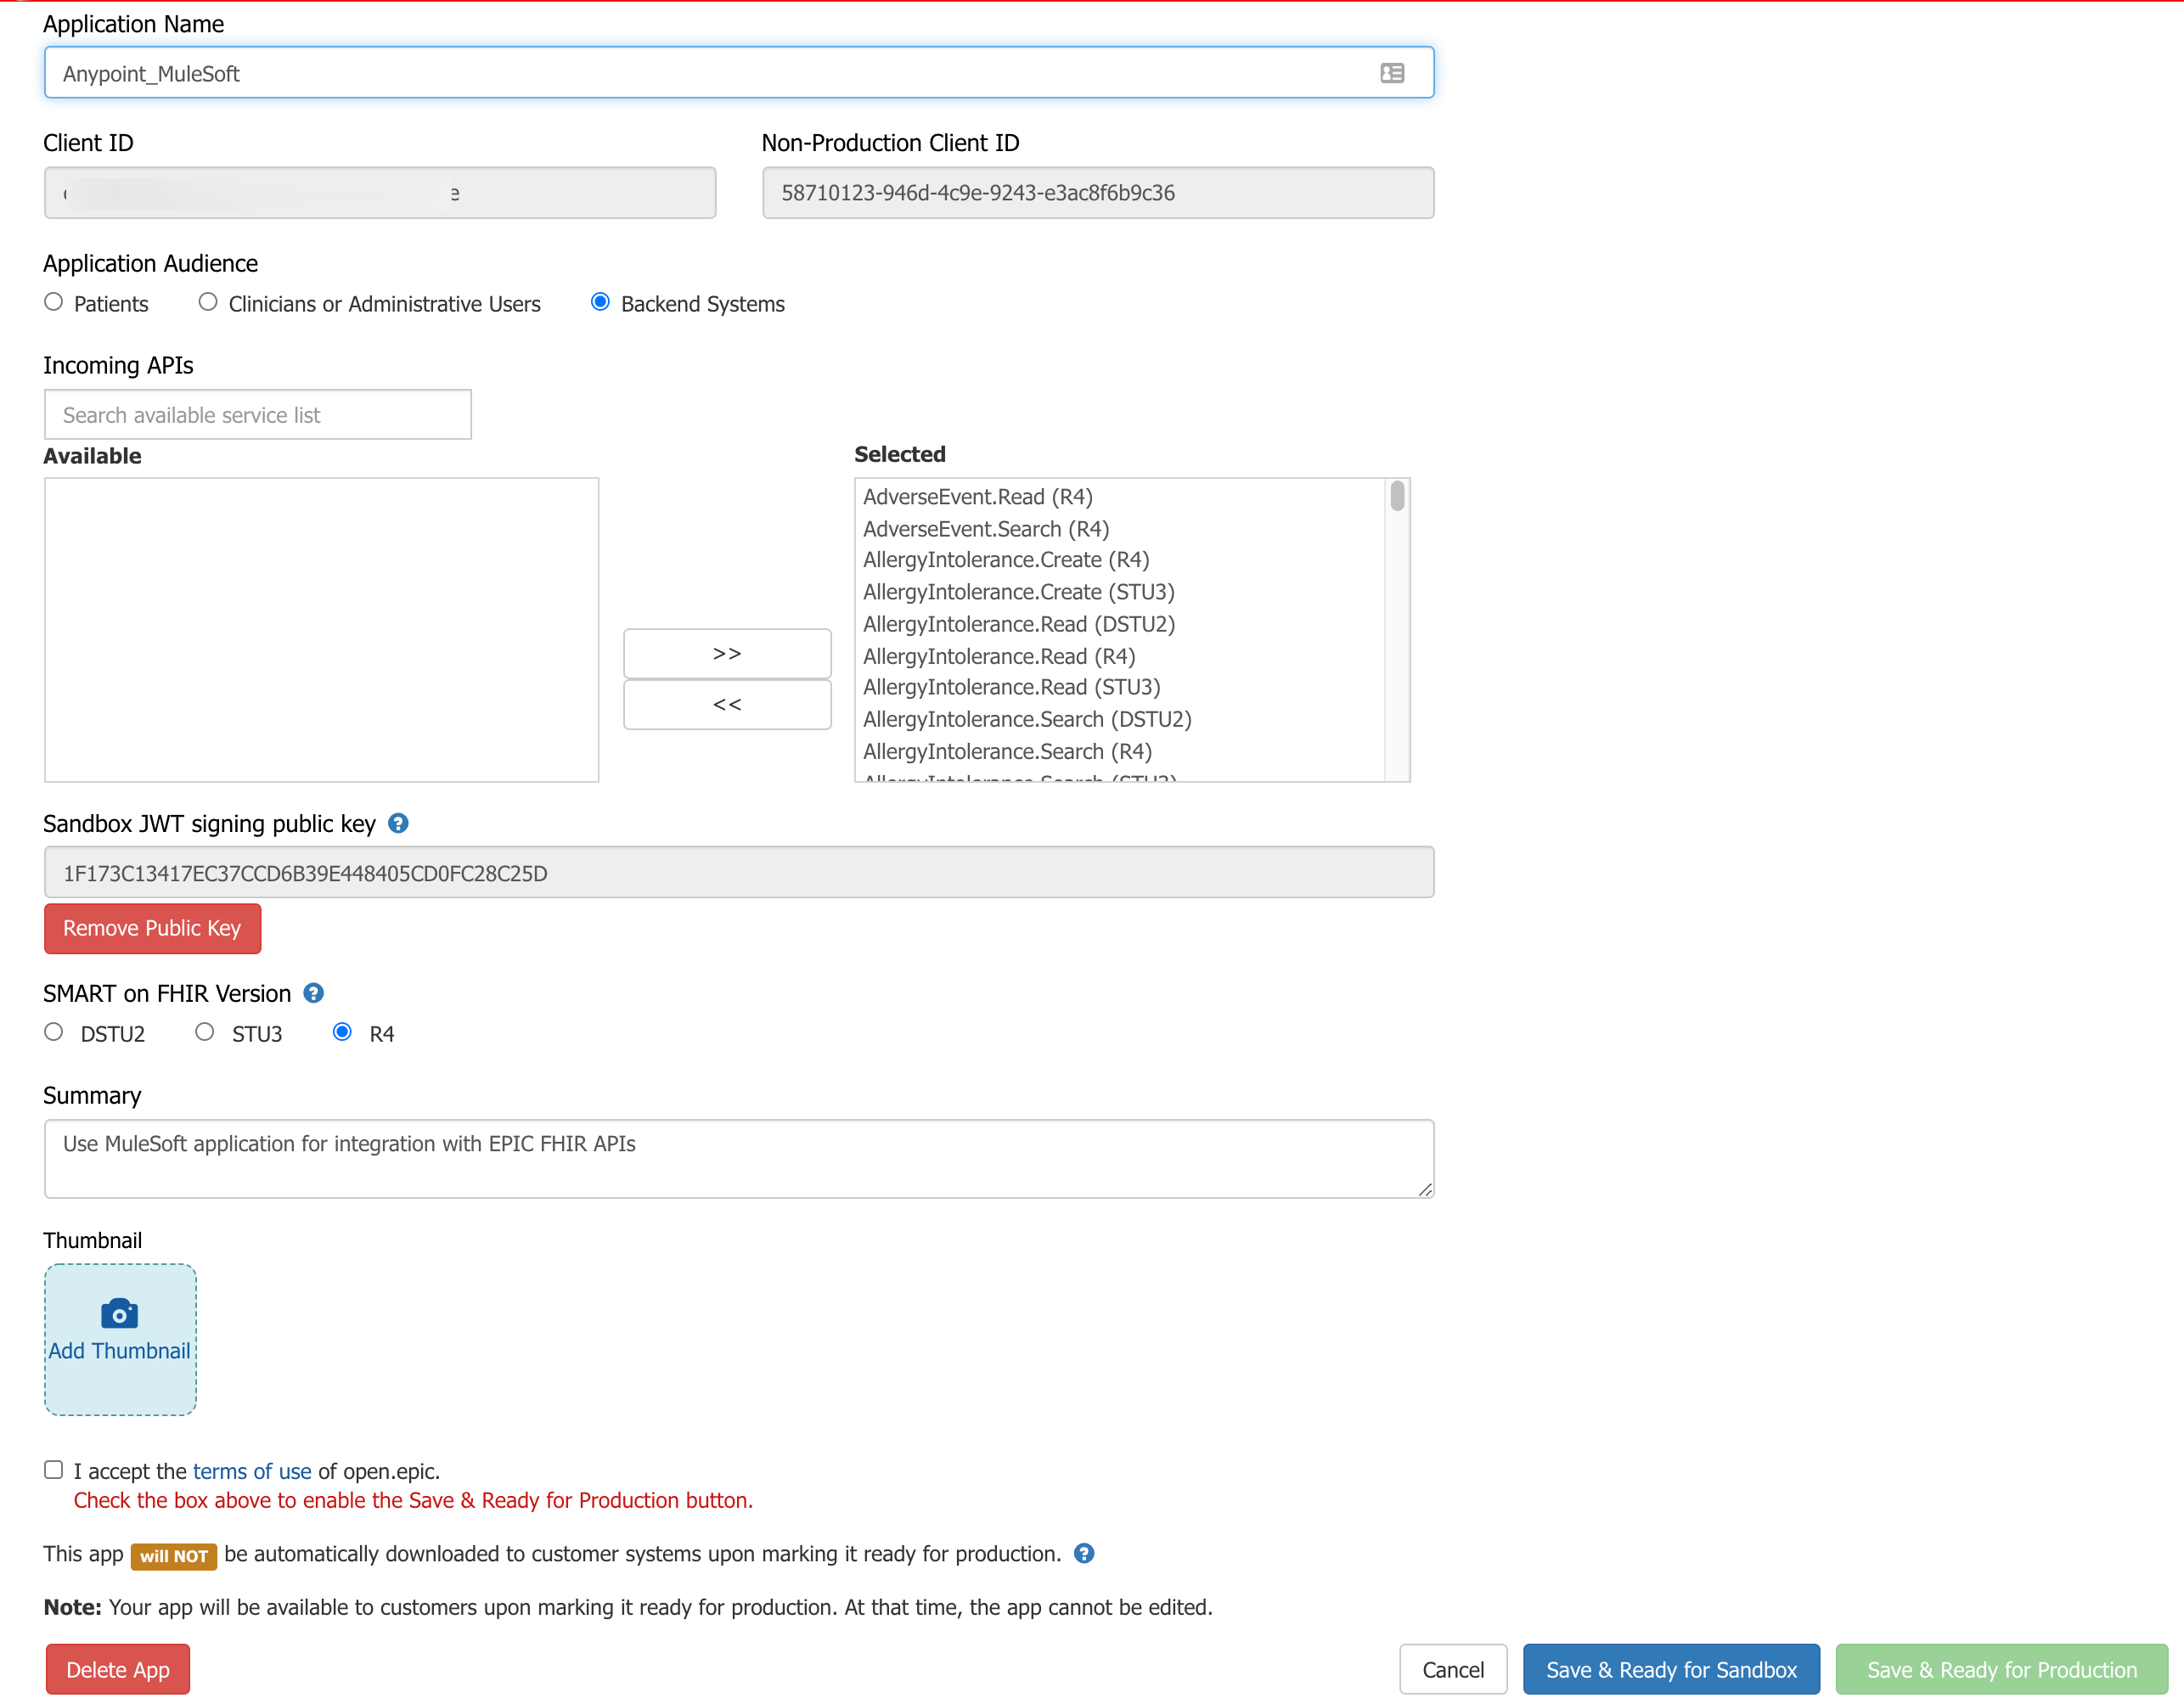
You should see the Client ID and Non-Production Client ID for your app. Select the SMART on FHIR version as R4, enter the summary, accept the terms of usage and click on ‘Save & Ready for Sandbox’.
In my experience it usually takes a couple of hours for your app to be usable in Epic. It took me ~2 hours for my app to be usable
Mule application details
Create a new Mule application, and copy the pkcs12 formatted keystore (Anypoint_Keystore.p12) created earlier, in the
src/main/resourcesfolder.To generate a signed JWT (JWS), we will use Java JWT library. In the pom.xml of your Mule application, include the following dependencies. (I have included Apache log4j dependencies, these are optional).
 1
 2
 3
 4
 5
 6
 7
 8
 9
10
11
12
13
14
15
16
17
18
19
20
21
22
23
24
25
26
27
28
29
30
31
<dependency> <groupId>org.apache.logging.log4j</groupId> <artifactId>log4j-api</artifactId> <version>2.14.0</version> </dependency> <dependency> <groupId>org.apache.logging.log4j</groupId> <artifactId>log4j-core</artifactId> <version>2.14.0</version> </dependency> <dependency> <groupId>io.jsonwebtoken</groupId> <artifactId>jjwt-api</artifactId> <version>0.11.2</version> </dependency> <dependency> <groupId>io.jsonwebtoken</groupId> <artifactId>jjwt-impl</artifactId> <version>0.11.2</version> </dependency> <dependency> <groupId>io.jsonwebtoken</groupId> <artifactId>jjwt-jackson</artifactId> <version>0.11.2</version> </dependency> <dependency> <groupId>org.bouncycastle</groupId> <artifactId>bcprov-jdk15on</artifactId> <version>1.65</version> <type>jar</type> </dependency>In Mule application’s
src/main/javafolder, create a new Java packagecom.dhimate.demo, classJWTProviderand use following code snippet to generate signed JWT.1 2 3 4 5 6 7 8 9 10 11 12 13 14 15 16 17 18 19 20 21 22 23 24 25 26 27 28 29 30 31 32 33 34 35 36 37 38 39 40 41 42 43 44 45 46 47 48 49 50 51 52 53 54 55 56 57 58 59 60 61 62 63 64 65 66package com.dhimate.demo; import io.jsonwebtoken.Jwts; import java.io.File; import java.io.FileInputStream; import java.net.URL; import java.security.KeyStore; import java.security.PrivateKey; import java.util.Date; import java.util.Enumeration; import java.util.UUID; import java.util.concurrent.TimeUnit; import org.apache.logging.log4j.LogManager; import org.apache.logging.log4j.Logger; public class JWTProvider { // private static final String PRIVATE_KEY_FILE_RSA = "Anypoint_Keystore.p12"; // private static final String PRIVATE_KEY_PASSWORD = "CHANGEIT"; // private static final String EPIC_CLIENT_ID = "86121d55-247e-4a0b-b3c0-6fa28c995f72"; // private static final String EPIC_FHIR_URL = "https://fhir.epic.com/interconnect-fhir-oauth/oauth2/token"; private static final Logger logger = LogManager.getLogger("JWTProvider"); public static String getToken(String PRIVATE_KEY_FILE_RSA, String PRIVATE_KEY_PASSWORD, String EPIC_CLIENT_ID, String EPIC_FHIR_URL) throws Exception { logger.info("Generating JWS token"); String jws = Jwts .builder() .setHeaderParam("alg", "RS384") .setHeaderParam("typ", "JWT") .setIssuer(EPIC_CLIENT_ID) .setSubject(EPIC_CLIENT_ID) .setAudience(EPIC_FHIR_URL) .setId(UUID.randomUUID().toString()) .setExpiration(new Date(System.currentTimeMillis() + TimeUnit.MINUTES.toMillis(5))) .signWith(getKey(PRIVATE_KEY_FILE_RSA, PRIVATE_KEY_PASSWORD)) .compact(); return (jws); } private static PrivateKey getKey(String PRIVATE_KEY_FILE_RSA, String PRIVATE_KEY_PASSWORD) throws Exception { KeyStore keystore = KeyStore.getInstance("PKCS12"); URL resource = JWTProvider.class.getClassLoader().getResource(PRIVATE_KEY_FILE_RSA); FileInputStream is = new FileInputStream(new File(resource.toURI())); keystore.load(is, PRIVATE_KEY_PASSWORD.toCharArray()); Enumeration<String> aliases = keystore.aliases(); String keyAlias = ""; while (aliases.hasMoreElements()) { keyAlias = (String) aliases.nextElement(); } PrivateKey key = (PrivateKey) keystore.getKey(keyAlias, PRIVATE_KEY_PASSWORD.toCharArray()); return (key); } }
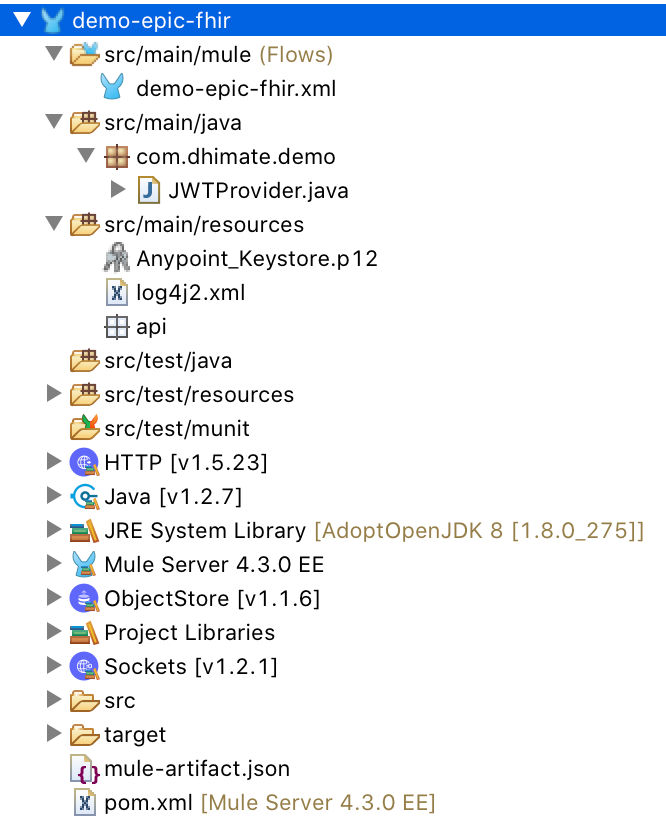
Your Mule application should look like this.
In Mule application’s
src/main/javafolder, create a new Java packagecom.dhimate.demo, classJWTProviderand use the following code snippet to generate signed JWT.Calling Epic’s FHIR APIs is a two-step process.
- In the first step we need to get the access token using the signed JWT token
- In the second step we will use the access token received in the step above to access FHIR resource
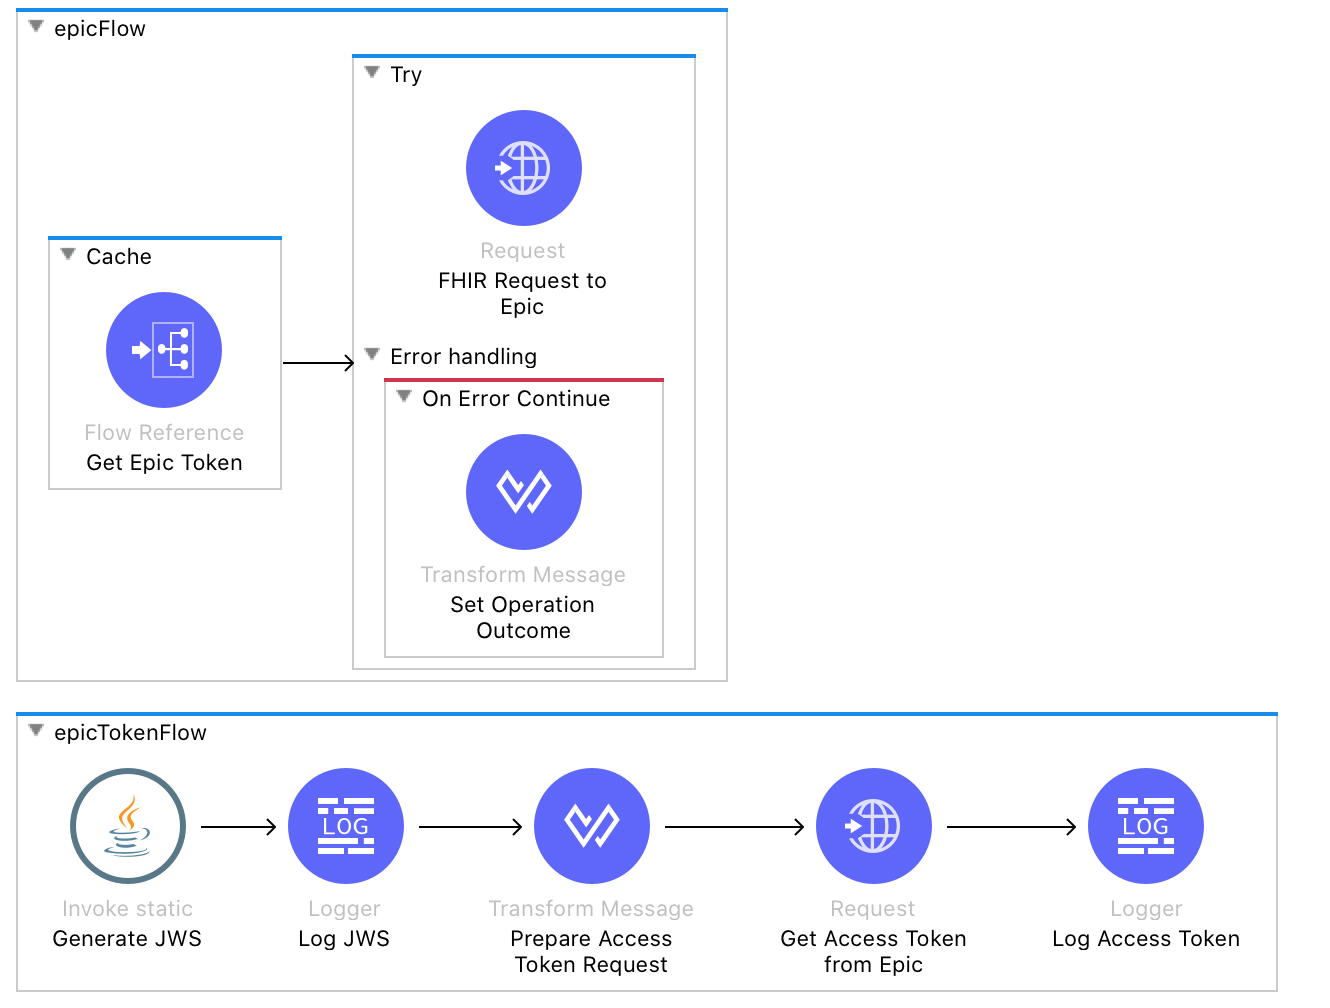
- Let’s look at the configuration of important components
- Generate signed JWS token using
Invoke Staticcomponent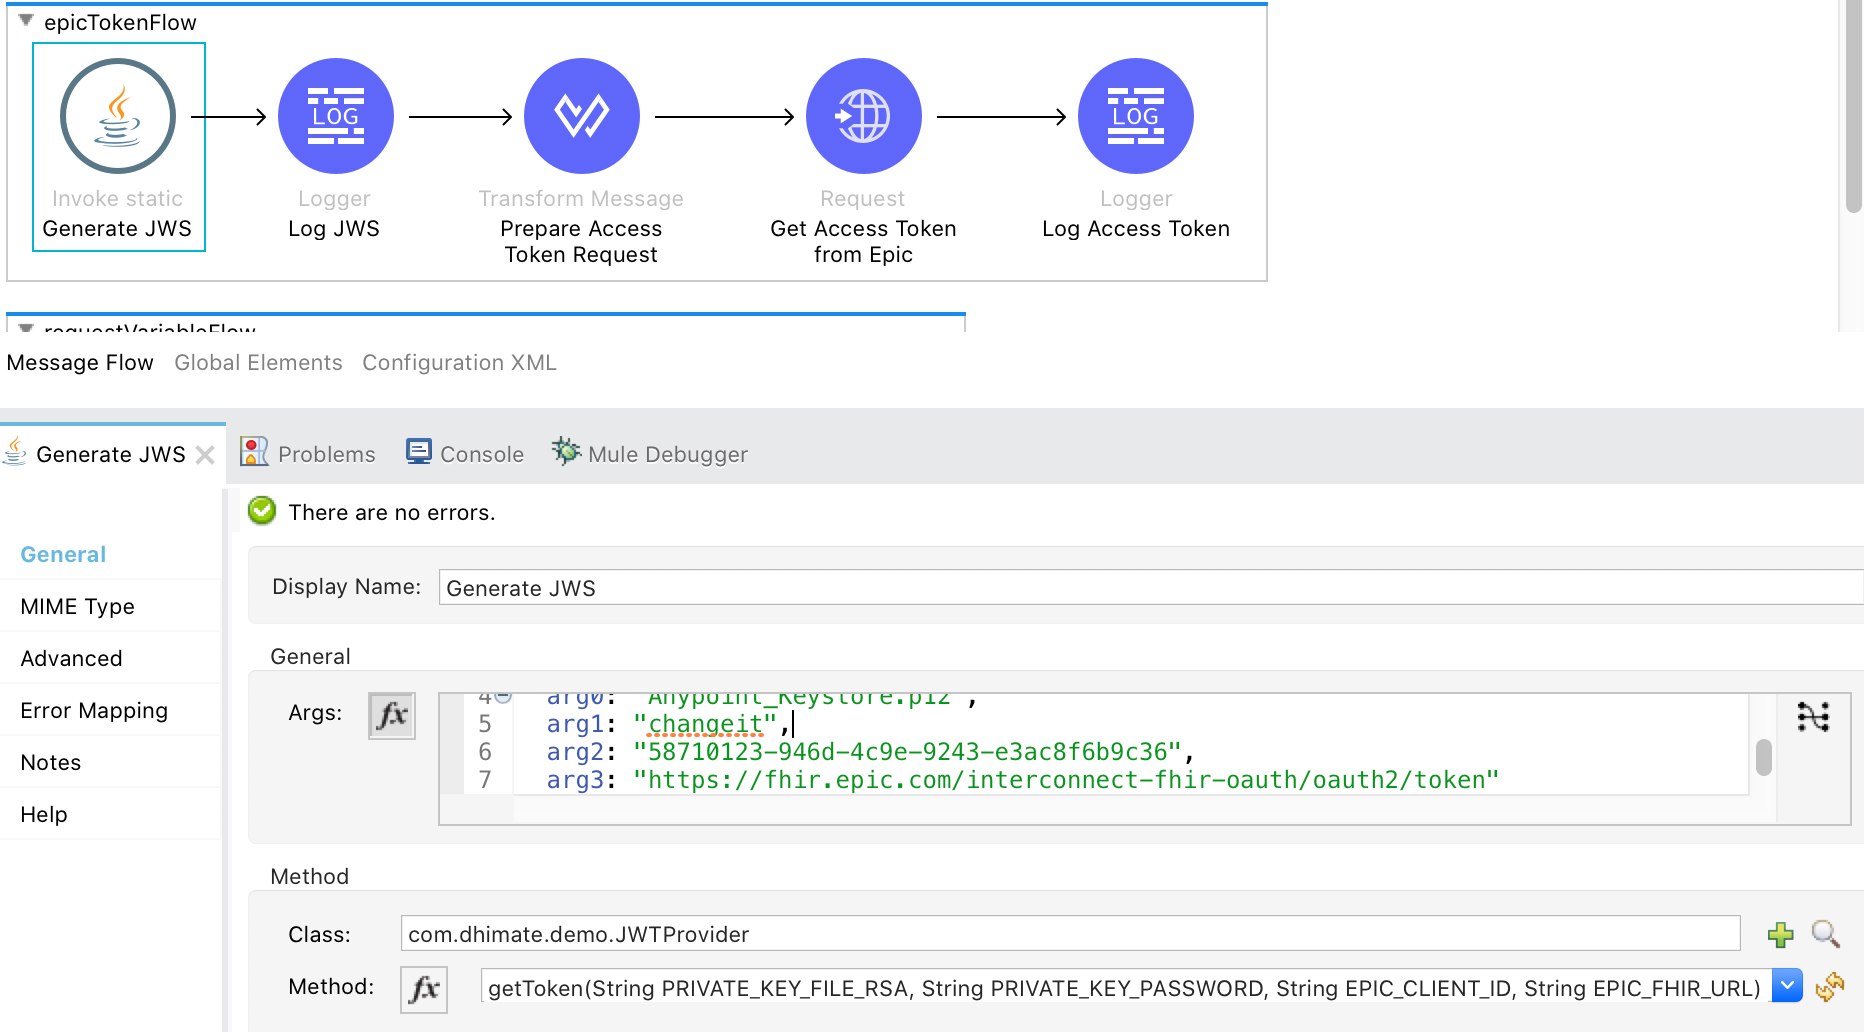
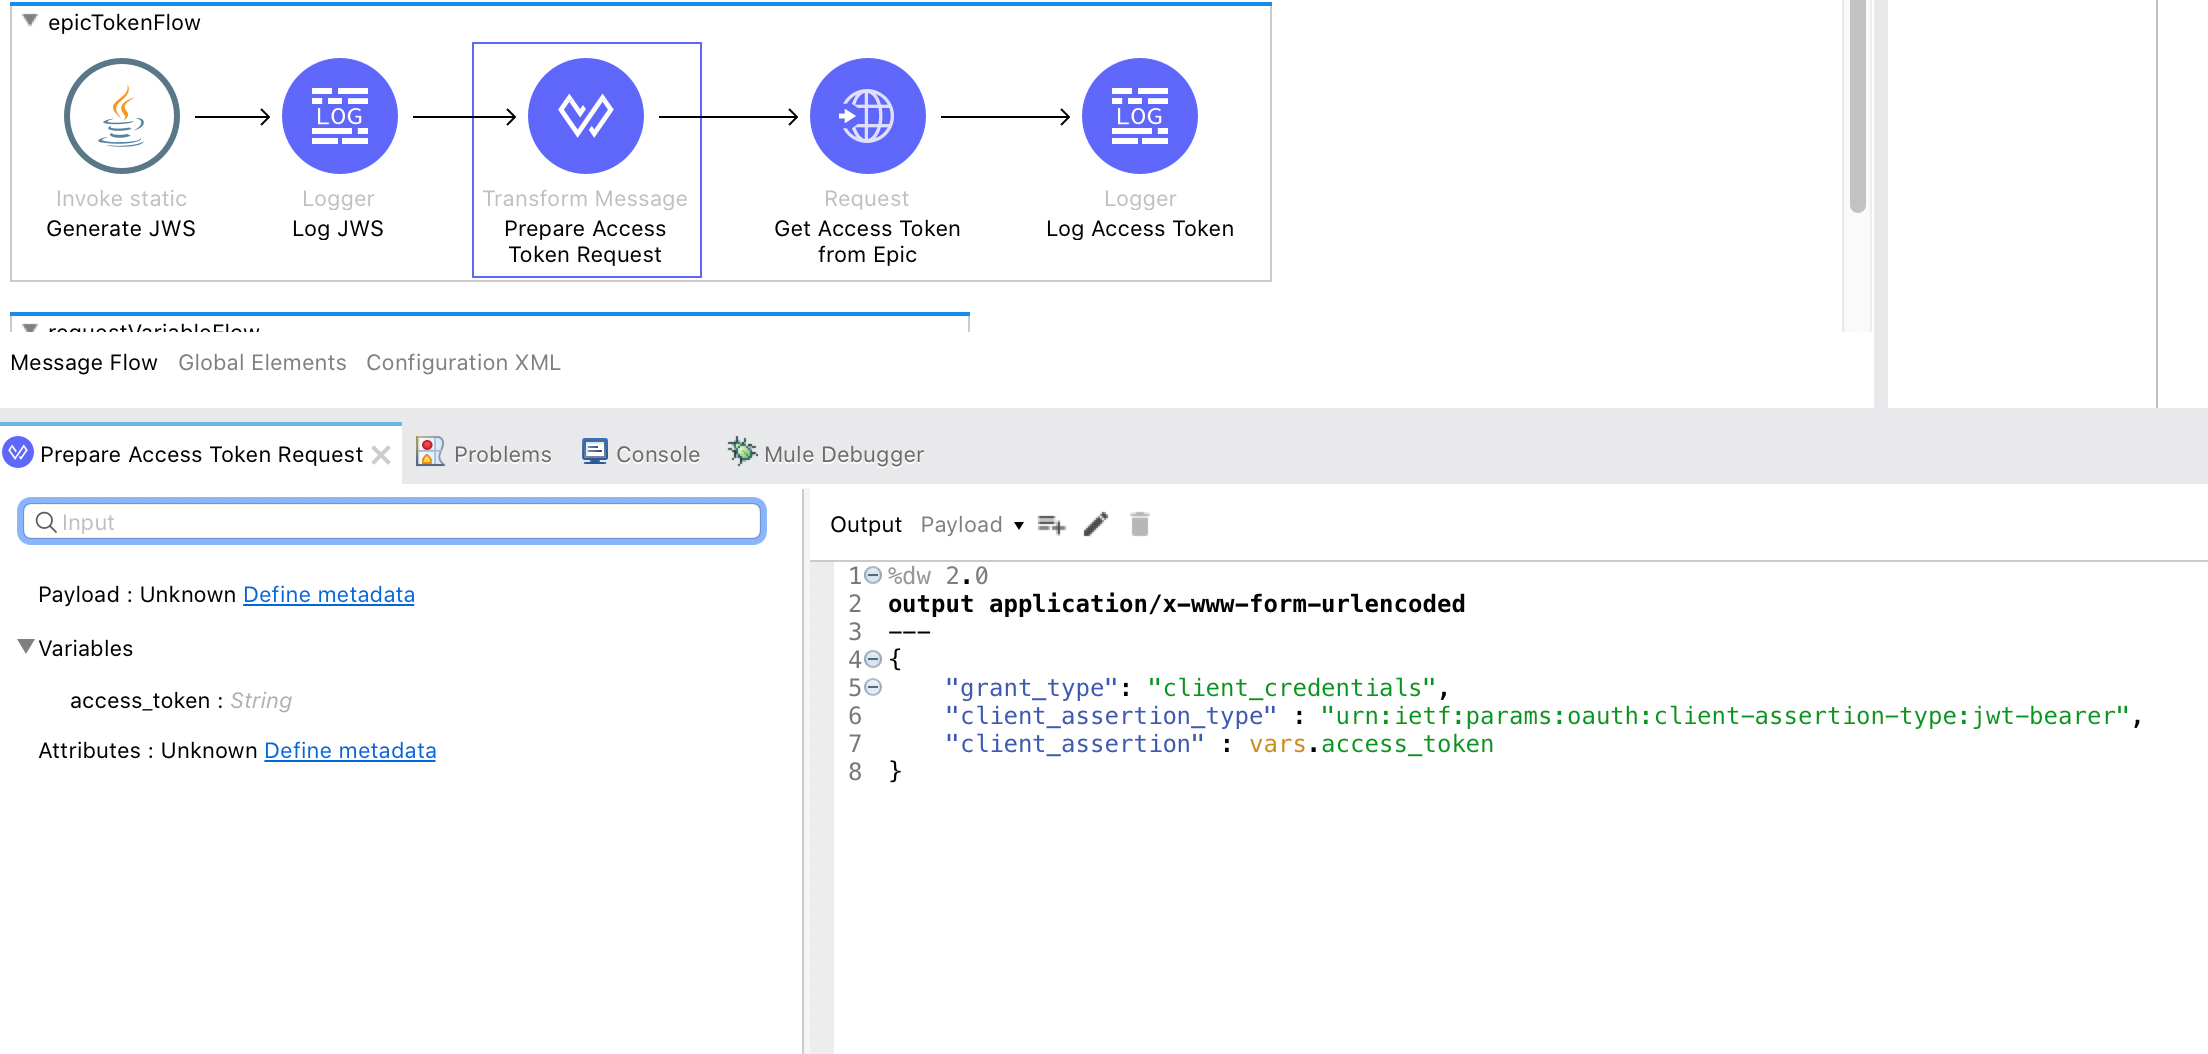
- Prepare request payload to get access token
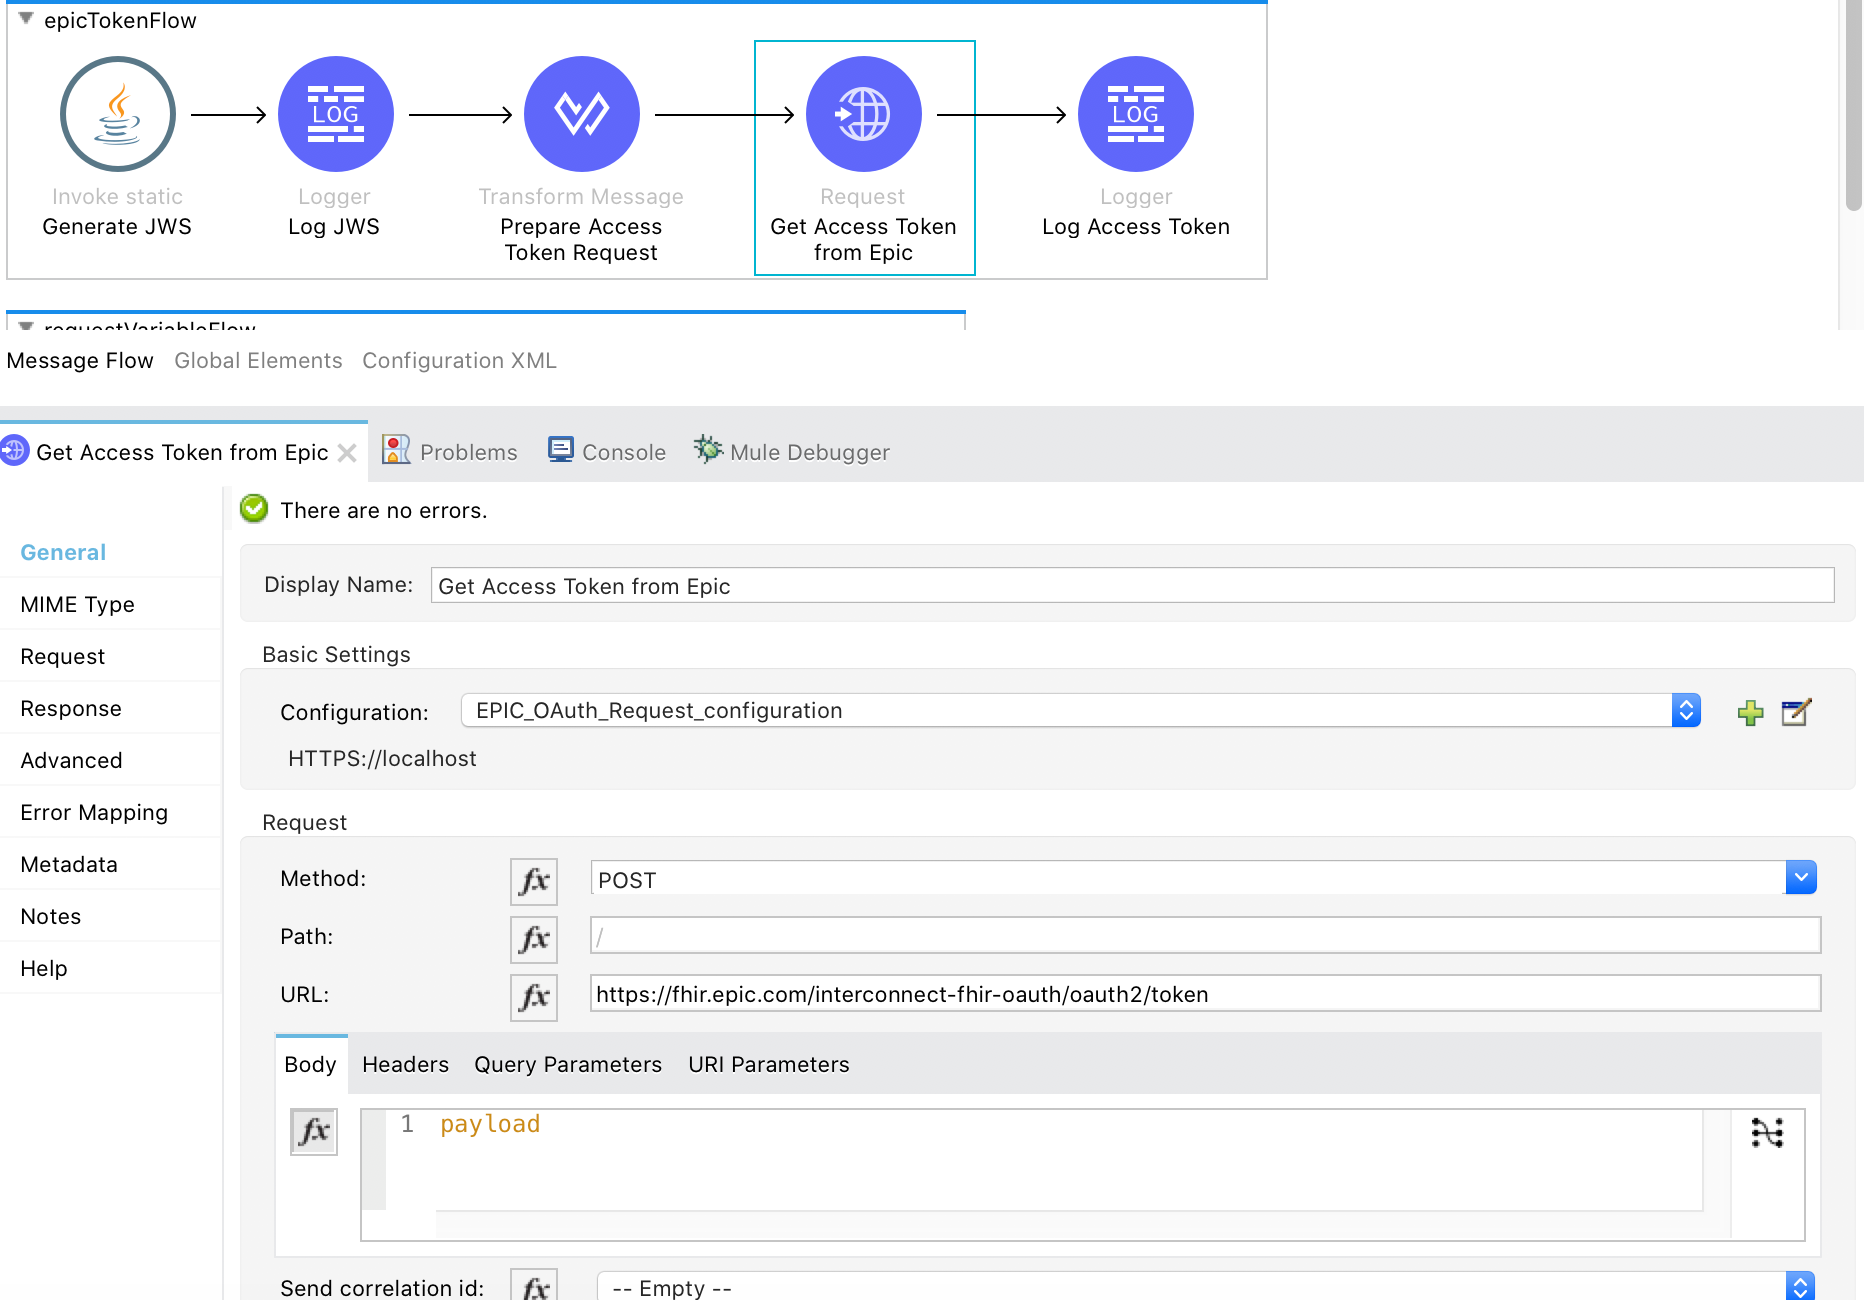
- Get the access token
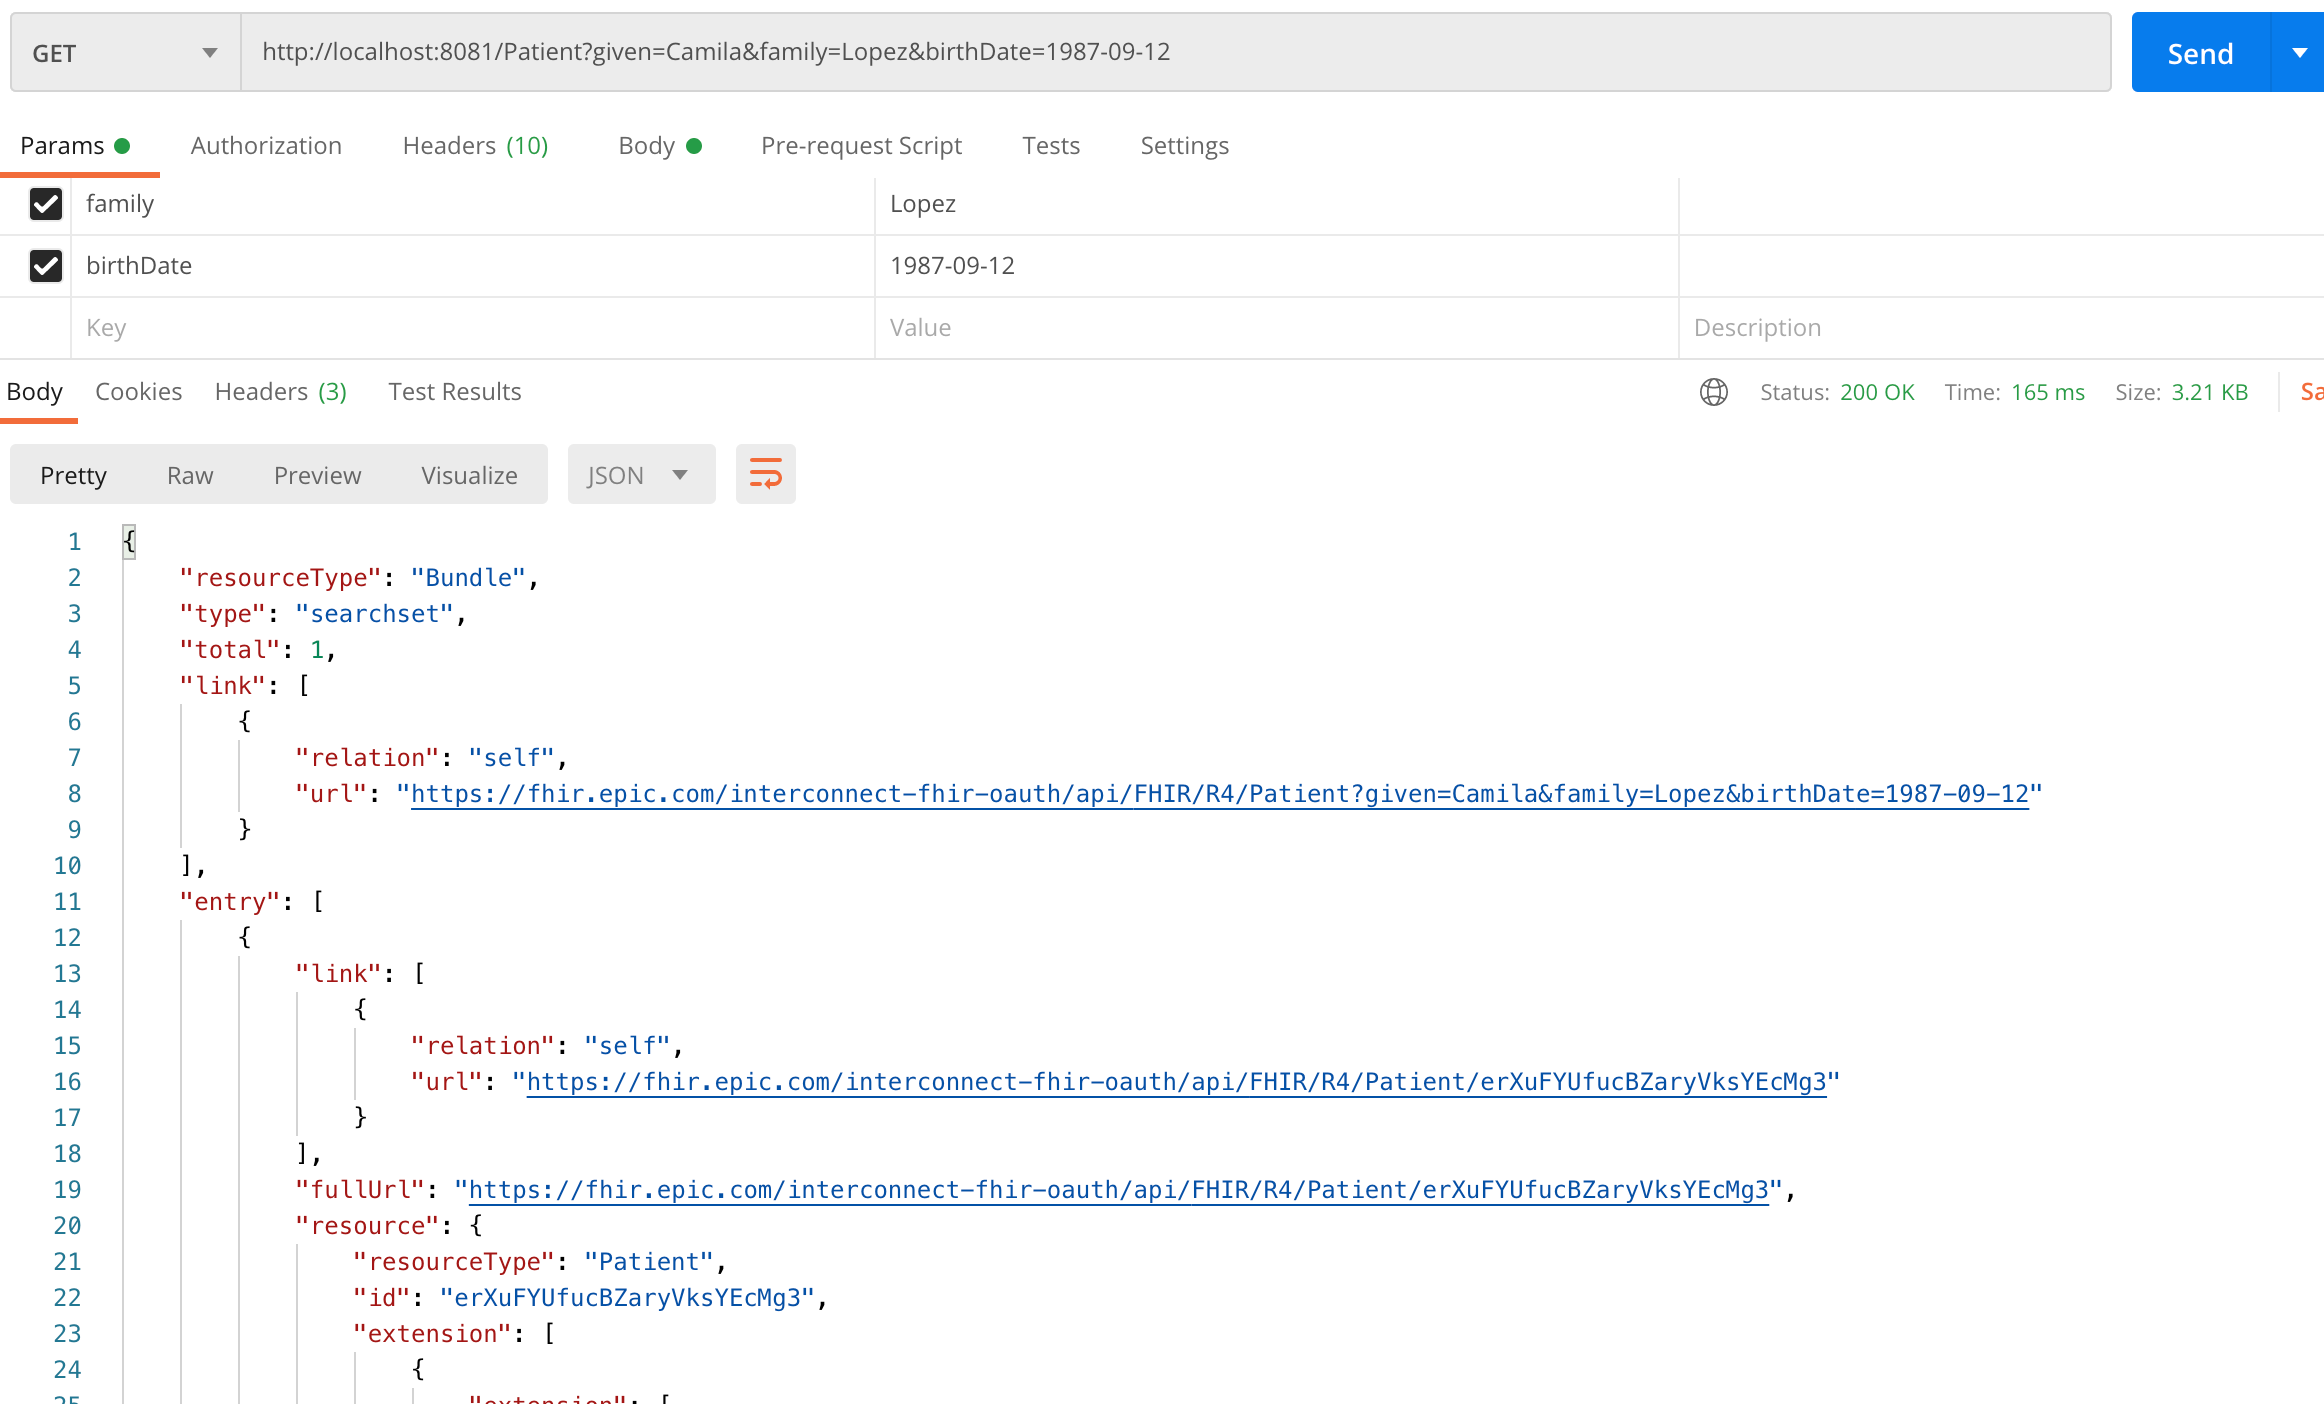
- Call FHIR API to get the data
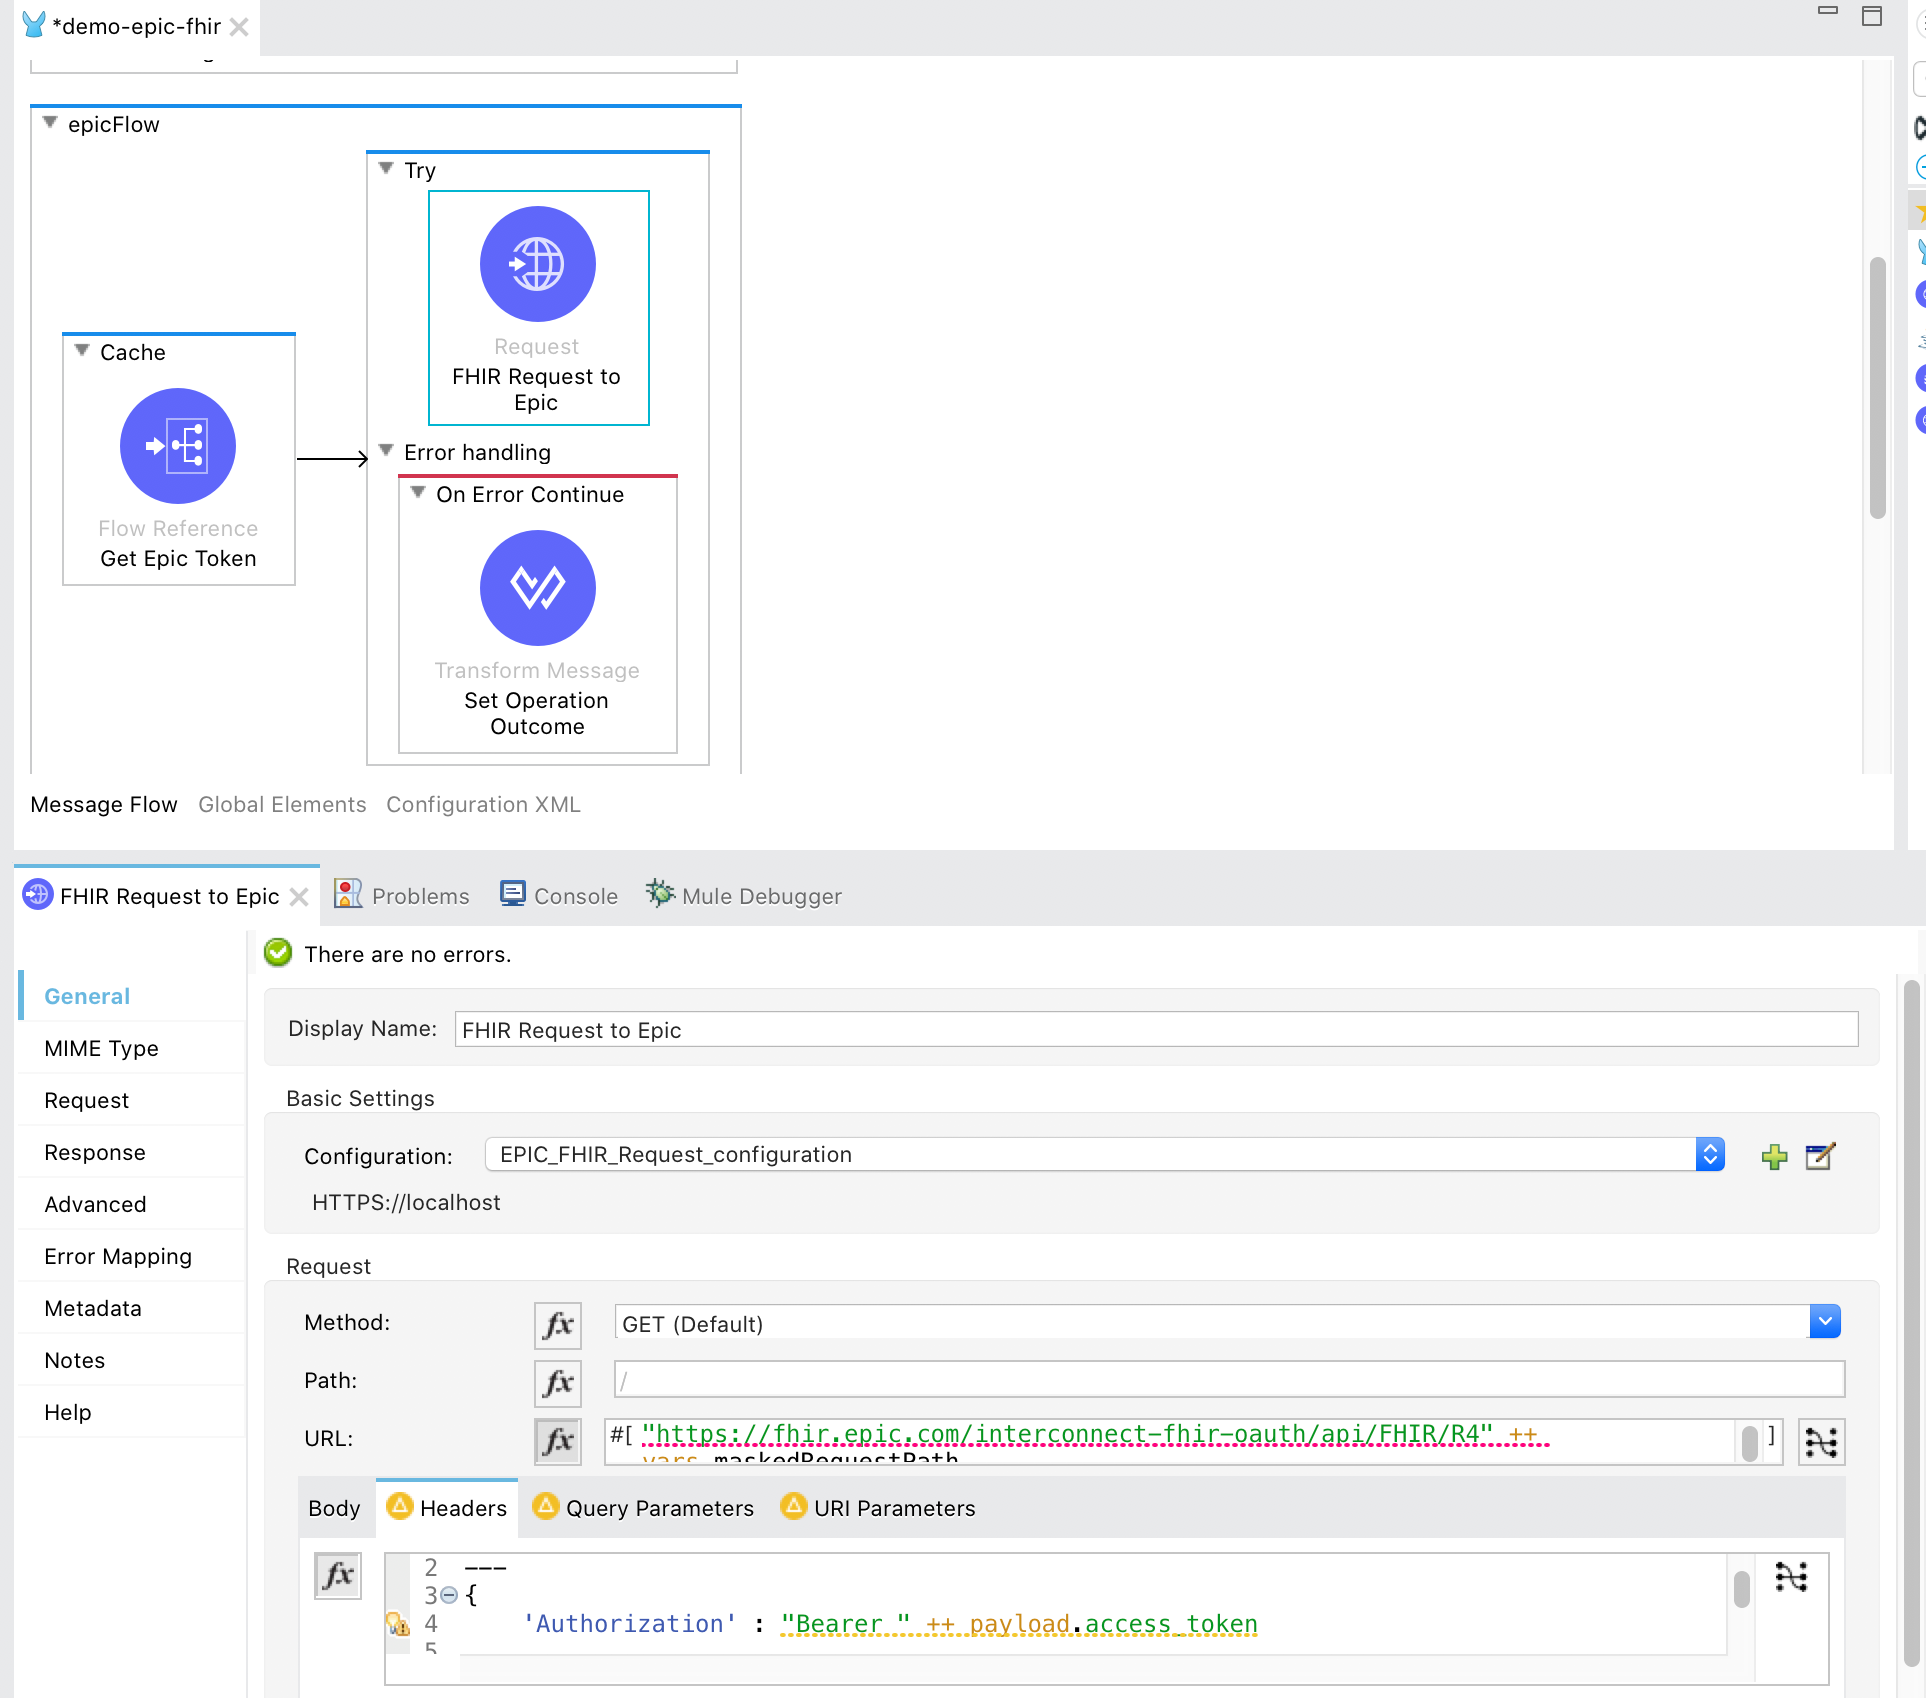
- Once this is done, we can add a simple HTTP listener and connect our flow to it to get the data from Epic’s FHIR API. Epic has provided test data in the sandbox. Let’s use it to search for a patient record.