How to Use Different Authentication Options for Salesforce Connector in Mule 4
Introduction
MuleSoft offers multiple connectors for Salesforce integration. This post is about Salesforce Connector for Mule 4. This connector helps in integrating with Sales Cloud, Service Cloud, Salesforce Platform, and Force.com. We will specifically look into different options for authentication with Salesforce.
Software Prerequisites
You need a Salesforce developer account. You can get one for free by signing up here. I have used the following versions for MuleSoft software.
- Anypoint Studio 7.7
- Salesforce Connector 10.8.0
Configuration
Security Token in Salesforce
Salesforce security token is an alphanumeric code associated with your password. You do not need a security token if you are trying to authenticate from an IP address that is inside your Salesforce org’s trusted IP range, or your Salesforce profile’s login IP range. When you sign up for a new developer account, your Salesforce org does not have trusted IP ranges. You can either set up trusted or login IP ranges in your org, or use the security token for authentication. Generating security token is simple.
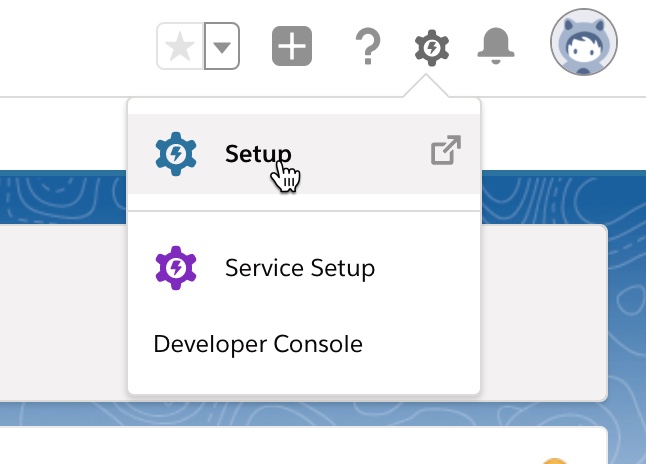
Go to settings
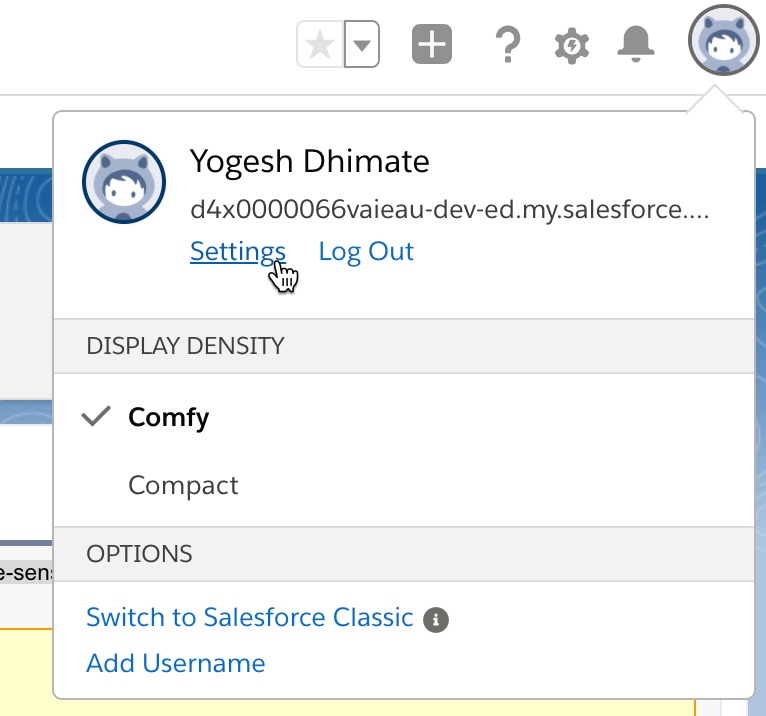
Reset security token by using the ‘Reset My Security Token’ menu and clicking on the ‘Reset Security Token’ button.
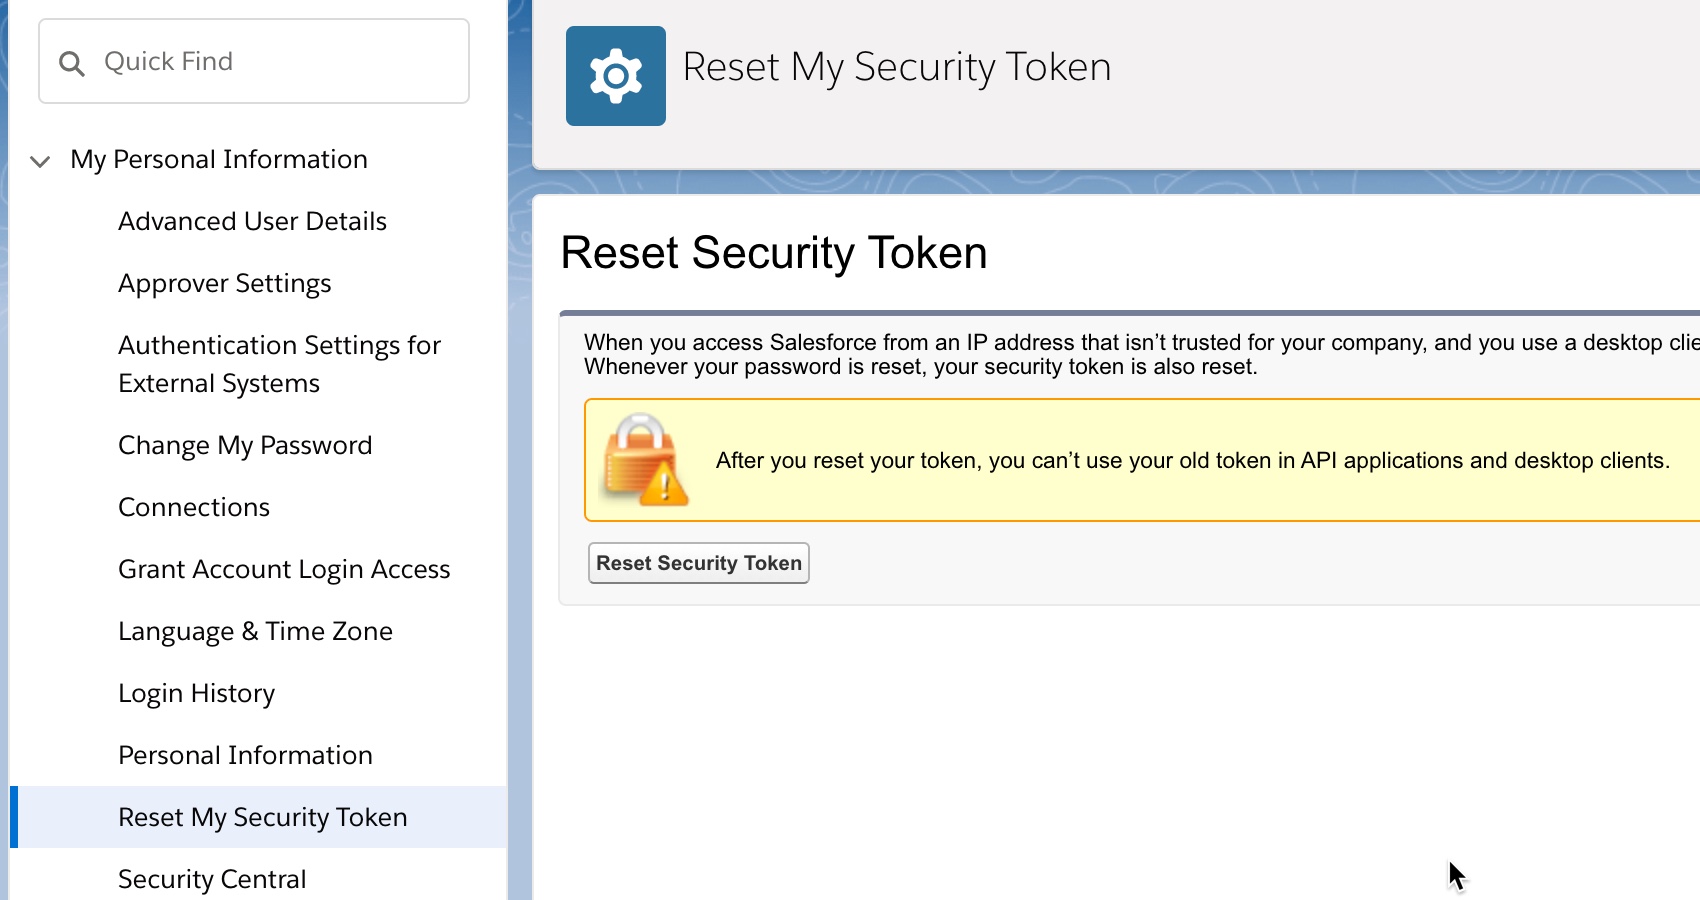
You should receive your new security token in your email account that you used to sign up for the Salesforce developer account.
Certificate setup in Salesforce
For certificate-based security, you need to set up a certificate in Salesforce.
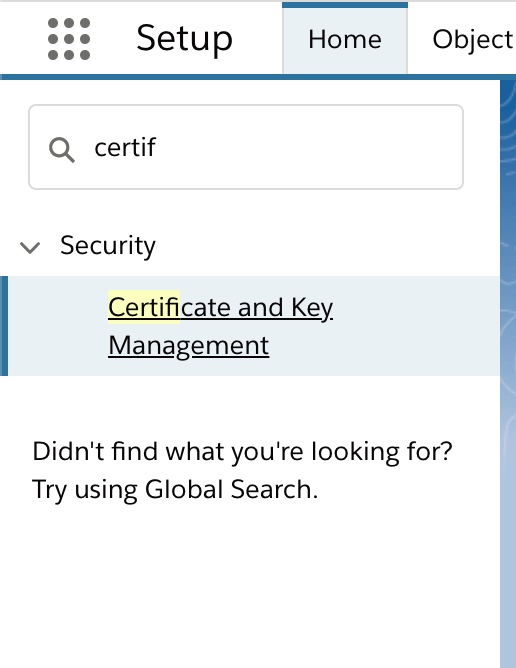
Go to setup
Search for certificate and key management and select the option
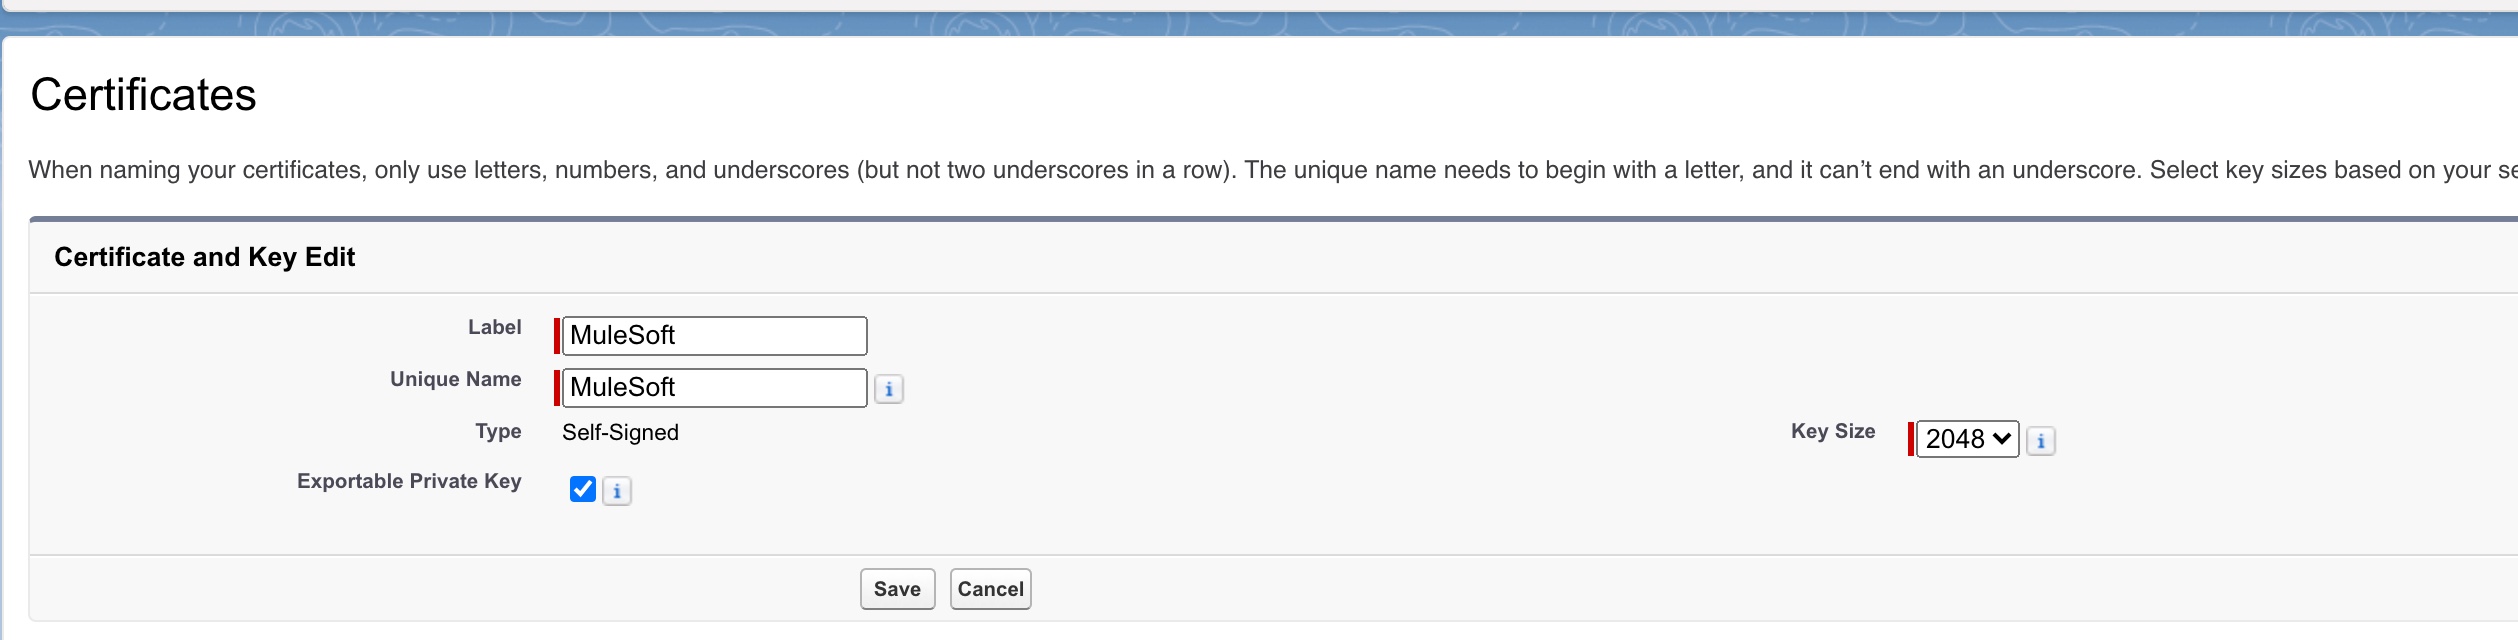
Click on ‘Create Self-Signed Certificate’ button to create a new certificate and enter the information and save it.
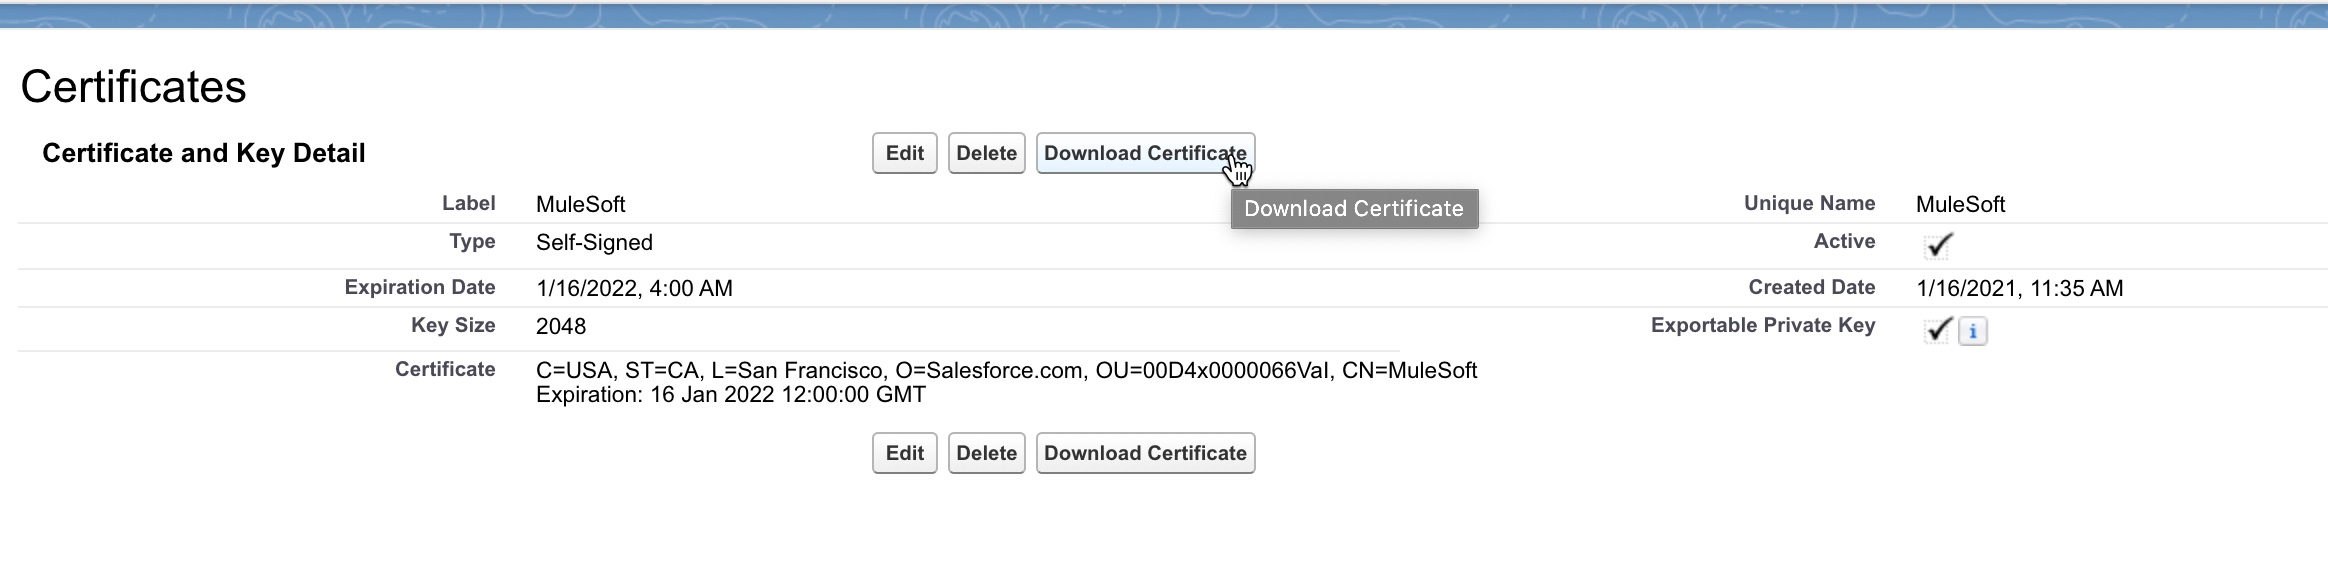
Once certificate is created, download the certificate (.crt) file. We need it for setting up the connected app.
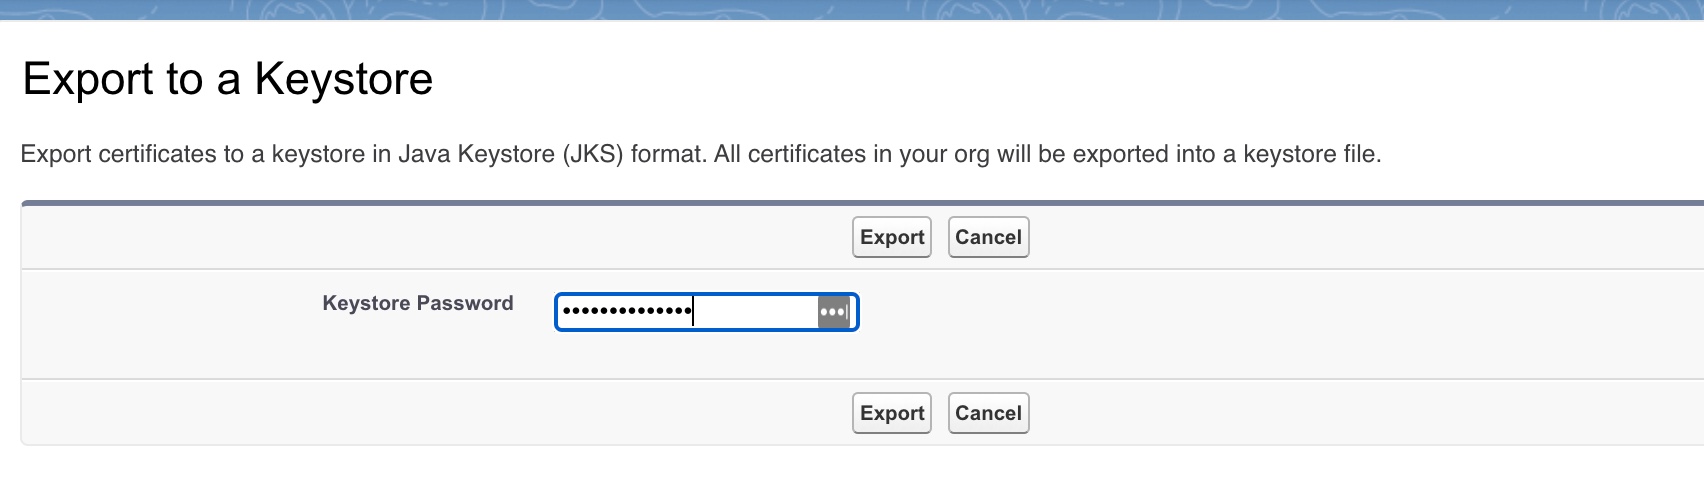
Export the certificate to keystore. We need it to configure the connection information in Mule app.

Enter the password when exporting to keystore
Make sure you save both the .crt file (downloaded in step 4 above) and the .jks file safely on your disk.
Connected App setup in Salesforce
Go to setup
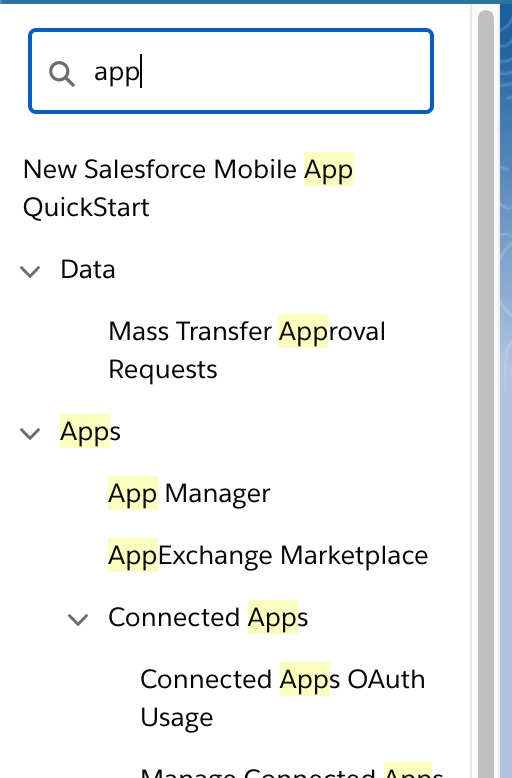
Search for app manager and select the ‘App Manager’ option
Use the ‘New Connected App’ button to create a new connected app.

Fill in name and email. Select ‘Enable OAuth Settings’ Enter two Callback URLs
- https://oauthdebugger.com/debug
- http://localhost:8081
Select ‘Use digital signatures’ and upload the .crt file received when setting up the certificate above.
Select all the OAuth Scopes if possible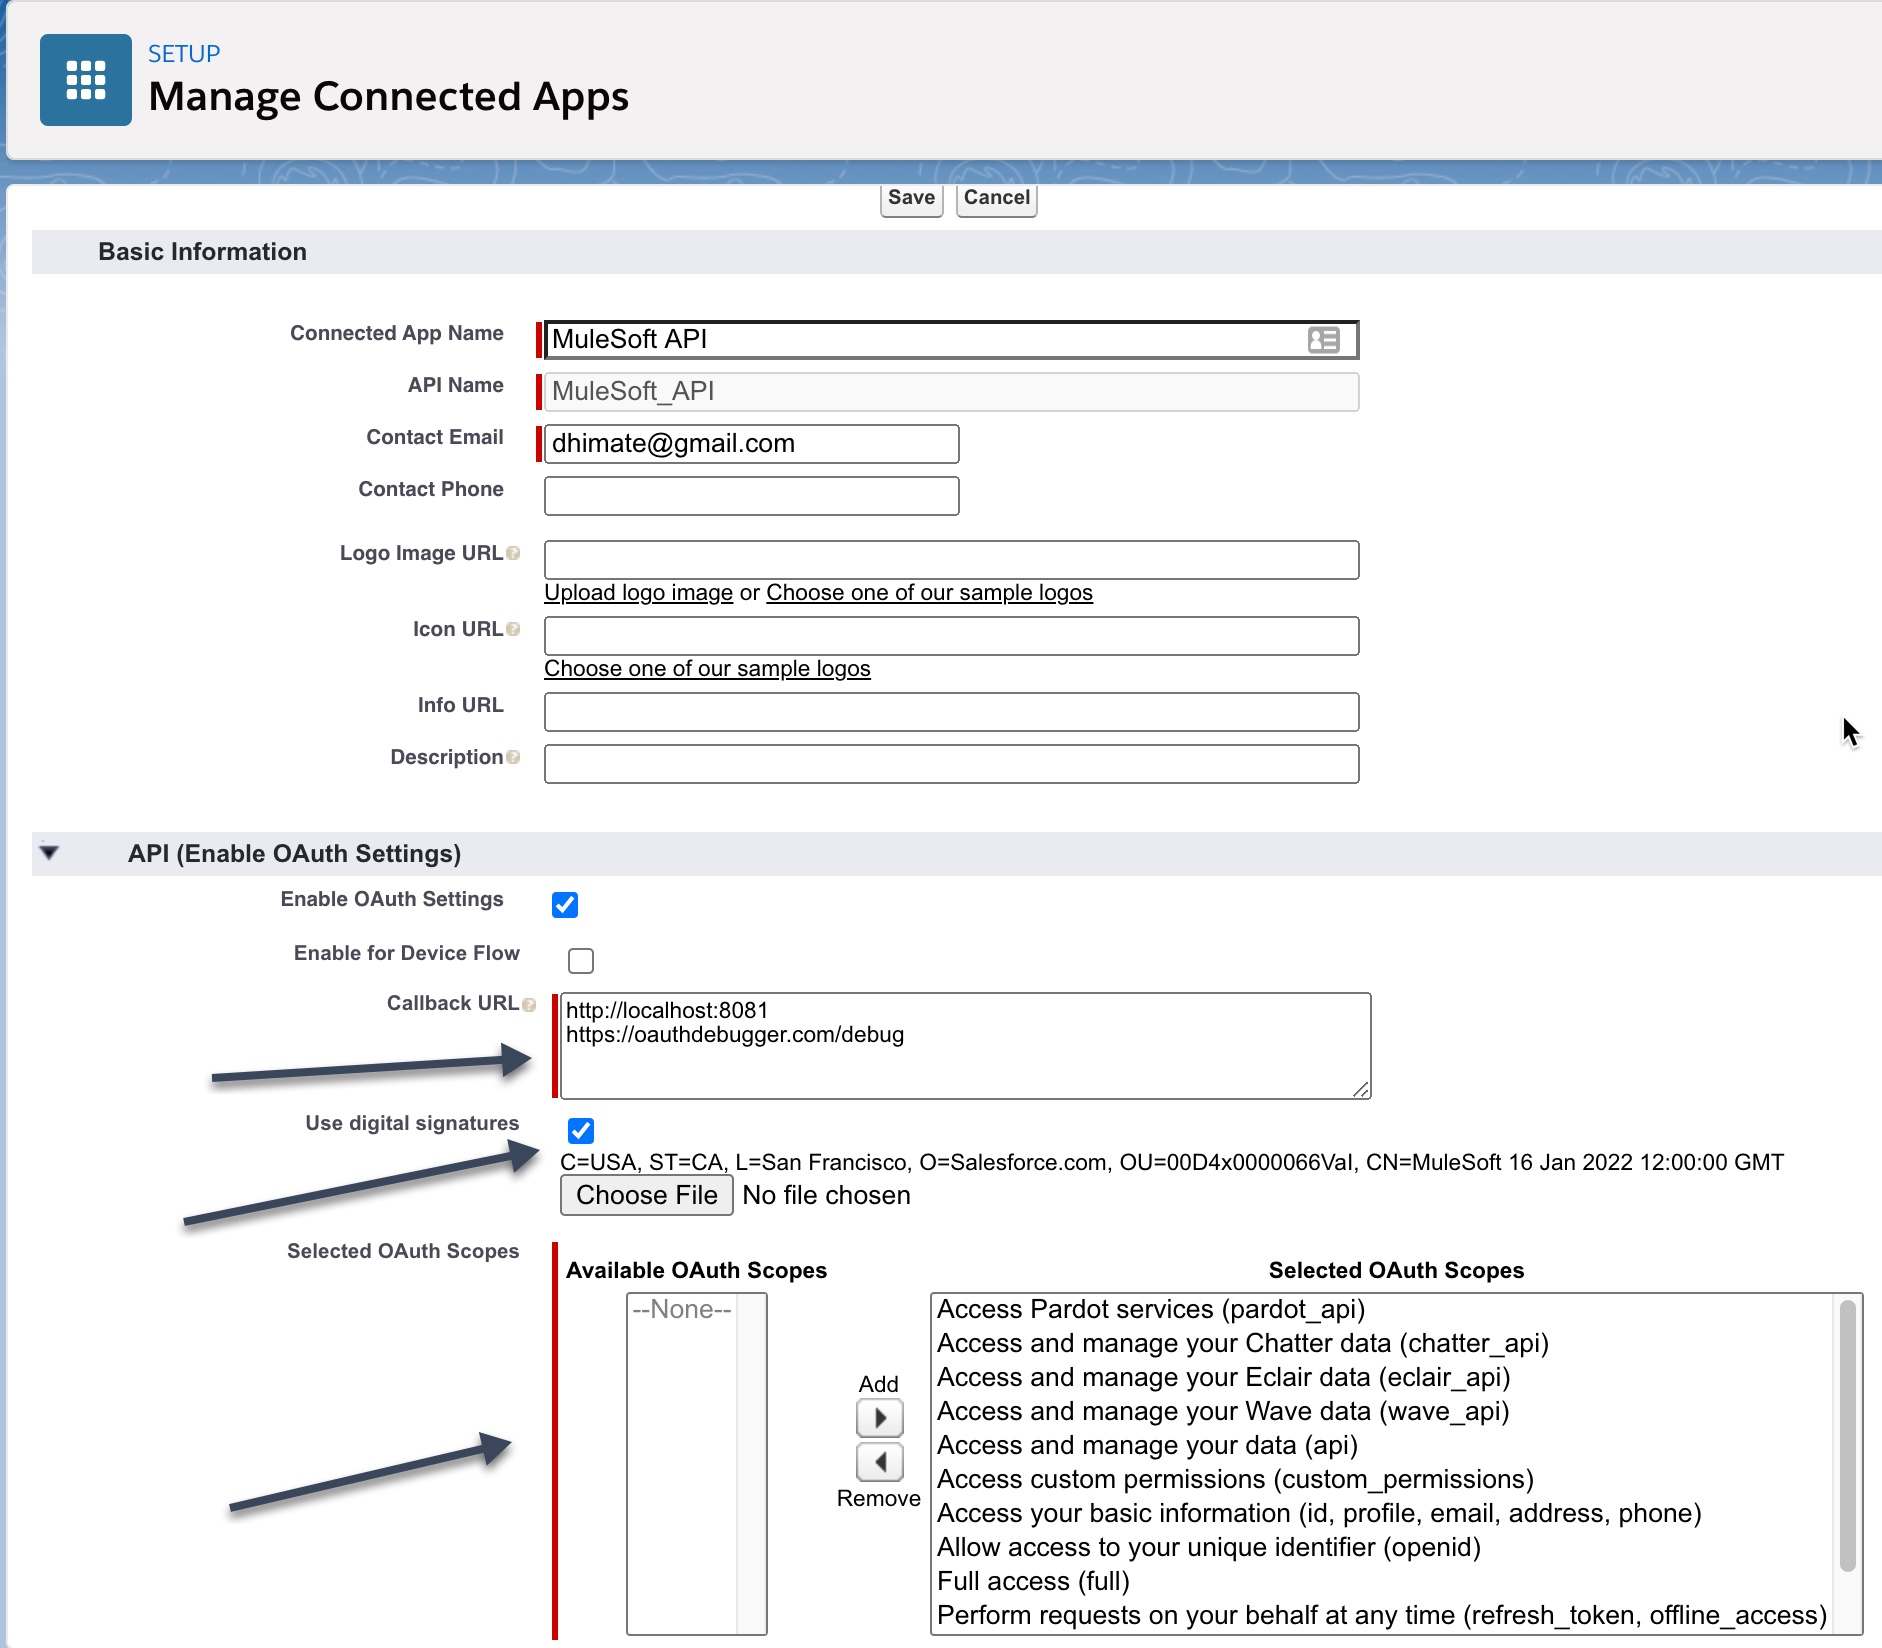
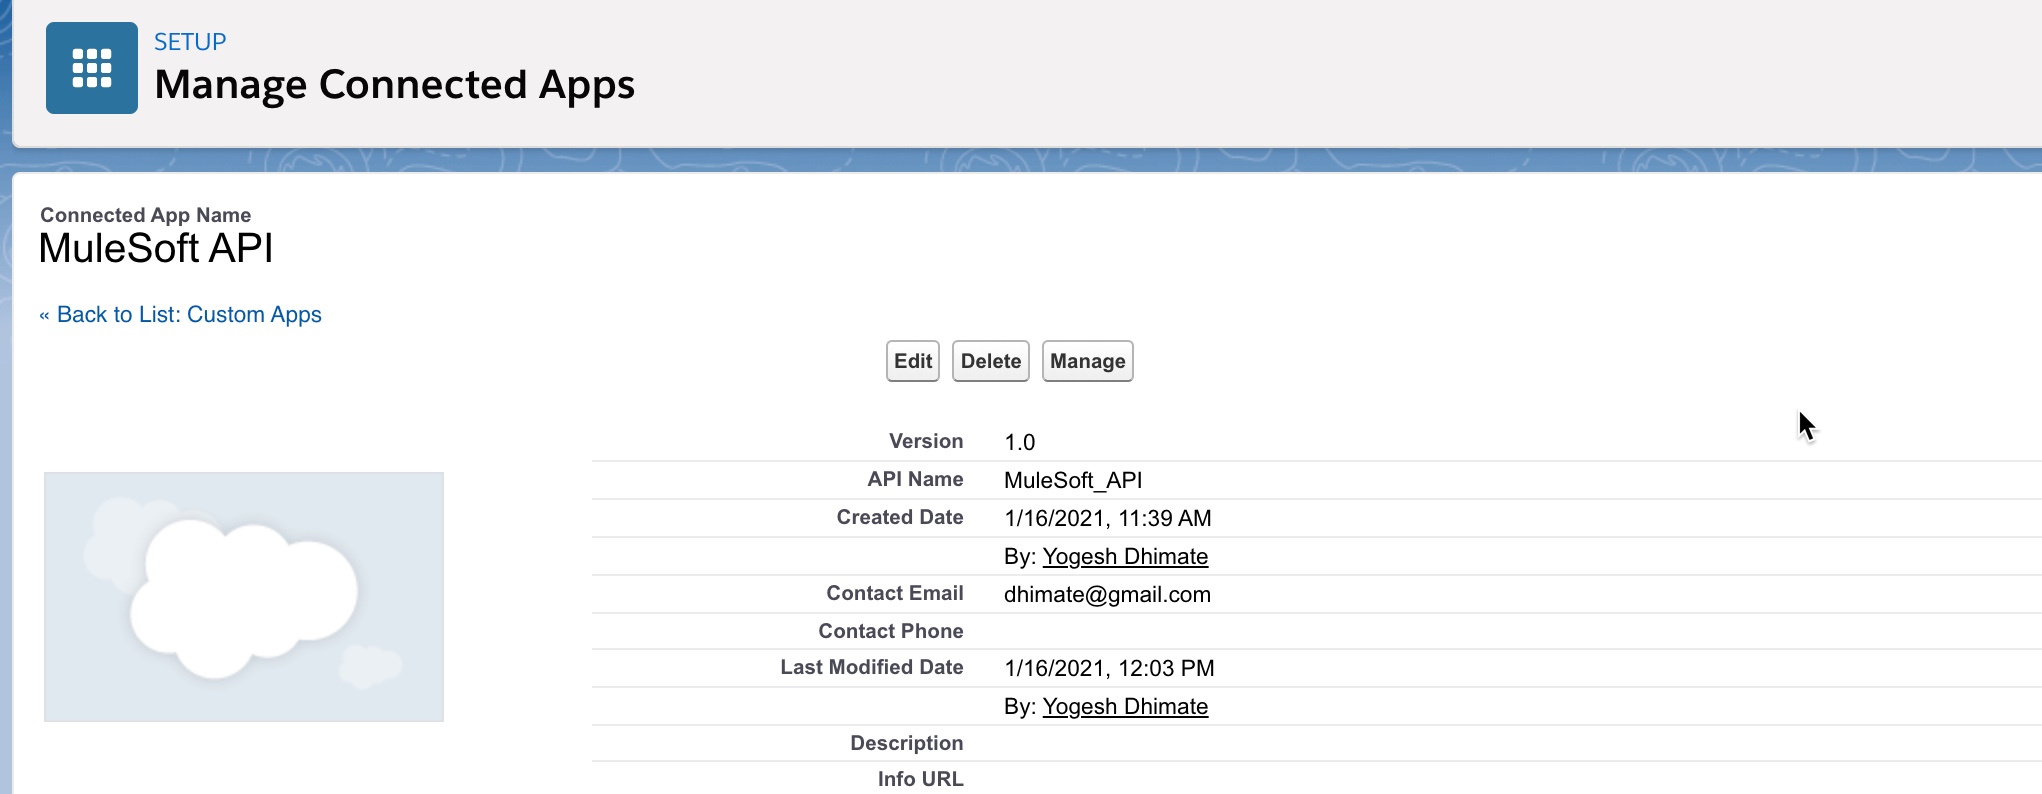
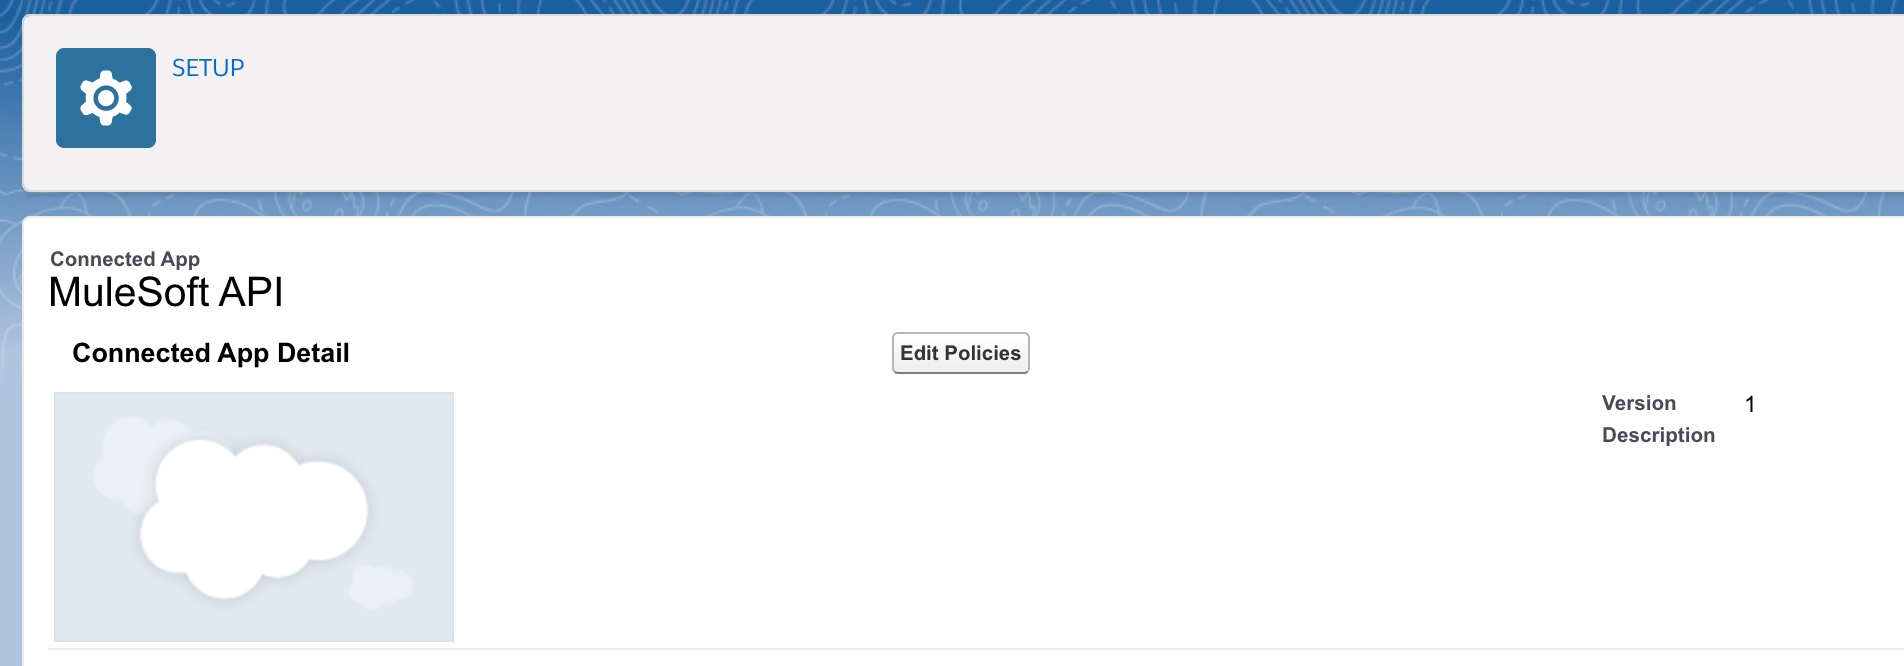
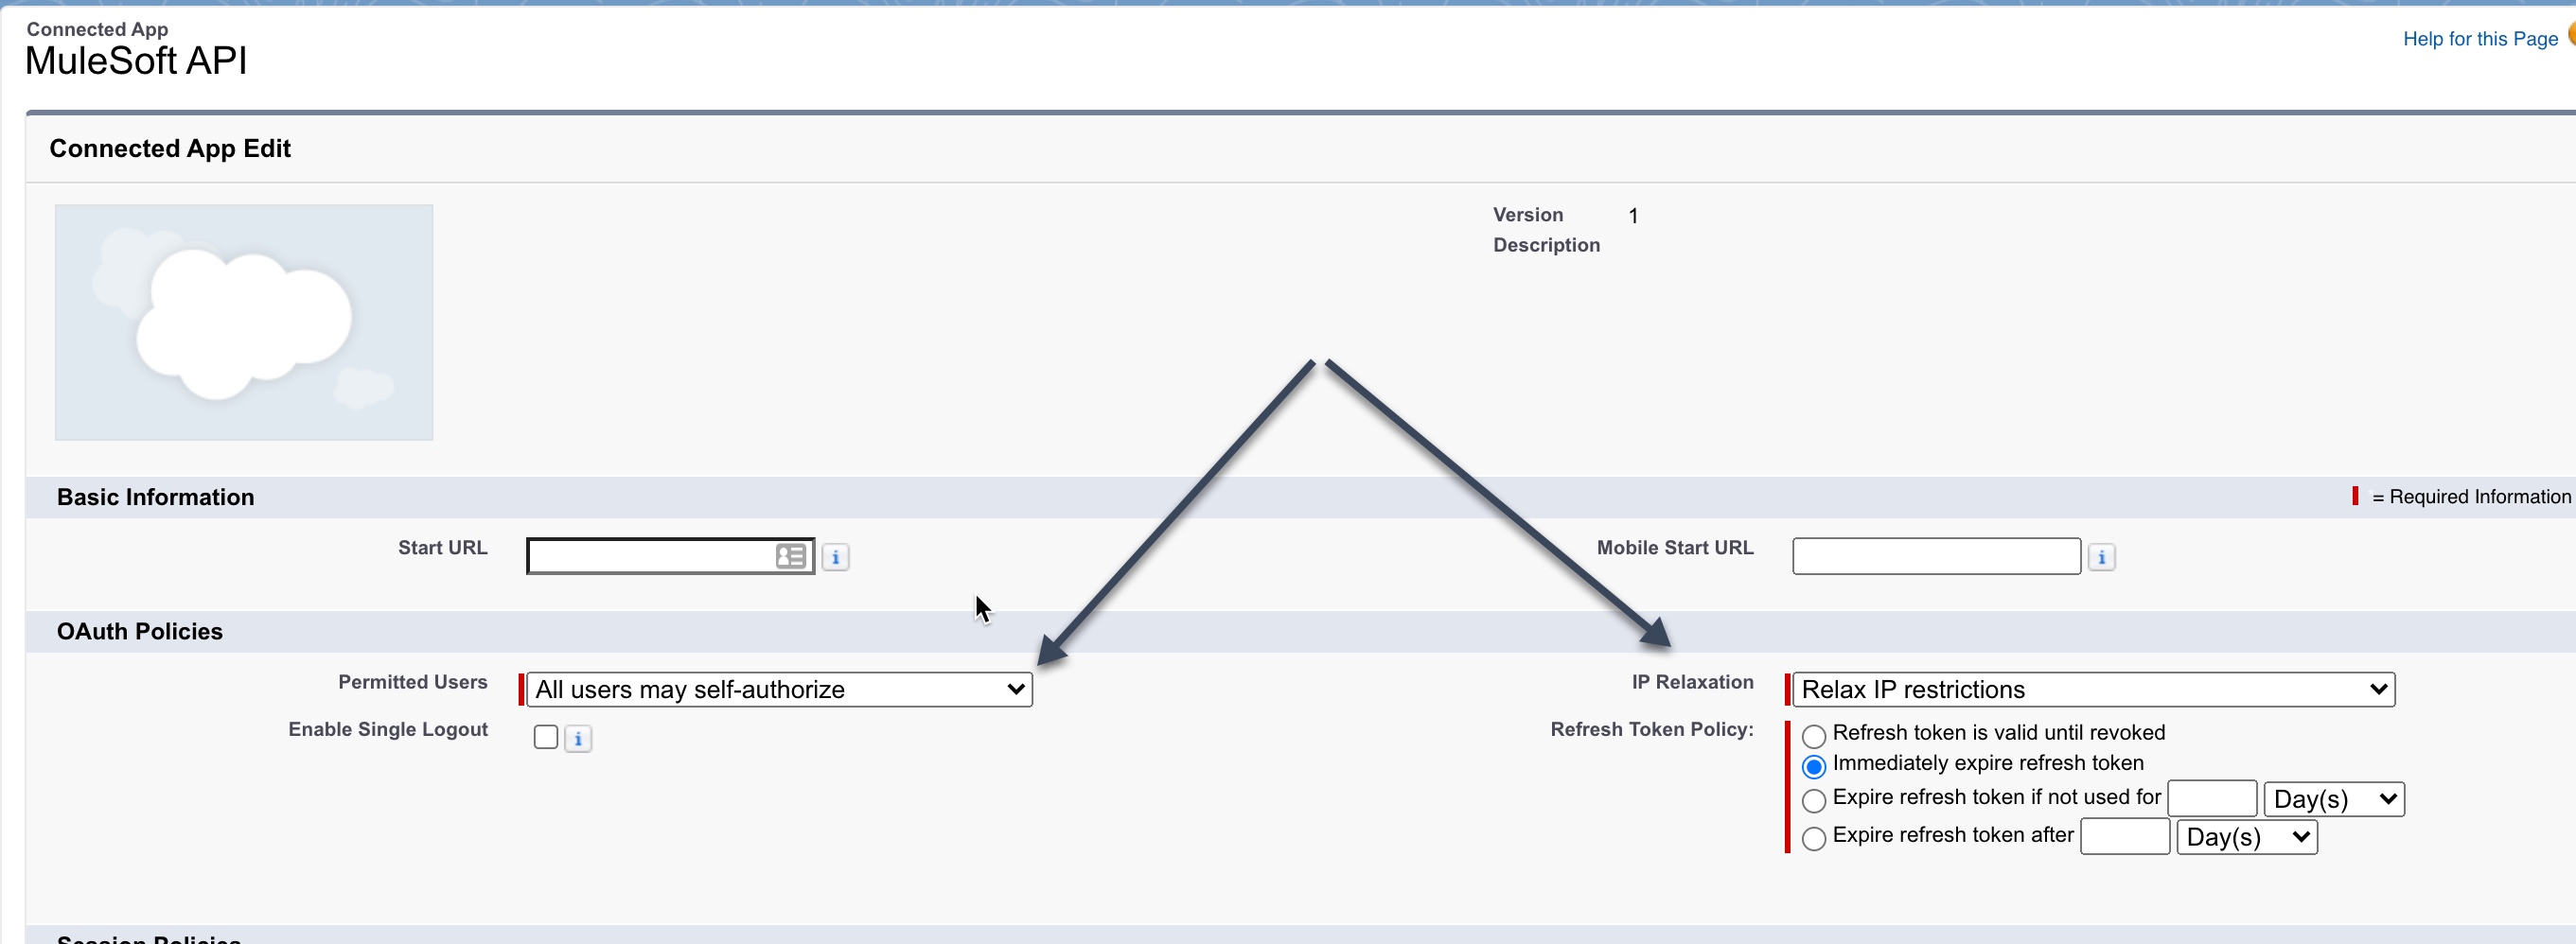
In your connected app’s page, click on Manage button to review and update the app policies. Click on Manage.
And then on ‘Edit Policies’
In the Permitted Users option you can see two options
Admin approved users are pre-authorized.
We will not go into the details of this option, but if you want to use it you can use the following steps
- Go to Settings > Manage Users > Profiles
- Edit the profile associated with the user
- For ‘Connected App Access’ under the profile, select the checkbox against the connected app. Save.
All users may self-authorize.
We will use this option. Ensure that you select this option and save the policy.
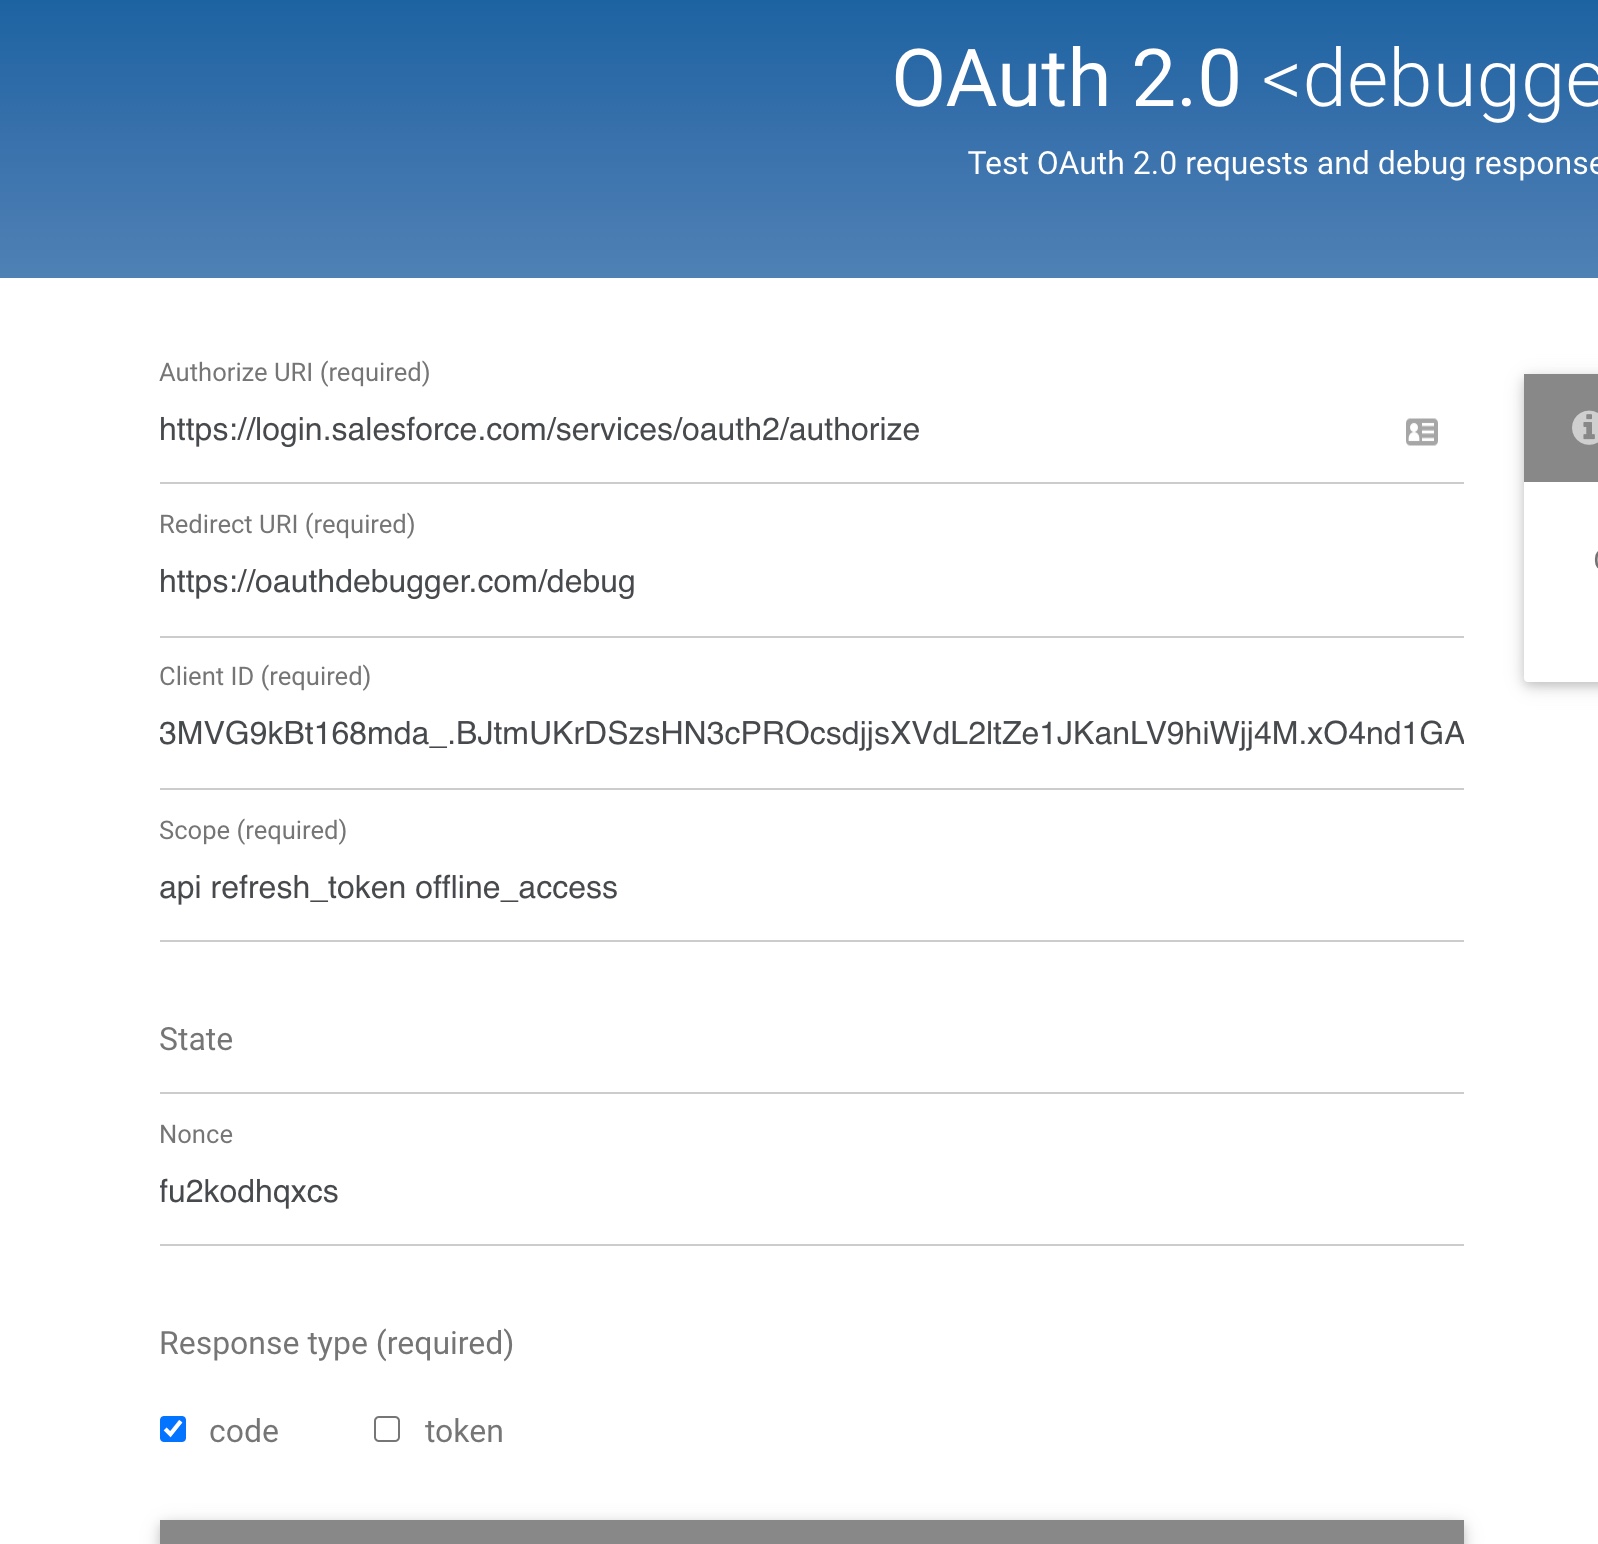
Open your browser and go to https://oauthdebugger.com/. Enter following details
- Authorization url = ‘https://login.salesforce.com/services/oauth2/authorize’
- Redirect URI = ‘https://oauthdebugger.com/debug’
- Client ID = obtained from the connected app
- Scope = ‘api refresh_token offline_access’
- Response type = ‘code’
- Response mode = ‘query’
- Click on “send request”
It should redirect you to enter your credentials on Salesforce login screen and you should receive an authorization code.
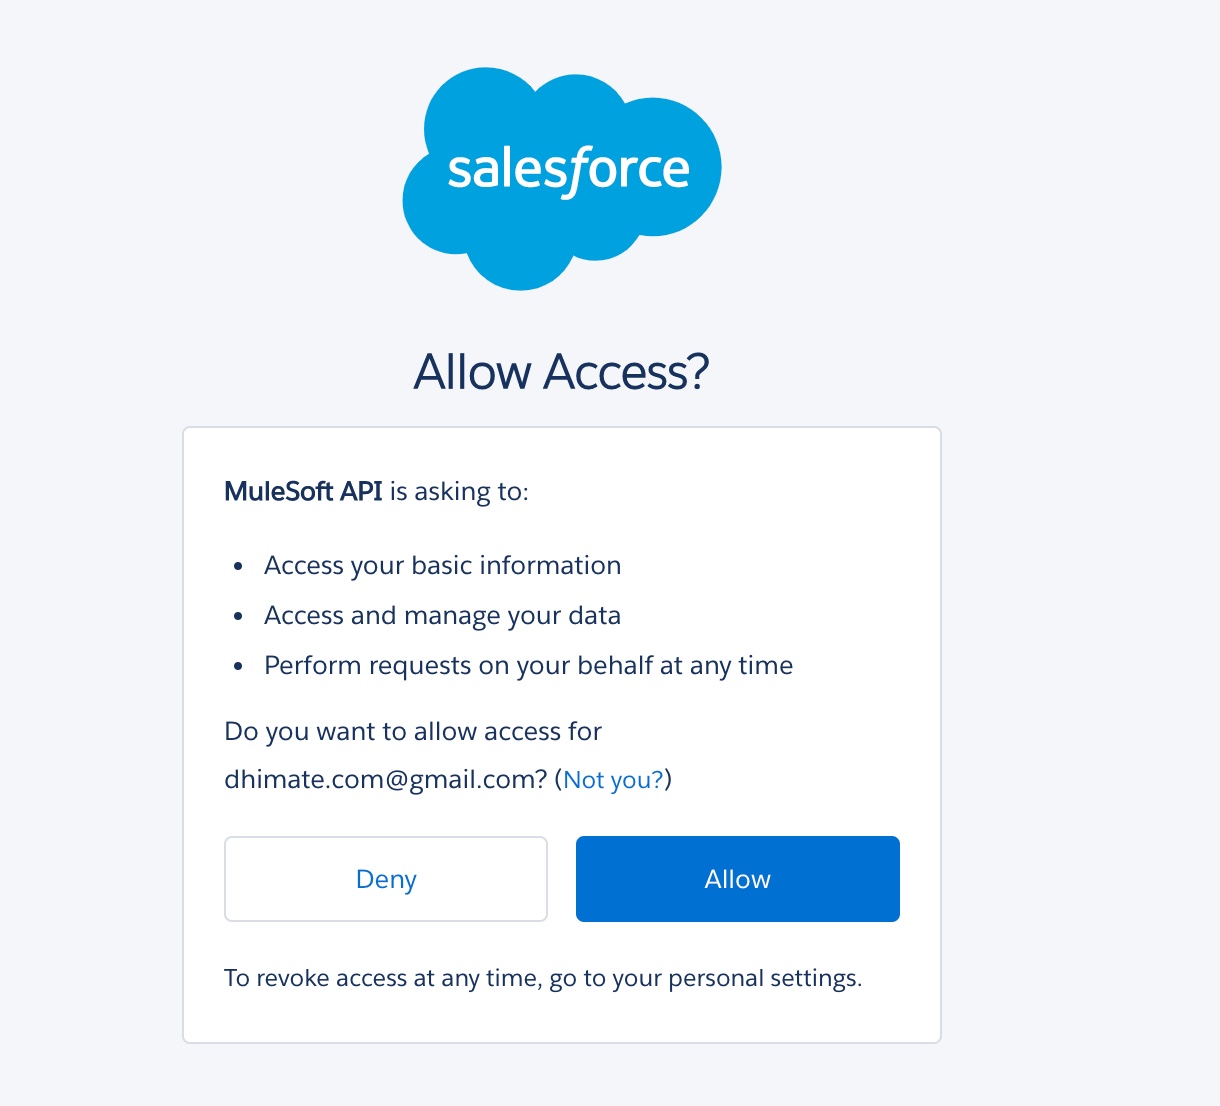
This will complete the connected app setup.
Basic Authentication
Basic authentication is the easiest way to authenticate with Salesforce. For basic authentication you need username and password, and optionally a security token.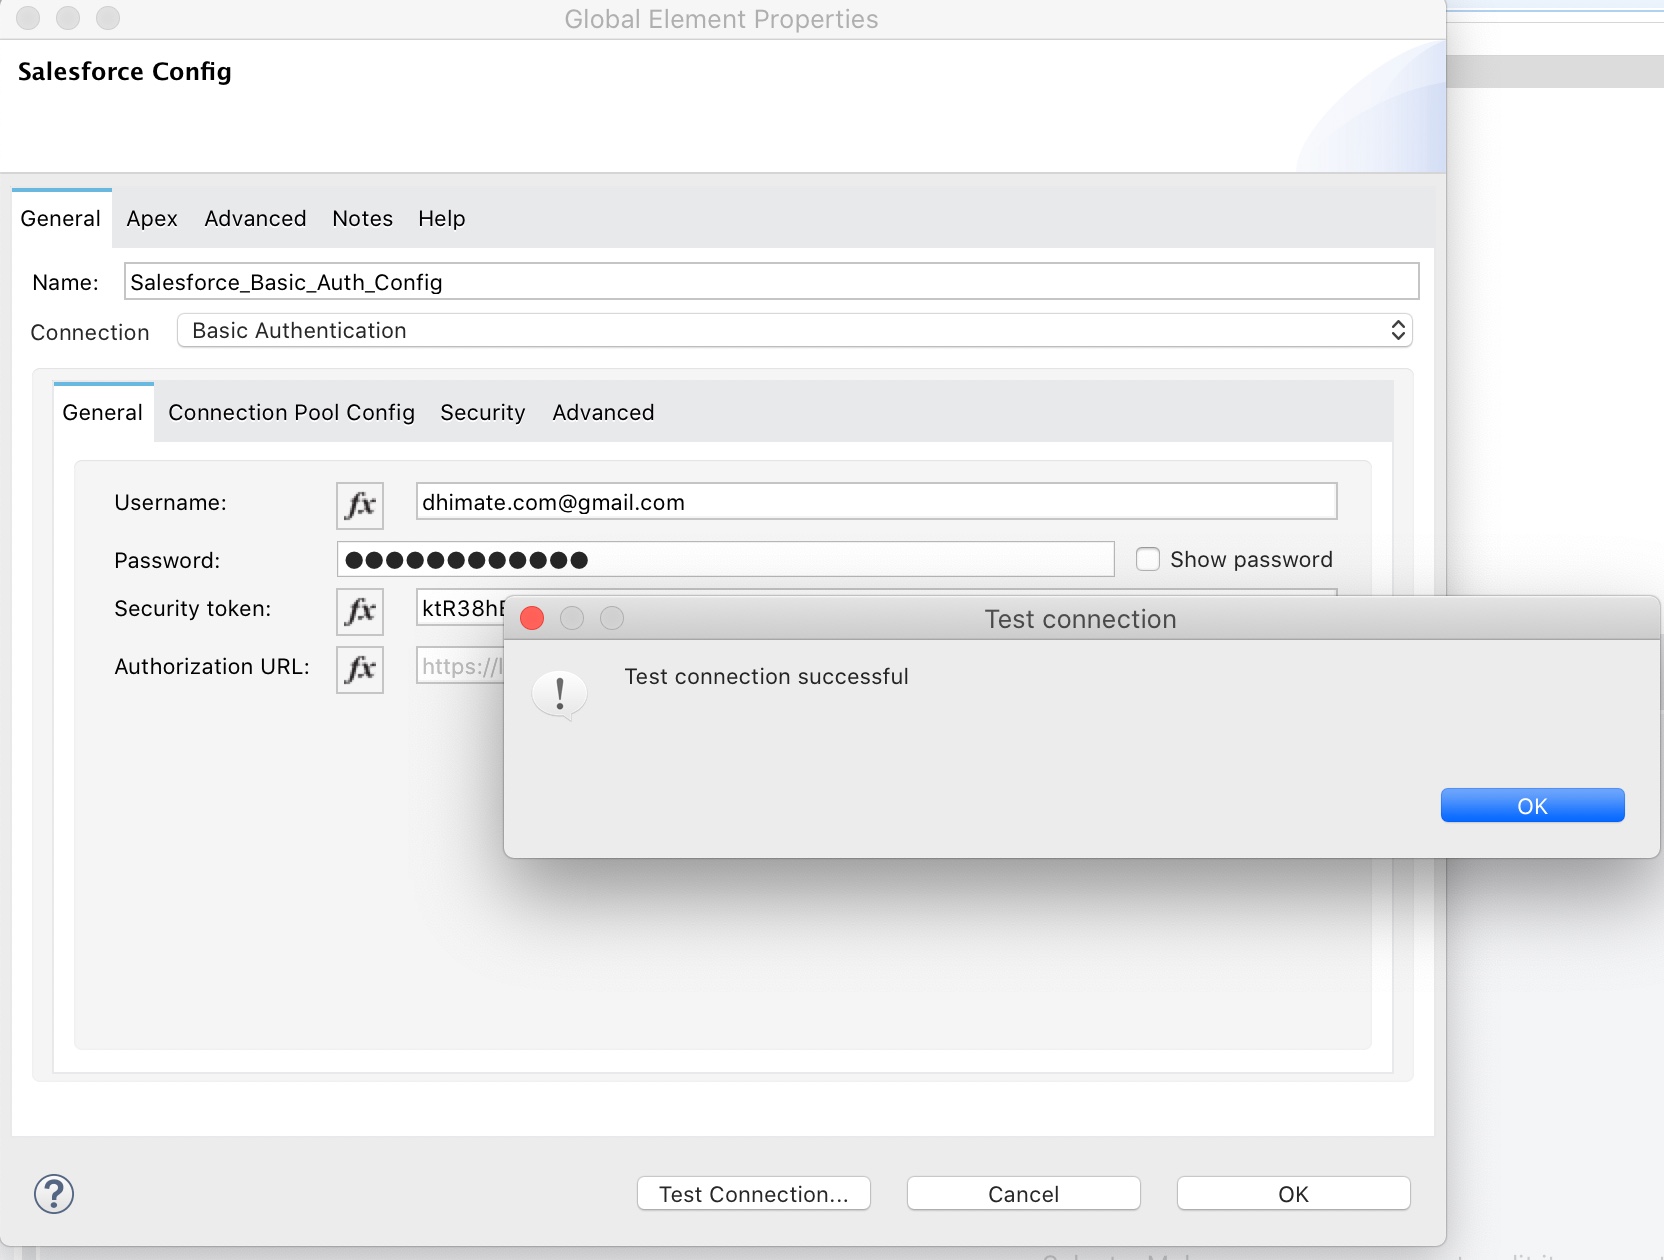
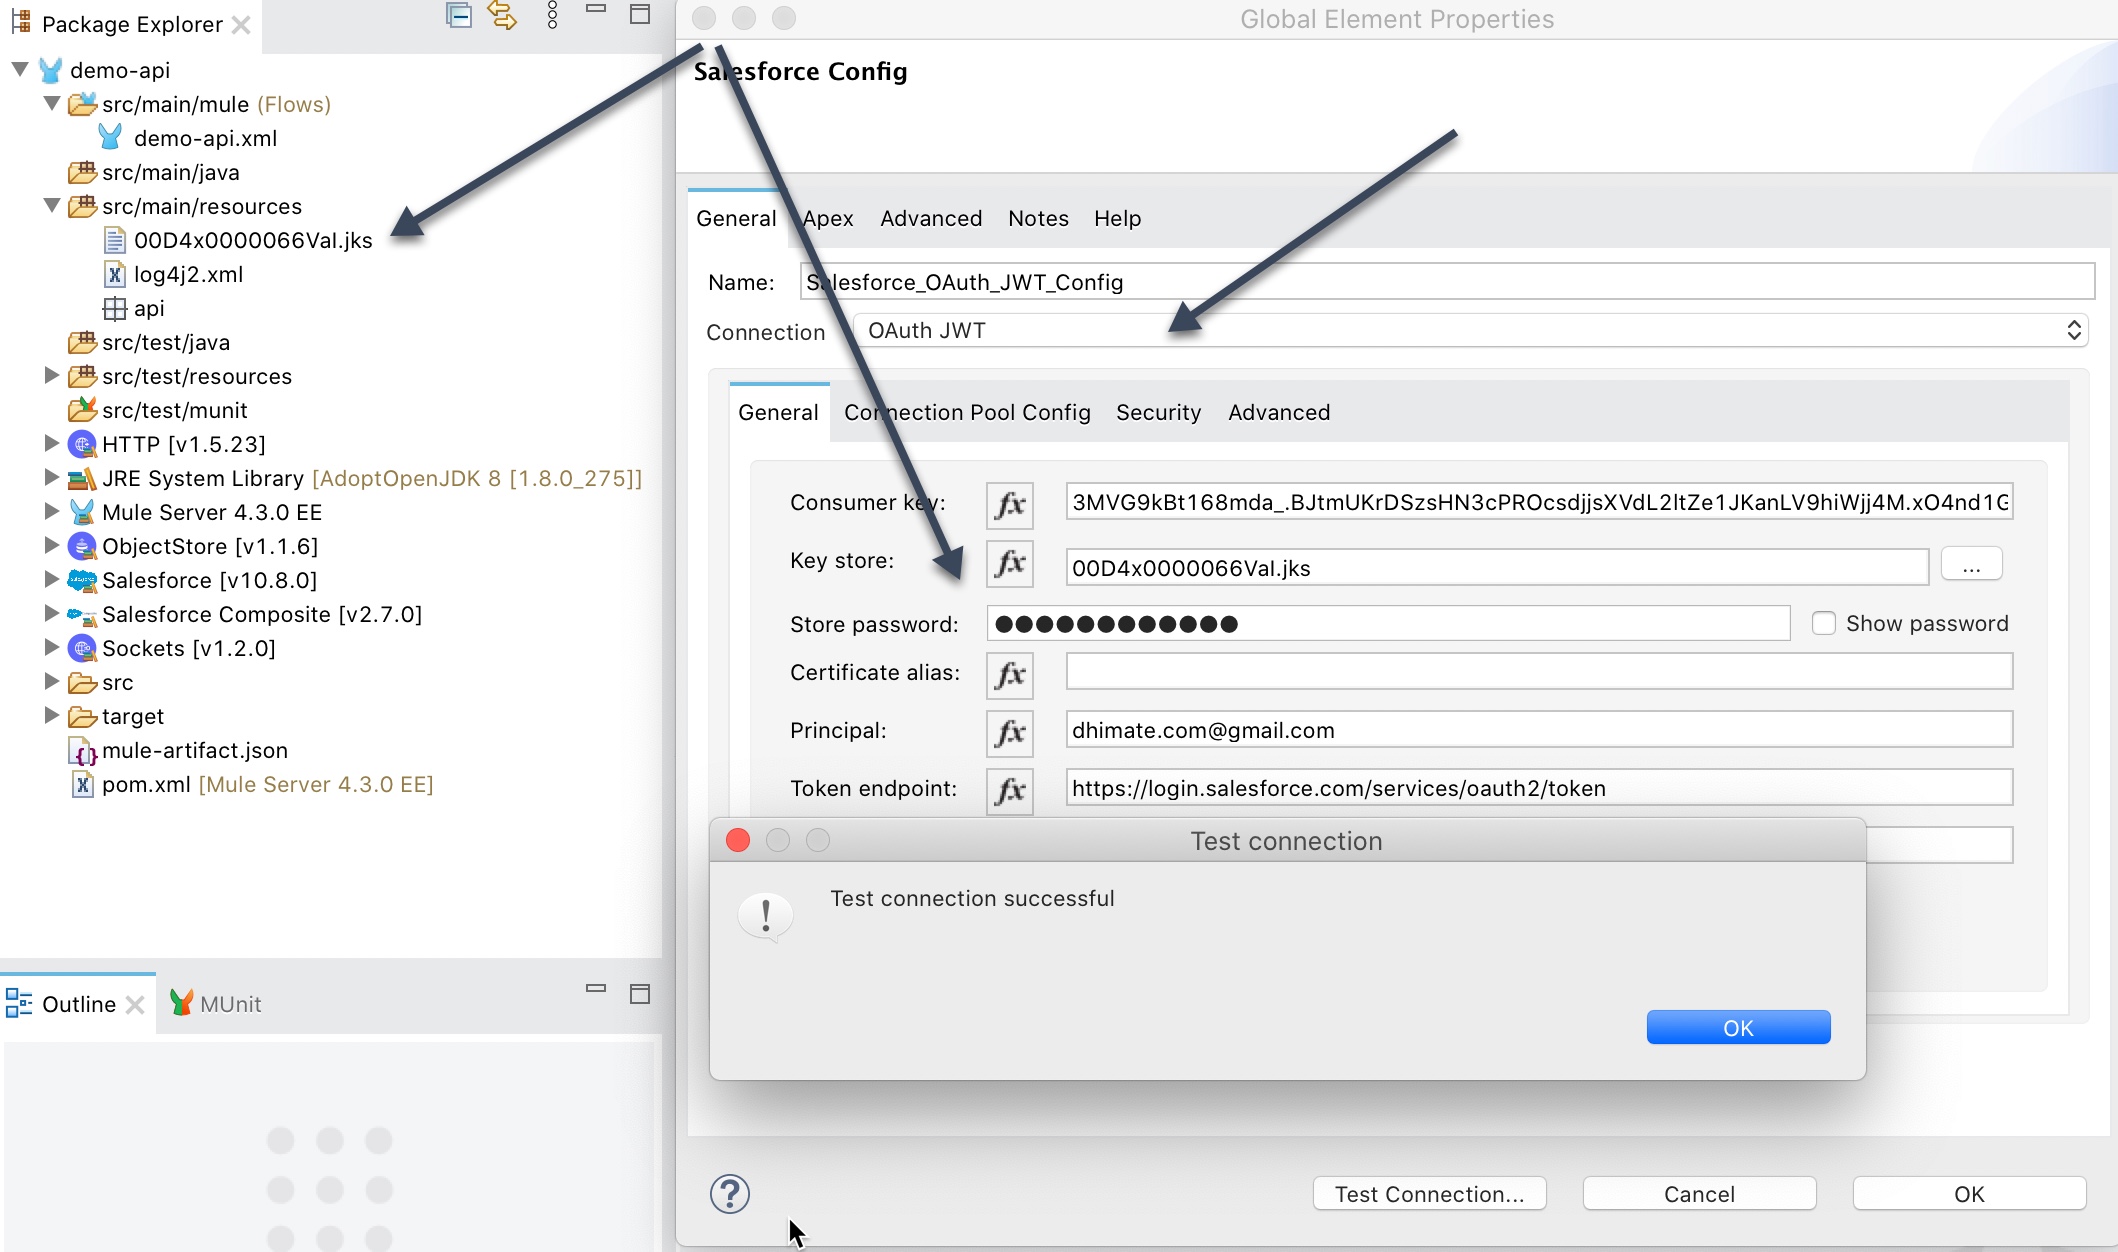
OAuth JWT
For OAuth JWT connection copy and paste the key store file (.jks) that you created in the certificate setup section into the src/main/resources folder.
- Consumer Key – Consumer key of the Connected App that was created in Salesforce
- Key Store – Keystore file (.jks) that you downloaded from the certificate setup
- Store Password – Keystore password that was created when you generated the key store file
- Principal – Salesforce username of the user that was approved against the authorization URL
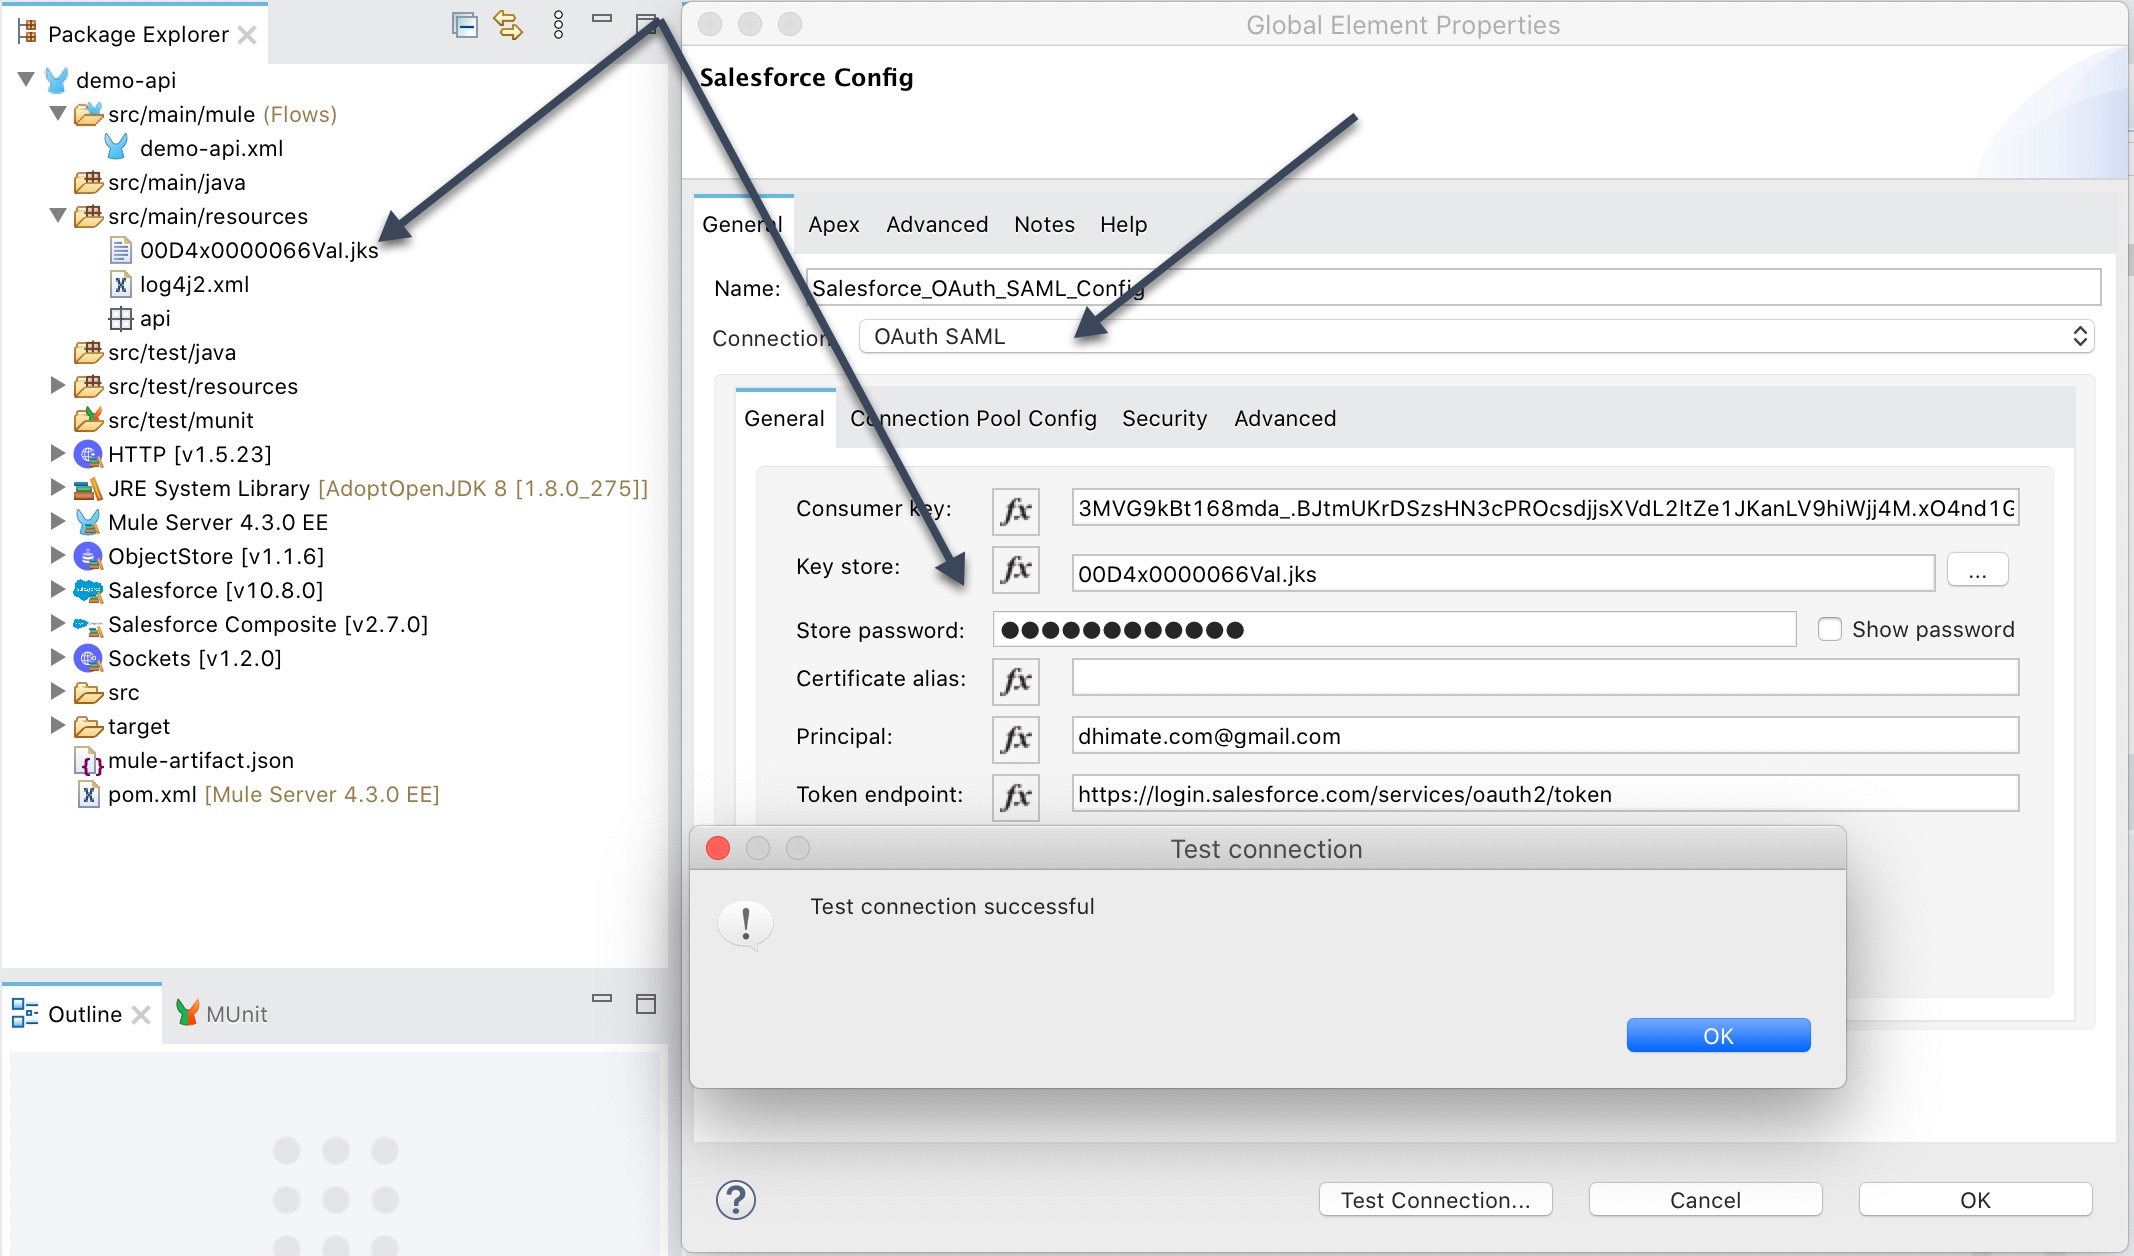
OAuth SAML
For OAuth SAML connection copy and paste the key store file (.jks) that you created in the certificate setup section into the src/main/resources folder.
- Consumer Key – Consumer key of the Connected App that was created in Salesforce
- Key Store – Keystore file (.jks) that you downloaded from the certificate setup
- Store Password – Keystore password that was created when you generated the key store file
- Principal – Salesforce username of the user that was approved against the authorization URL
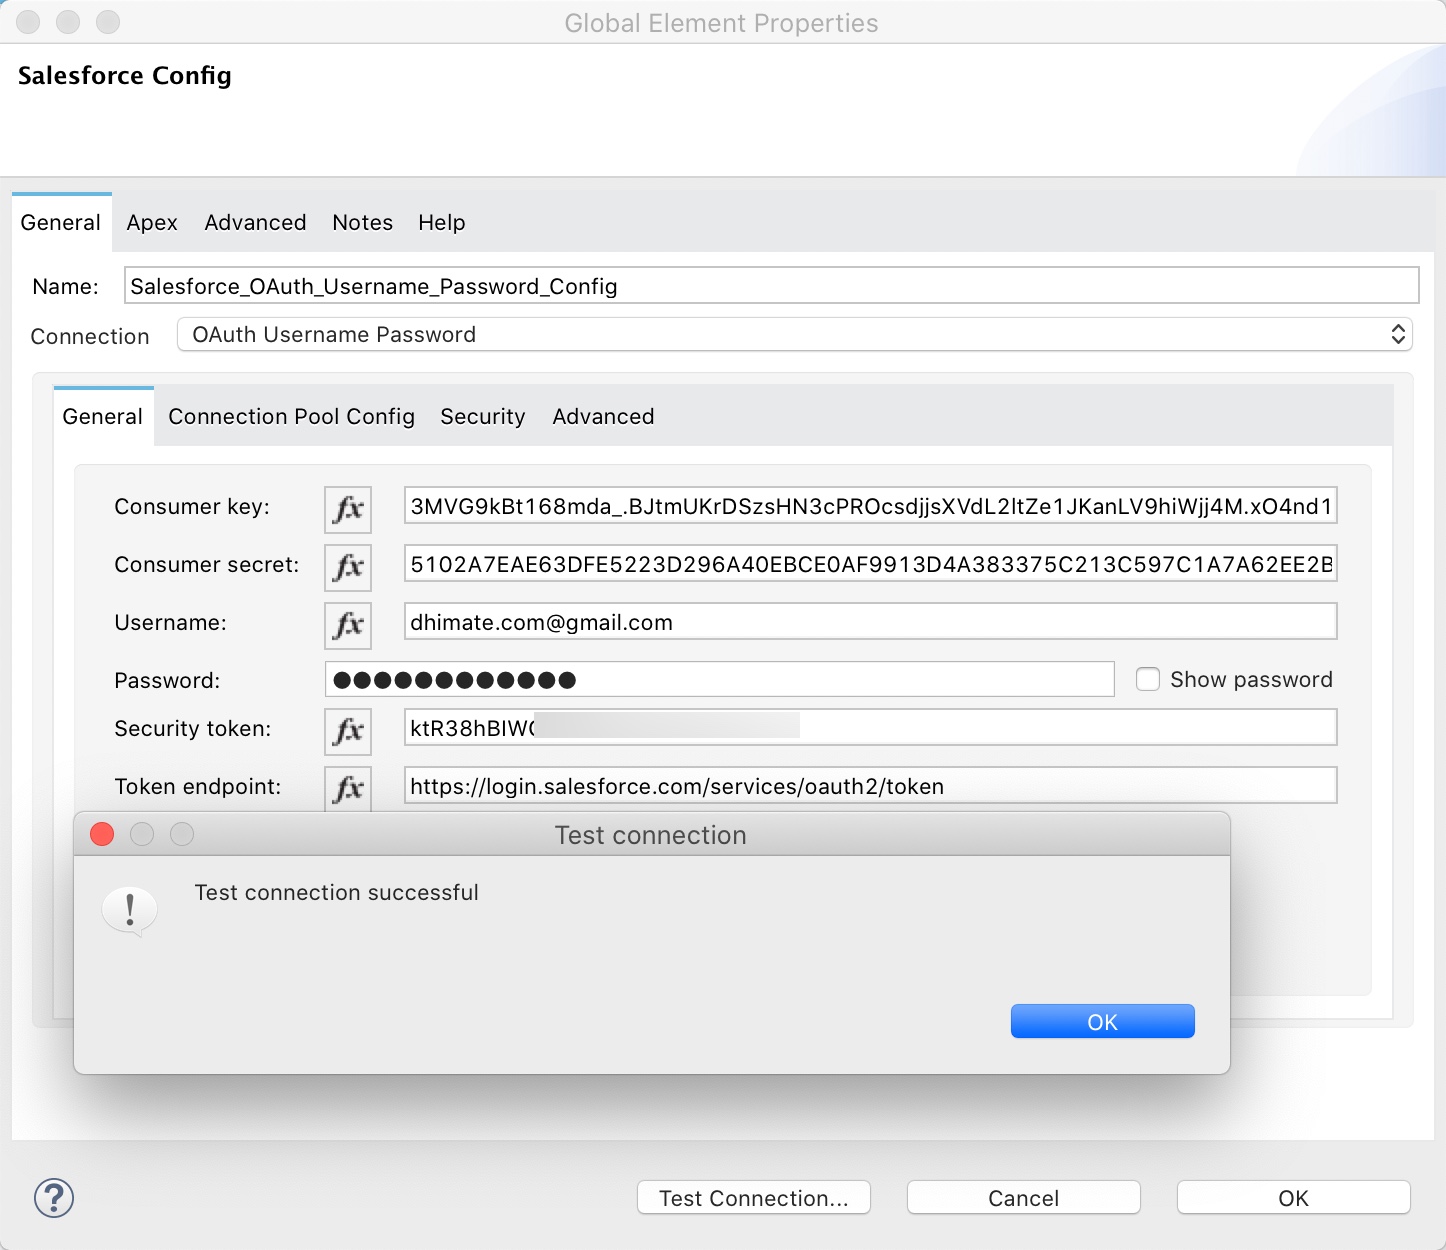
OAuth Username Password
For OAuth Username Password configure the following properties
- Consumer Key – Consumer key of the Connected App that was created in Salesforce
- Consumer Secret – Consumer secret of the Connected App that was created in Salesforce
- Username – Salesforce login id
- Password – Salesforce password
- Security Token - Security token associated with the username