I haven’t posted anything in February. It was the busiest month I ever had. Our baby girl decided to arrive earlier than expected. Due to the pandemic, we decided to manage baby things on our own, without our parents. It’s fun, but for the first time parents like us, it’s not easy. The most difficult part is baby can’t talk and exactly tell us what she wants yet. So we have to decipher her crying. Decoding her crying is like solving a puzzle. Is the diper wet, or poopy? Is she hungry? Or too full and needs to burp? But we just burped few mins ago. Is she too cold or too warm? Or just plain bored? The first few weeks I took a brute force approach and tried everything to soothe her. It worked but it was very inefficient (and exhausting). After a couple of more weeks, we got a hang of it and somewhat able to understand what she wants. (or she has given up on our parenting :)). The interesting thing about parenting is that everyone else has an opinion, and it usually comes down to how we are doing it wrong. ;) I learned to ignore it for the most part. I think nobody knows what they are doing, so it’s just figuring out on the go.
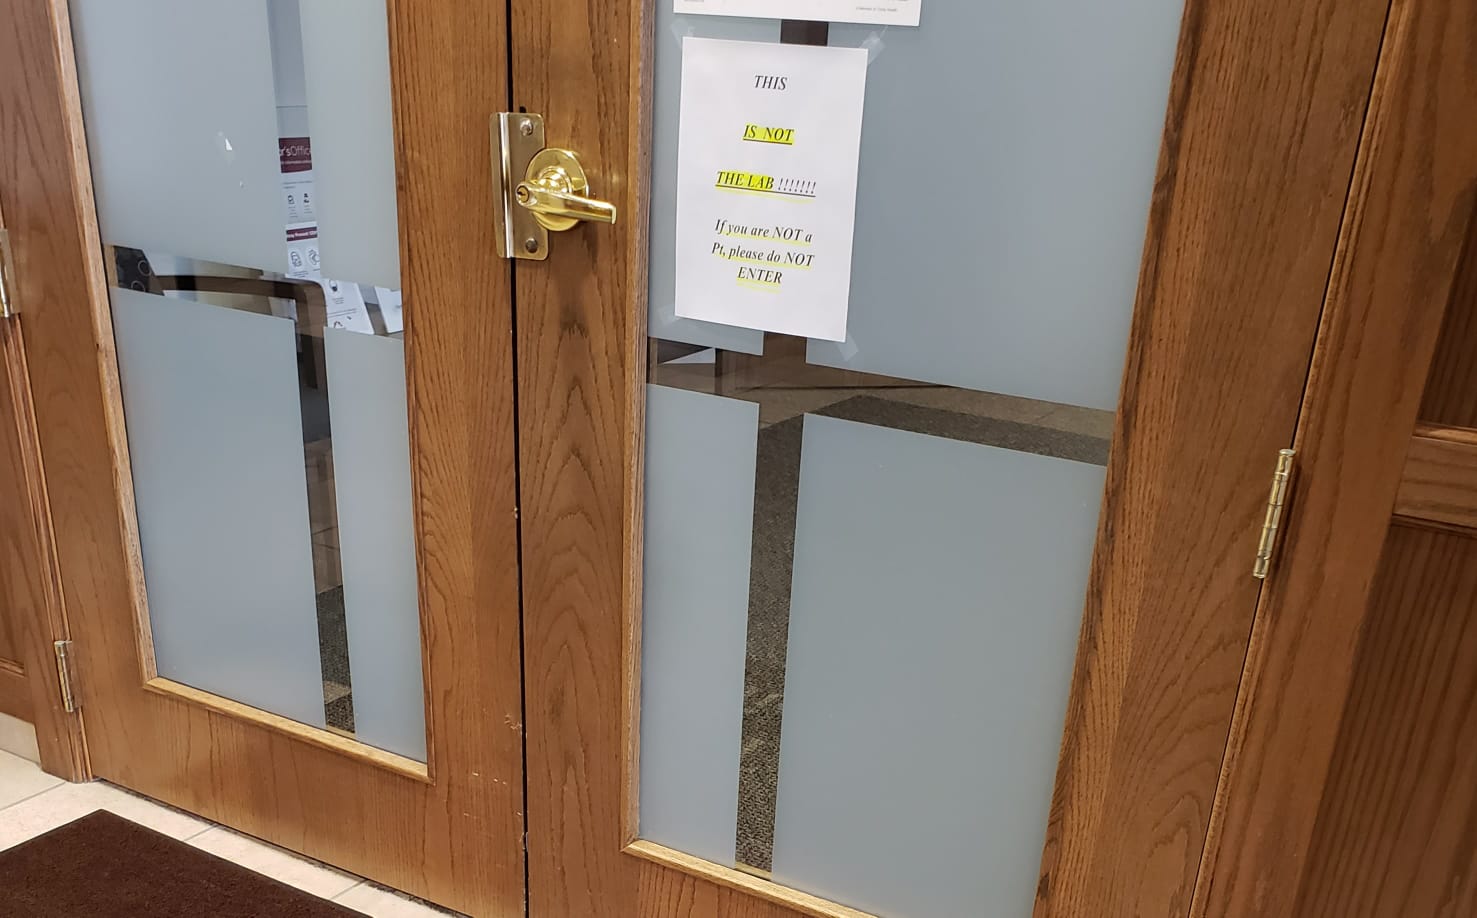
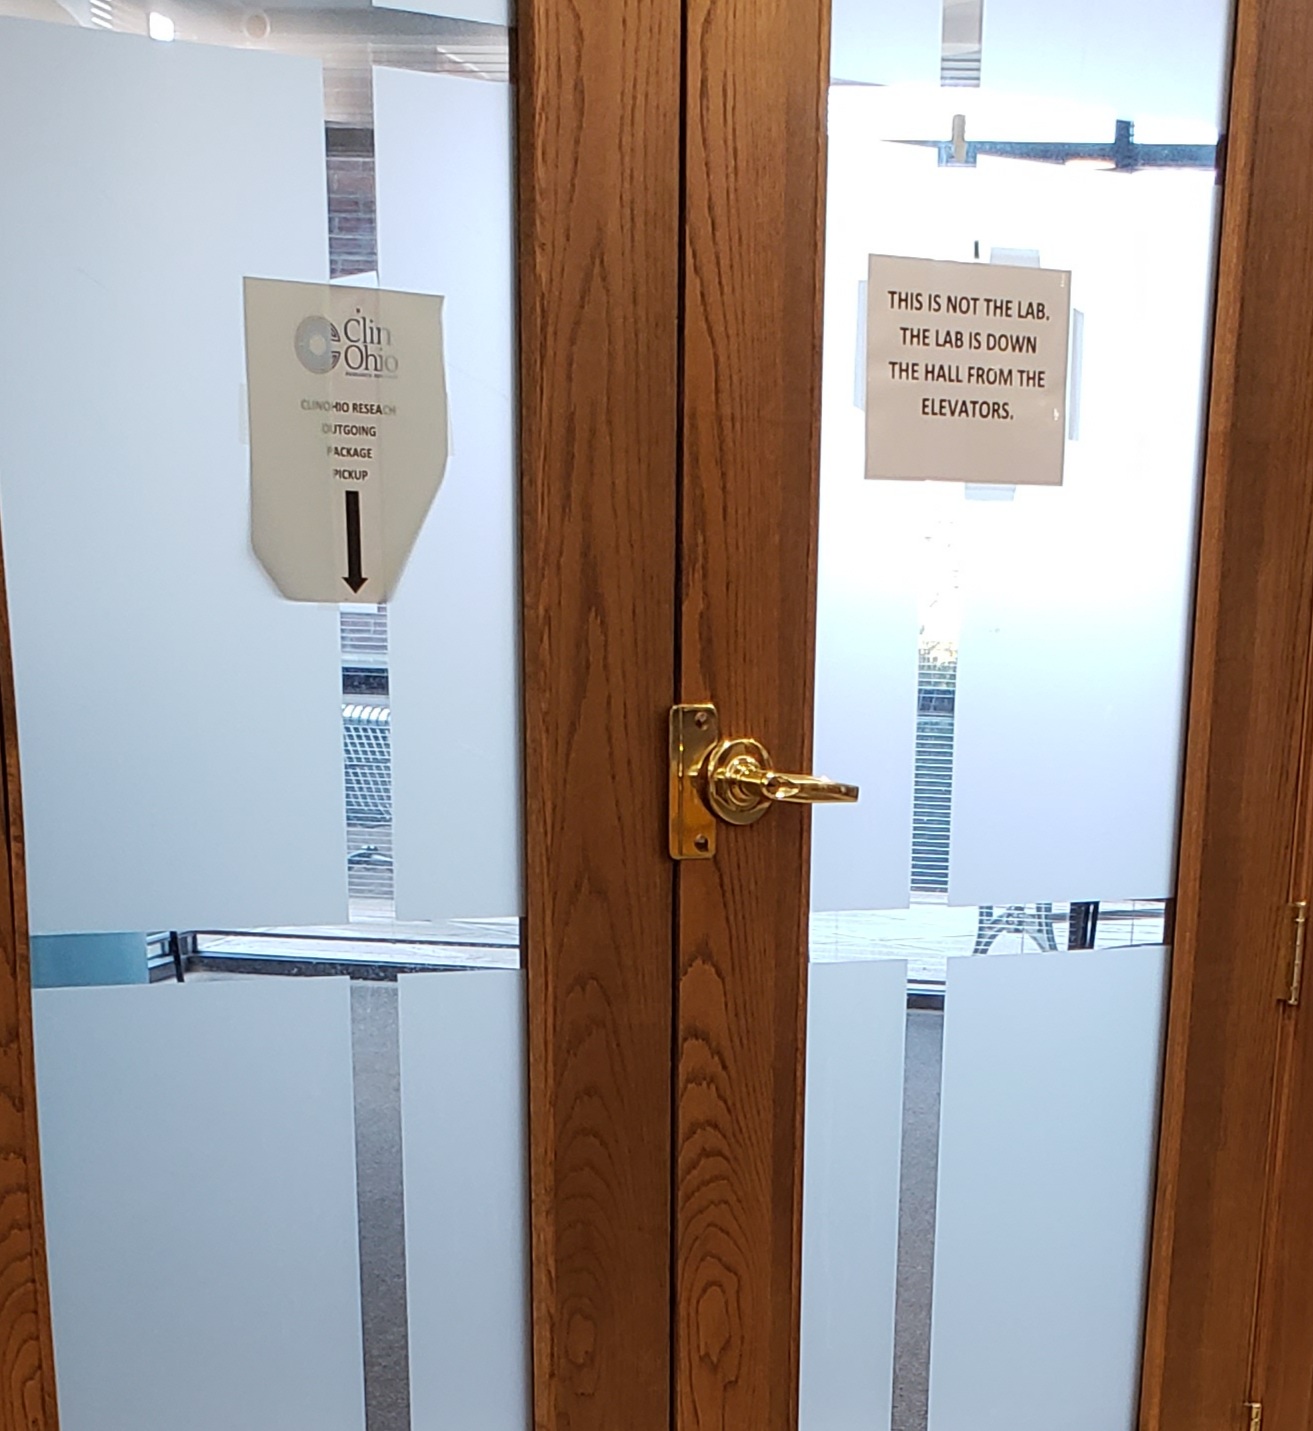
Anyways, here is a funny anecdote. We were visiting the doctor for regular checkups over the last year. On our first visit to the hospital, the nurse told us to ‘go downstairs to the lab’ for the blood checkup. Downstairs I noticed something interesting. There was no lab to be found. At least not easily. There were at least 4 other offices, each of them telling me that ‘it’s not a lab’. The notice on one door told me that the lab was down the hall. But the Y shaped hallway had 3 corners to go.
After walking across all the hallways on that floor for 8-10 minutes, we finally located the lab in one remote corner. I guess we were just unlucky to pick the wrong hallways first. This bad ‘UX’ could’ve been easily avoided by simply putting a small arrow in the direction of the lab.
Whenever I am near the hospital, I feel I should go inside the building and put an arrow to show where the lab is.
FHIR (Fast Healthcare Interoperability Resources) is a new and emerging standard for interoperability in healthcare IT. Unlike the ancient HL7v2 standard, FHIR is open, extensible, and composable. It supports modern web standards like JSON, XML, HTTP(!), and Turtle. It also defines different data exchange methods like RESTful API, messaging, services, documents, and persistent storage. Best of all the FHIR documentation is outstanding: There is detail documentation for every type of resource, with lots of examples. Enough detail for anyone to create a compliant implementation. All of the data types like dates and times, terminologies, identifiers, references, numeric values, extensions are documented in detail, including how to read and write them. It’s probably one of the best documented and well thought out APIs I have worked with.
Epic made their FHIR APIs available on https://fhir.epic.com/. In this post, we will discuss using Epic’s FHIR APIs in Mule 4
Prerequisites
You will need an Epic developer account. You can get one for free by signing up here. I have used Anypoint Studio 7.7 for Mule app.
Configuration
Certificate setup for JWS
We will use SMART Backend Services approach described here which uses signed JWT to get the access token.
Generate a new public-private key pair, and get the certificate(s) in appropriate format
1
2
3
4
5
6
7
8
# generate a new public-private key pairopenssl genrsa -out Anypoint_Mulesoft.pem 2048# export the public key to a base64 encoded X.509 certificateopenssl req -new -x509 -key Anypoint_Mulesoft.pem -out Anypoint_PublicKey.pem -subj '/CN=Anypoint' -days 365# export the keystore in pkcs12openssl pkcs12 -export -in Anypoint_PublicKey.pem -inkey Anypoint_Mulesoft.pem -out Anypoint_Keystore.p12
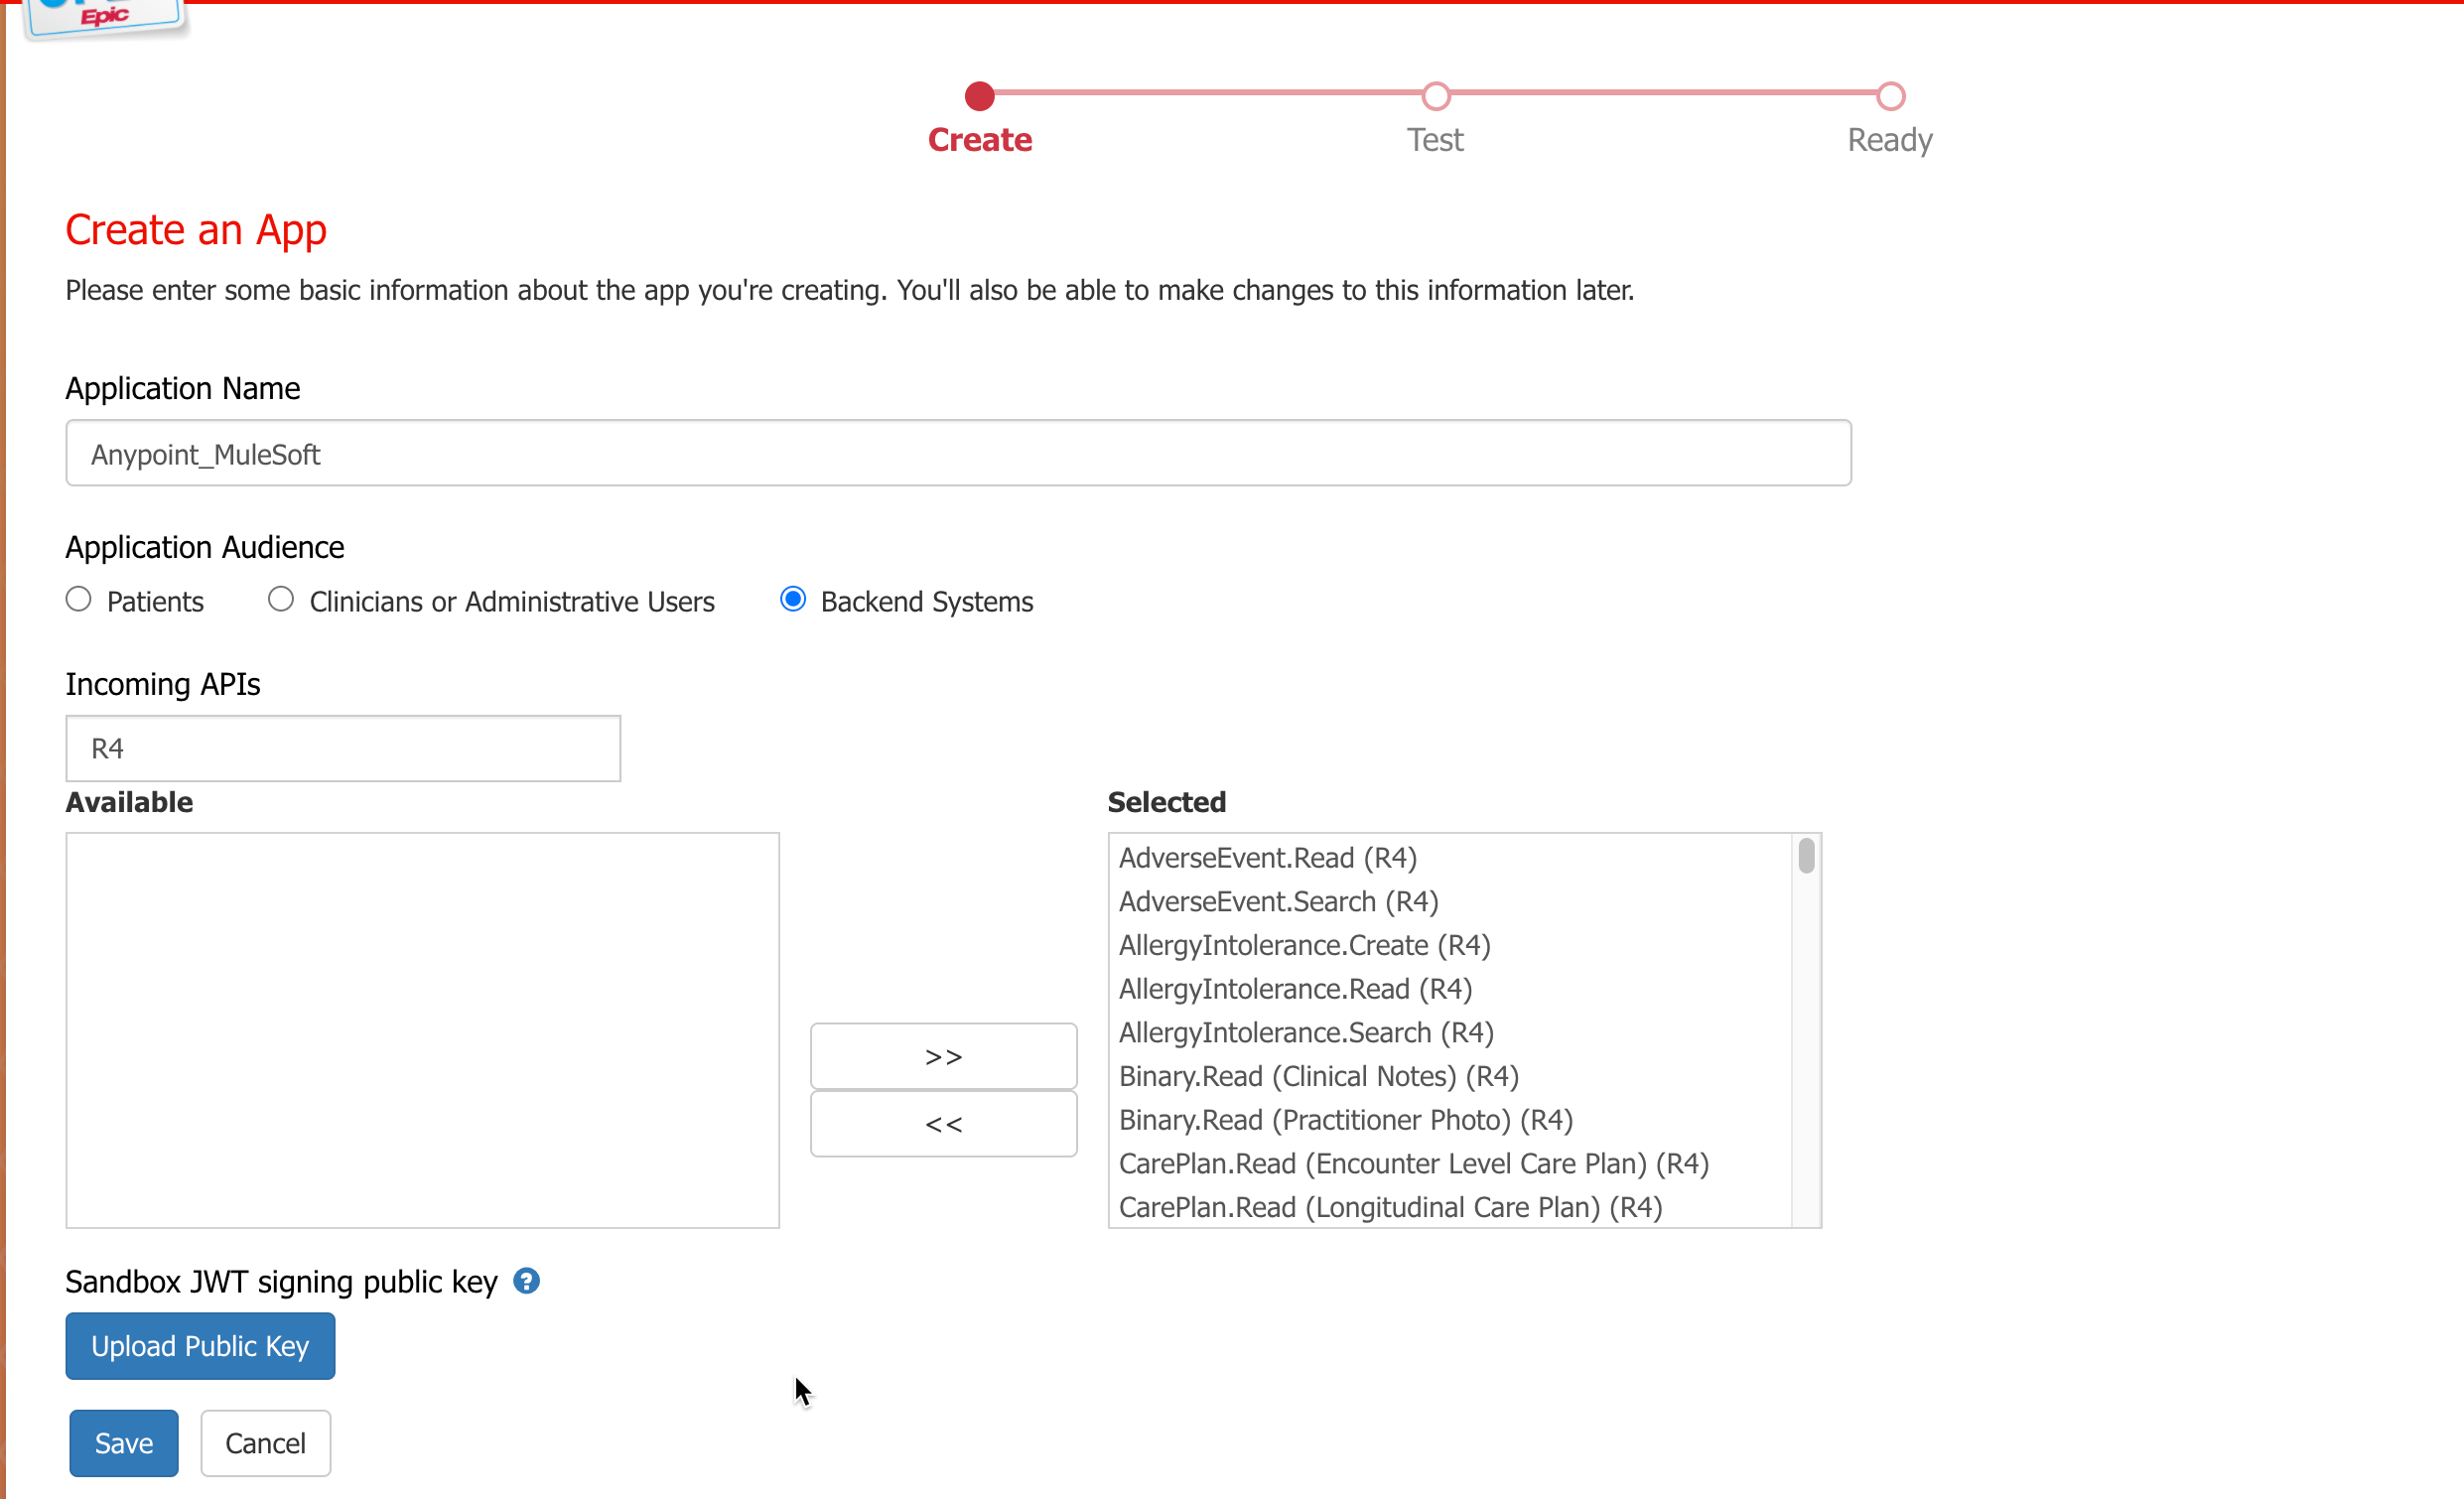
Click on ‘Create’ and enter your app details as follows. Make sure to select the Application Audience as ‘Backend Systems’. For Sandbox JWT signing public key, upload the public key store (Anypoint_PublicKey.pem) file generated in the previous step. Click on save.
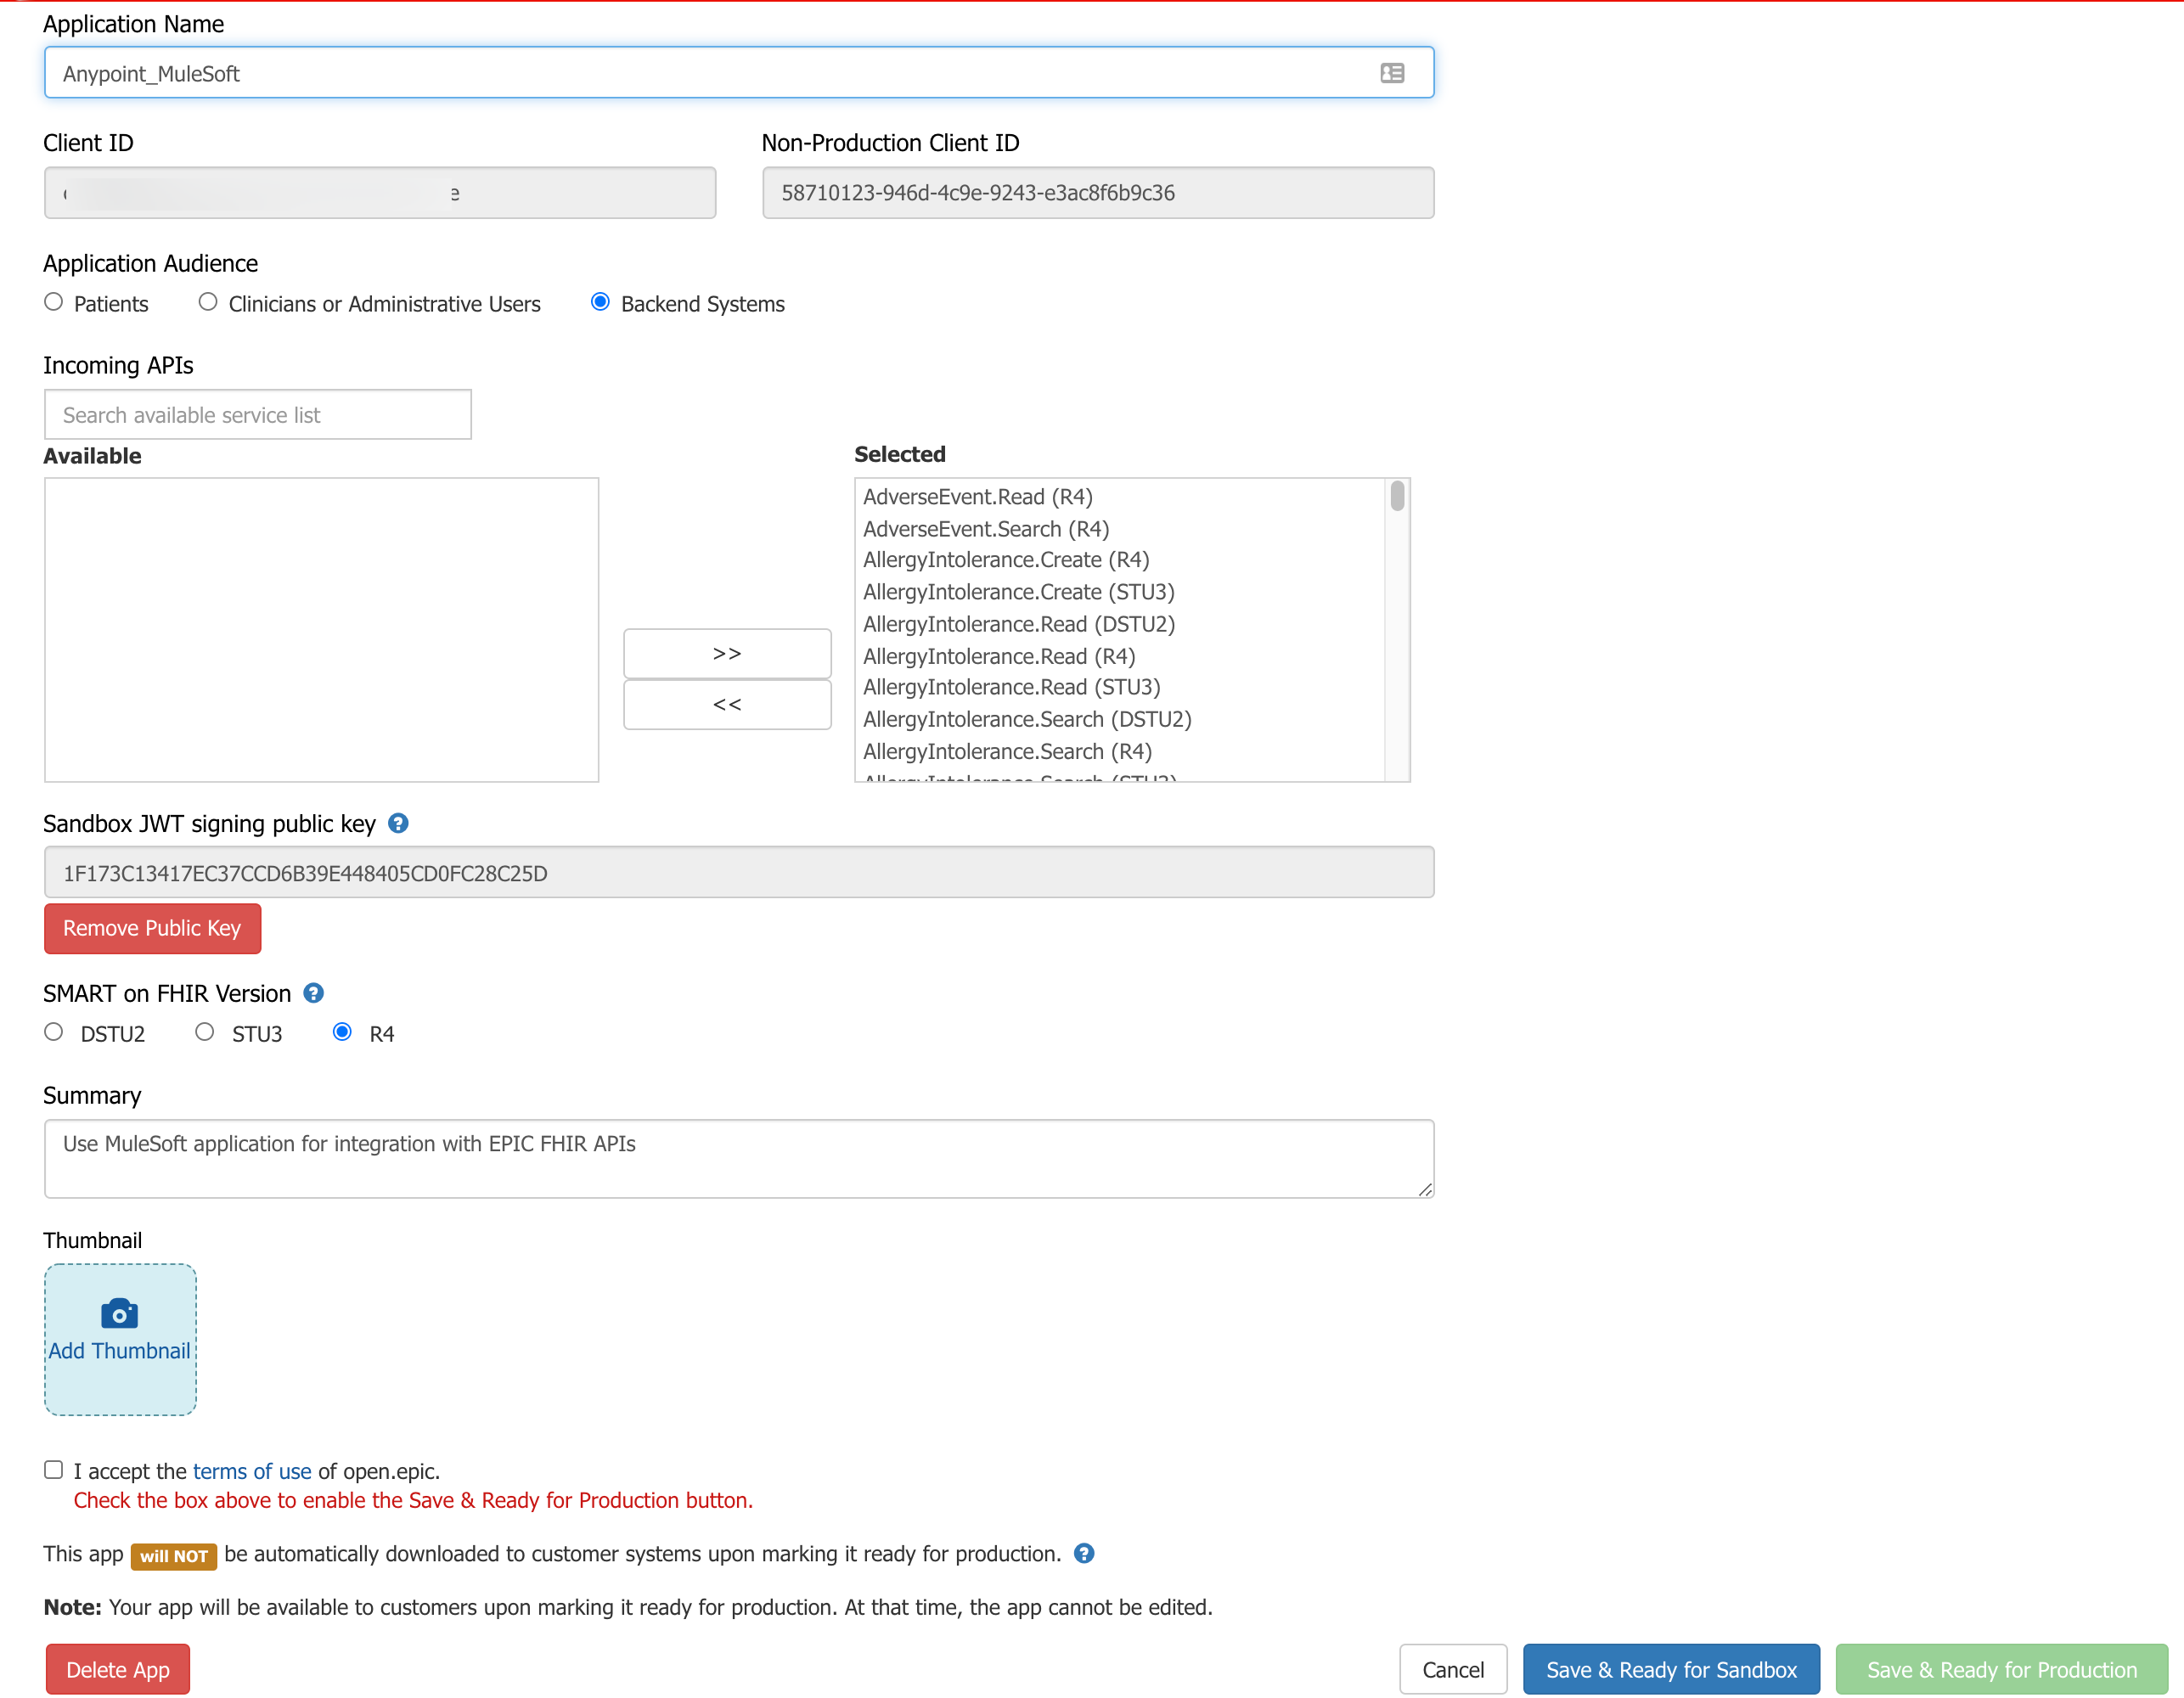
You should see the Client ID and Non-Production Client ID for your app. Select the SMART on FHIR version as R4, enter the summary, accept the terms of usage and click on ‘Save & Ready for Sandbox’.
In my experience it usually takes a couple of hours for your app to be usable in Epic. It took me ~2 hours for my app to be usable
Mule application details
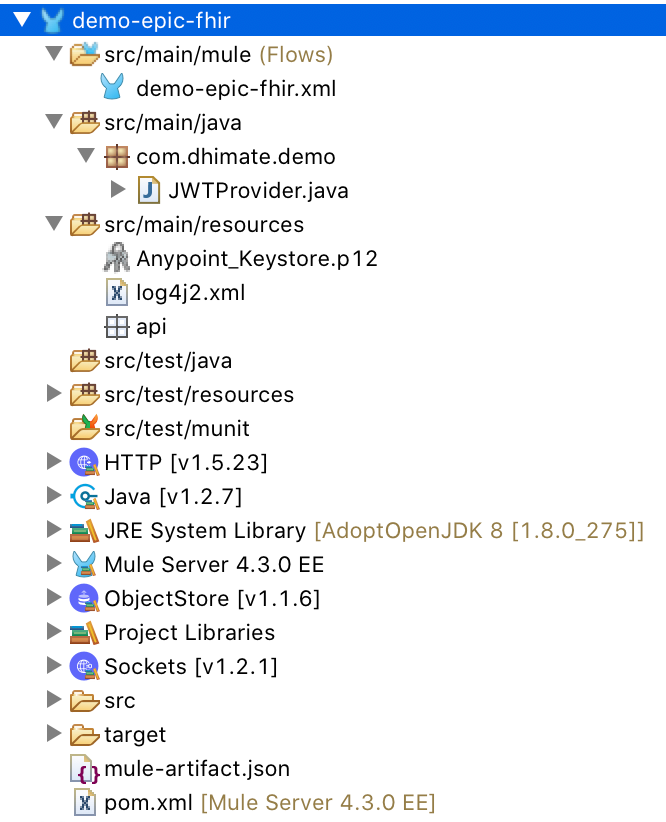
Create a new Mule application, and copy the pkcs12 formatted keystore (Anypoint_Keystore.p12) created earlier, in the src/main/resources folder.
To generate a signed JWT (JWS), we will use Java JWT library. In the pom.xml of your Mule application, include the following dependencies. (I have included Apache log4j dependencies, these are optional).
In Mule application’s src/main/java folder, create a new Java package com.dhimate.demo, class JWTProvider and use following code snippet to generate signed JWT.
In Mule application’s src/main/java folder, create a new Java package com.dhimate.demo, class JWTProvider and use the following code snippet to generate signed JWT.
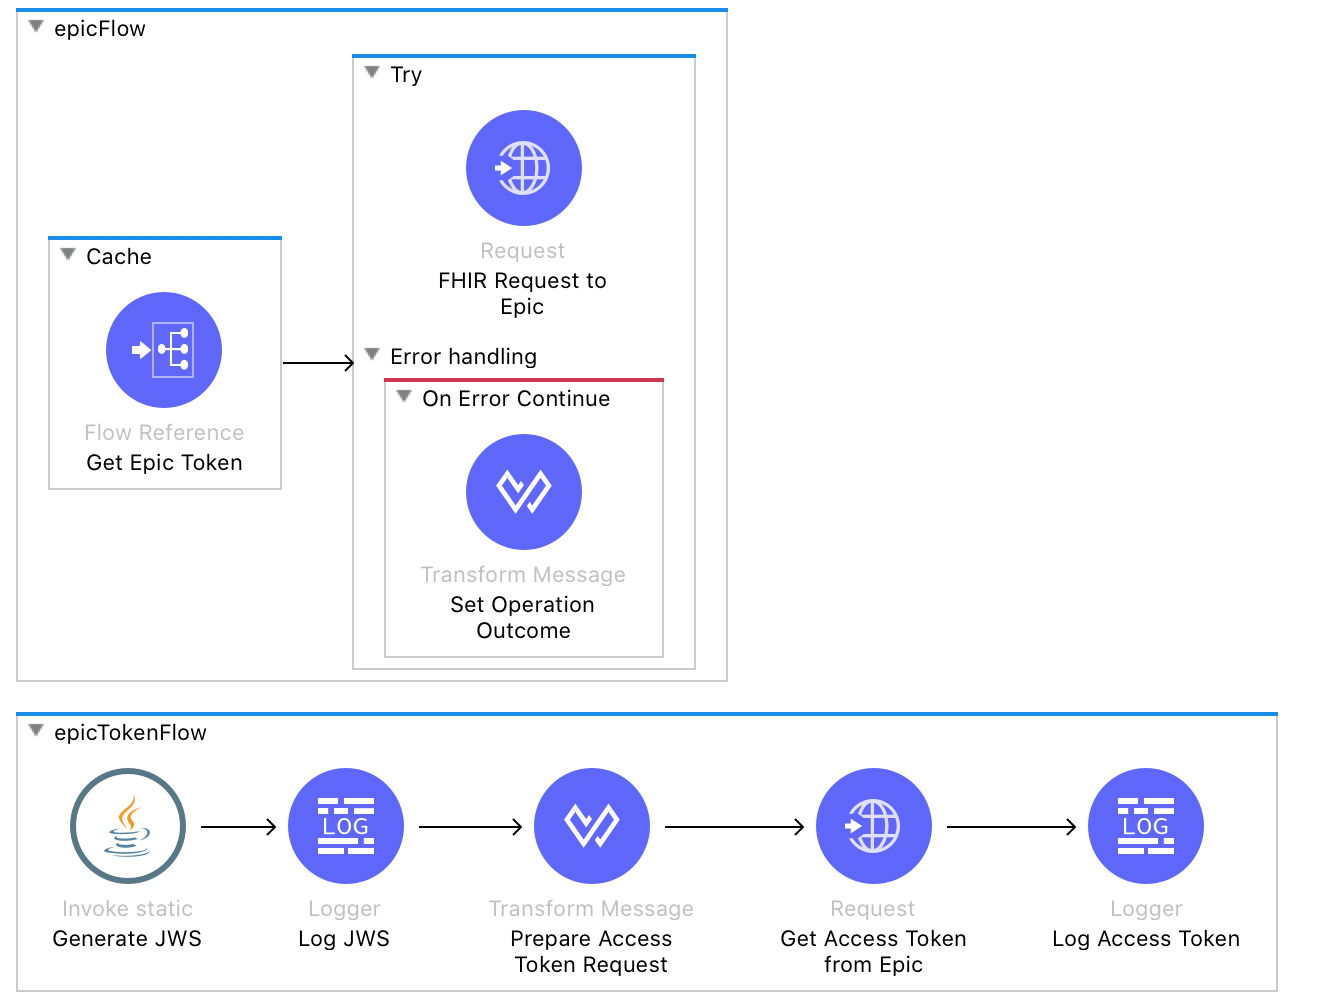
Calling Epic’s FHIR APIs is a two-step process.
In the first step we need to get the access token using the signed JWT token
In the second step we will use the access token received in the step above to access FHIR resource
Let’s look at the configuration of important components
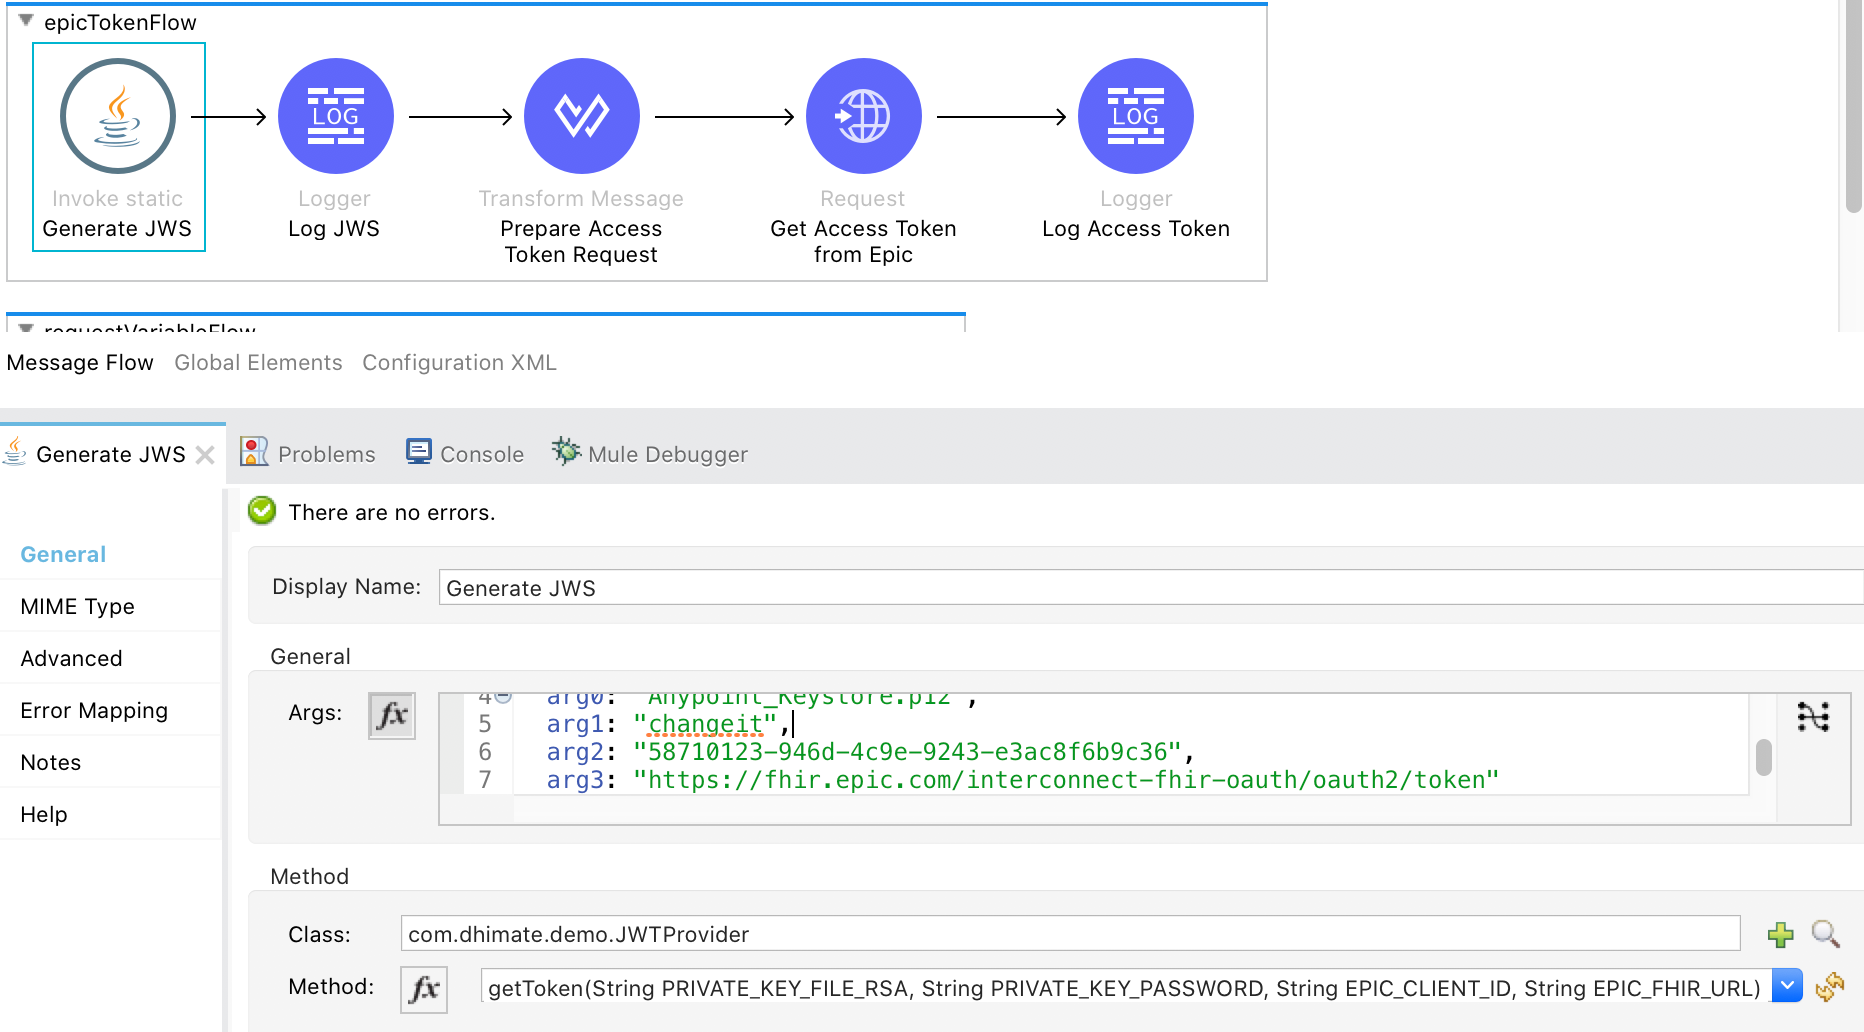
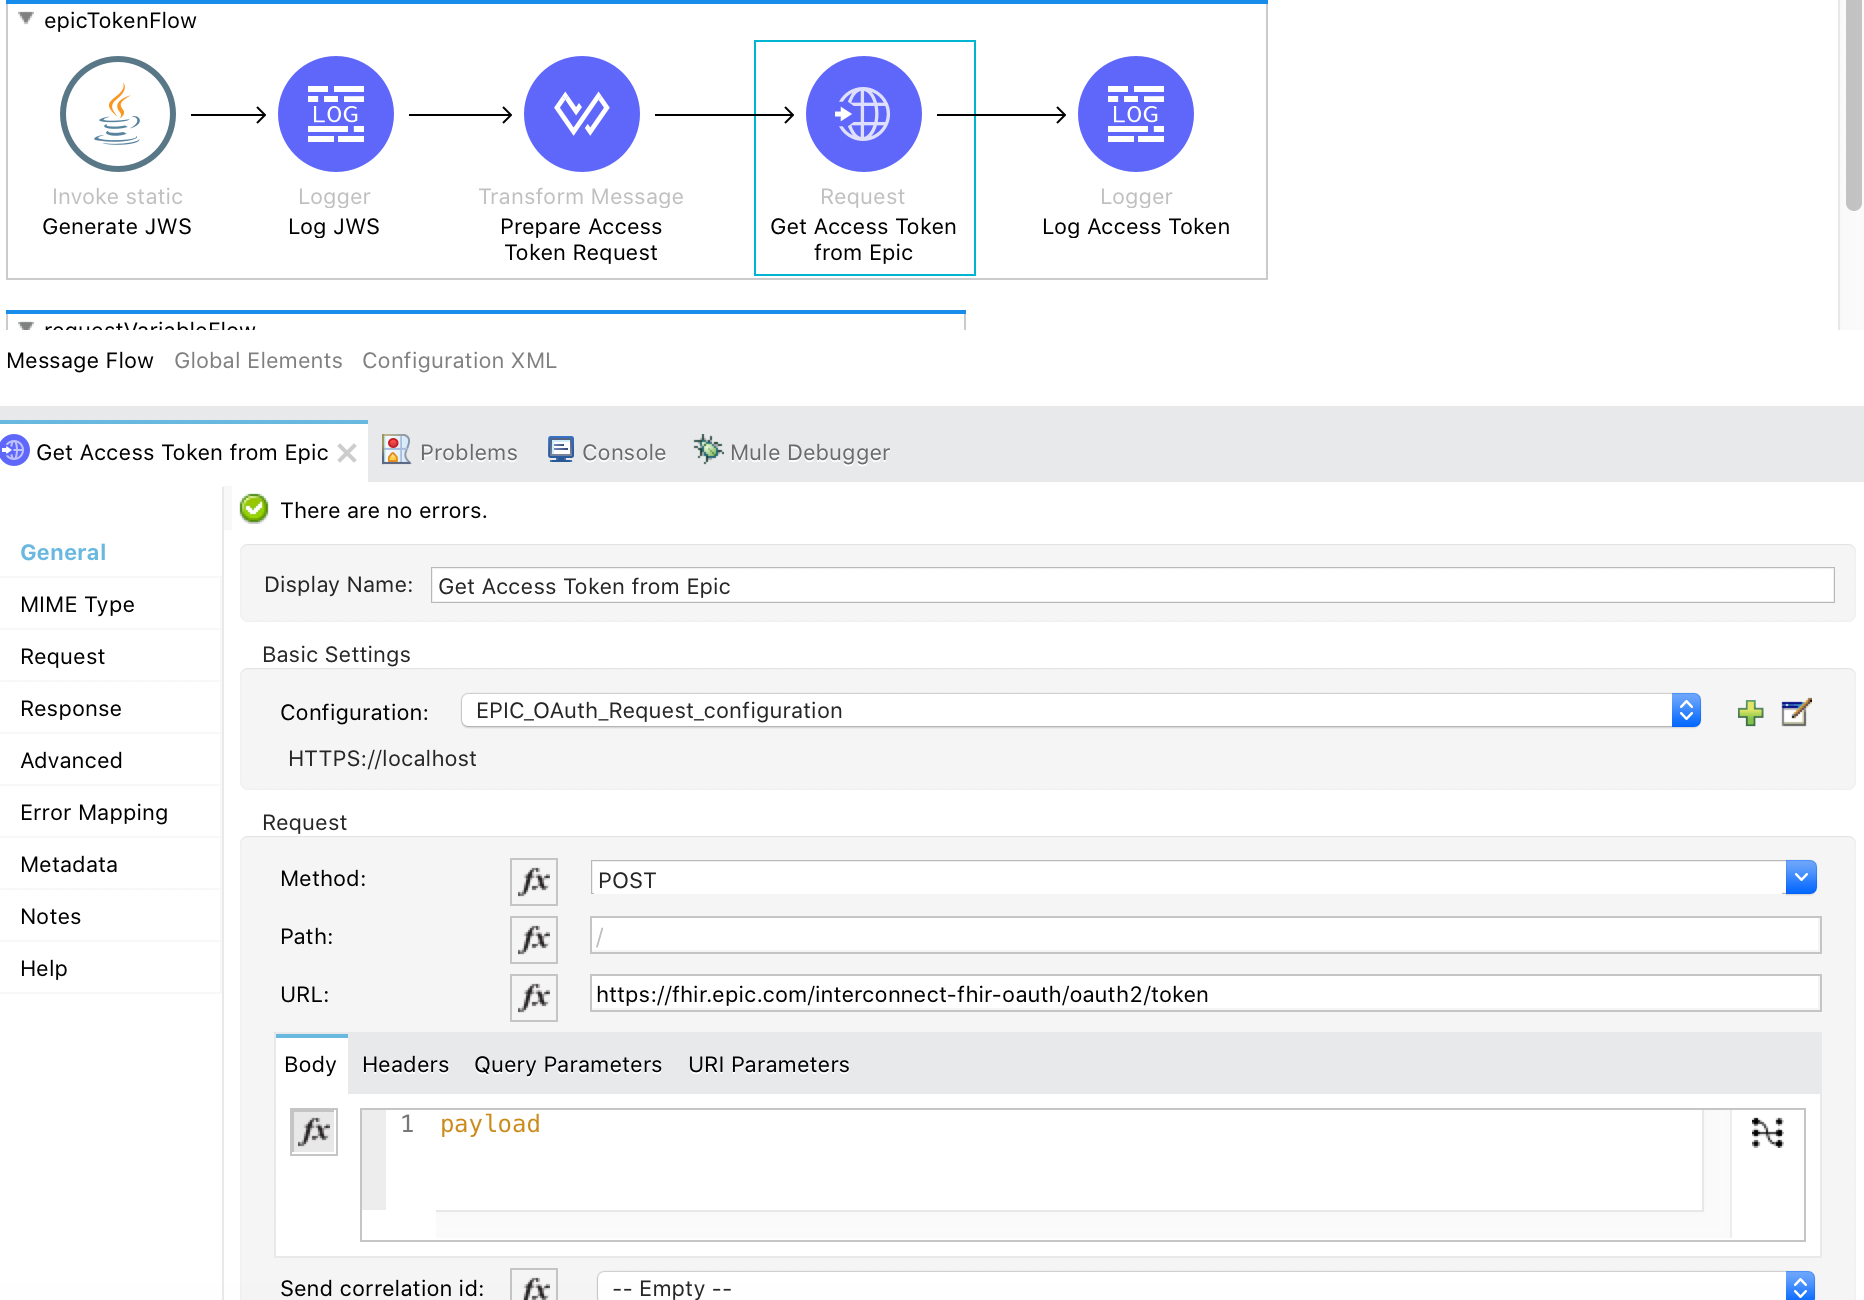
Generate signed JWS token using Invoke Static component
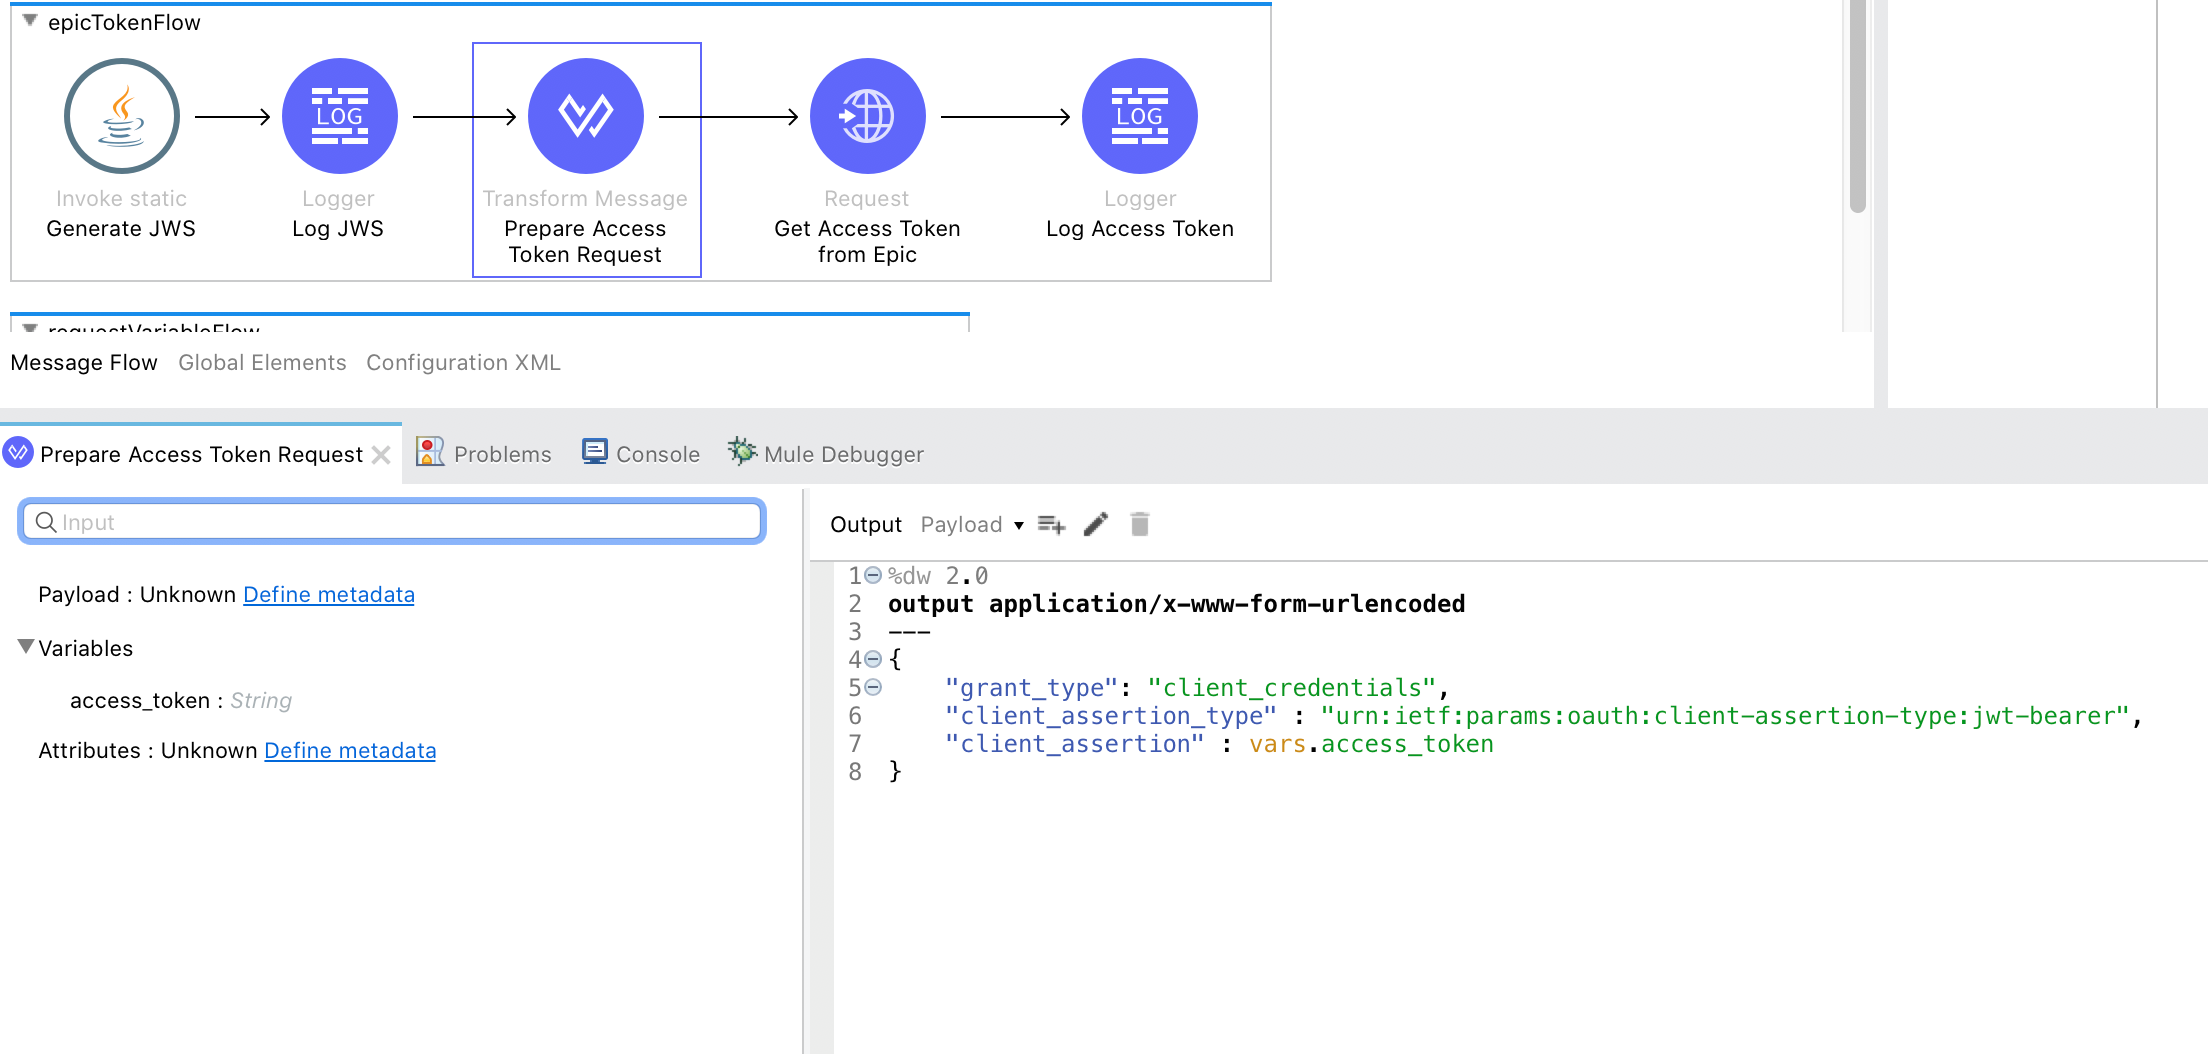
Prepare request payload to get access token
Get the access token
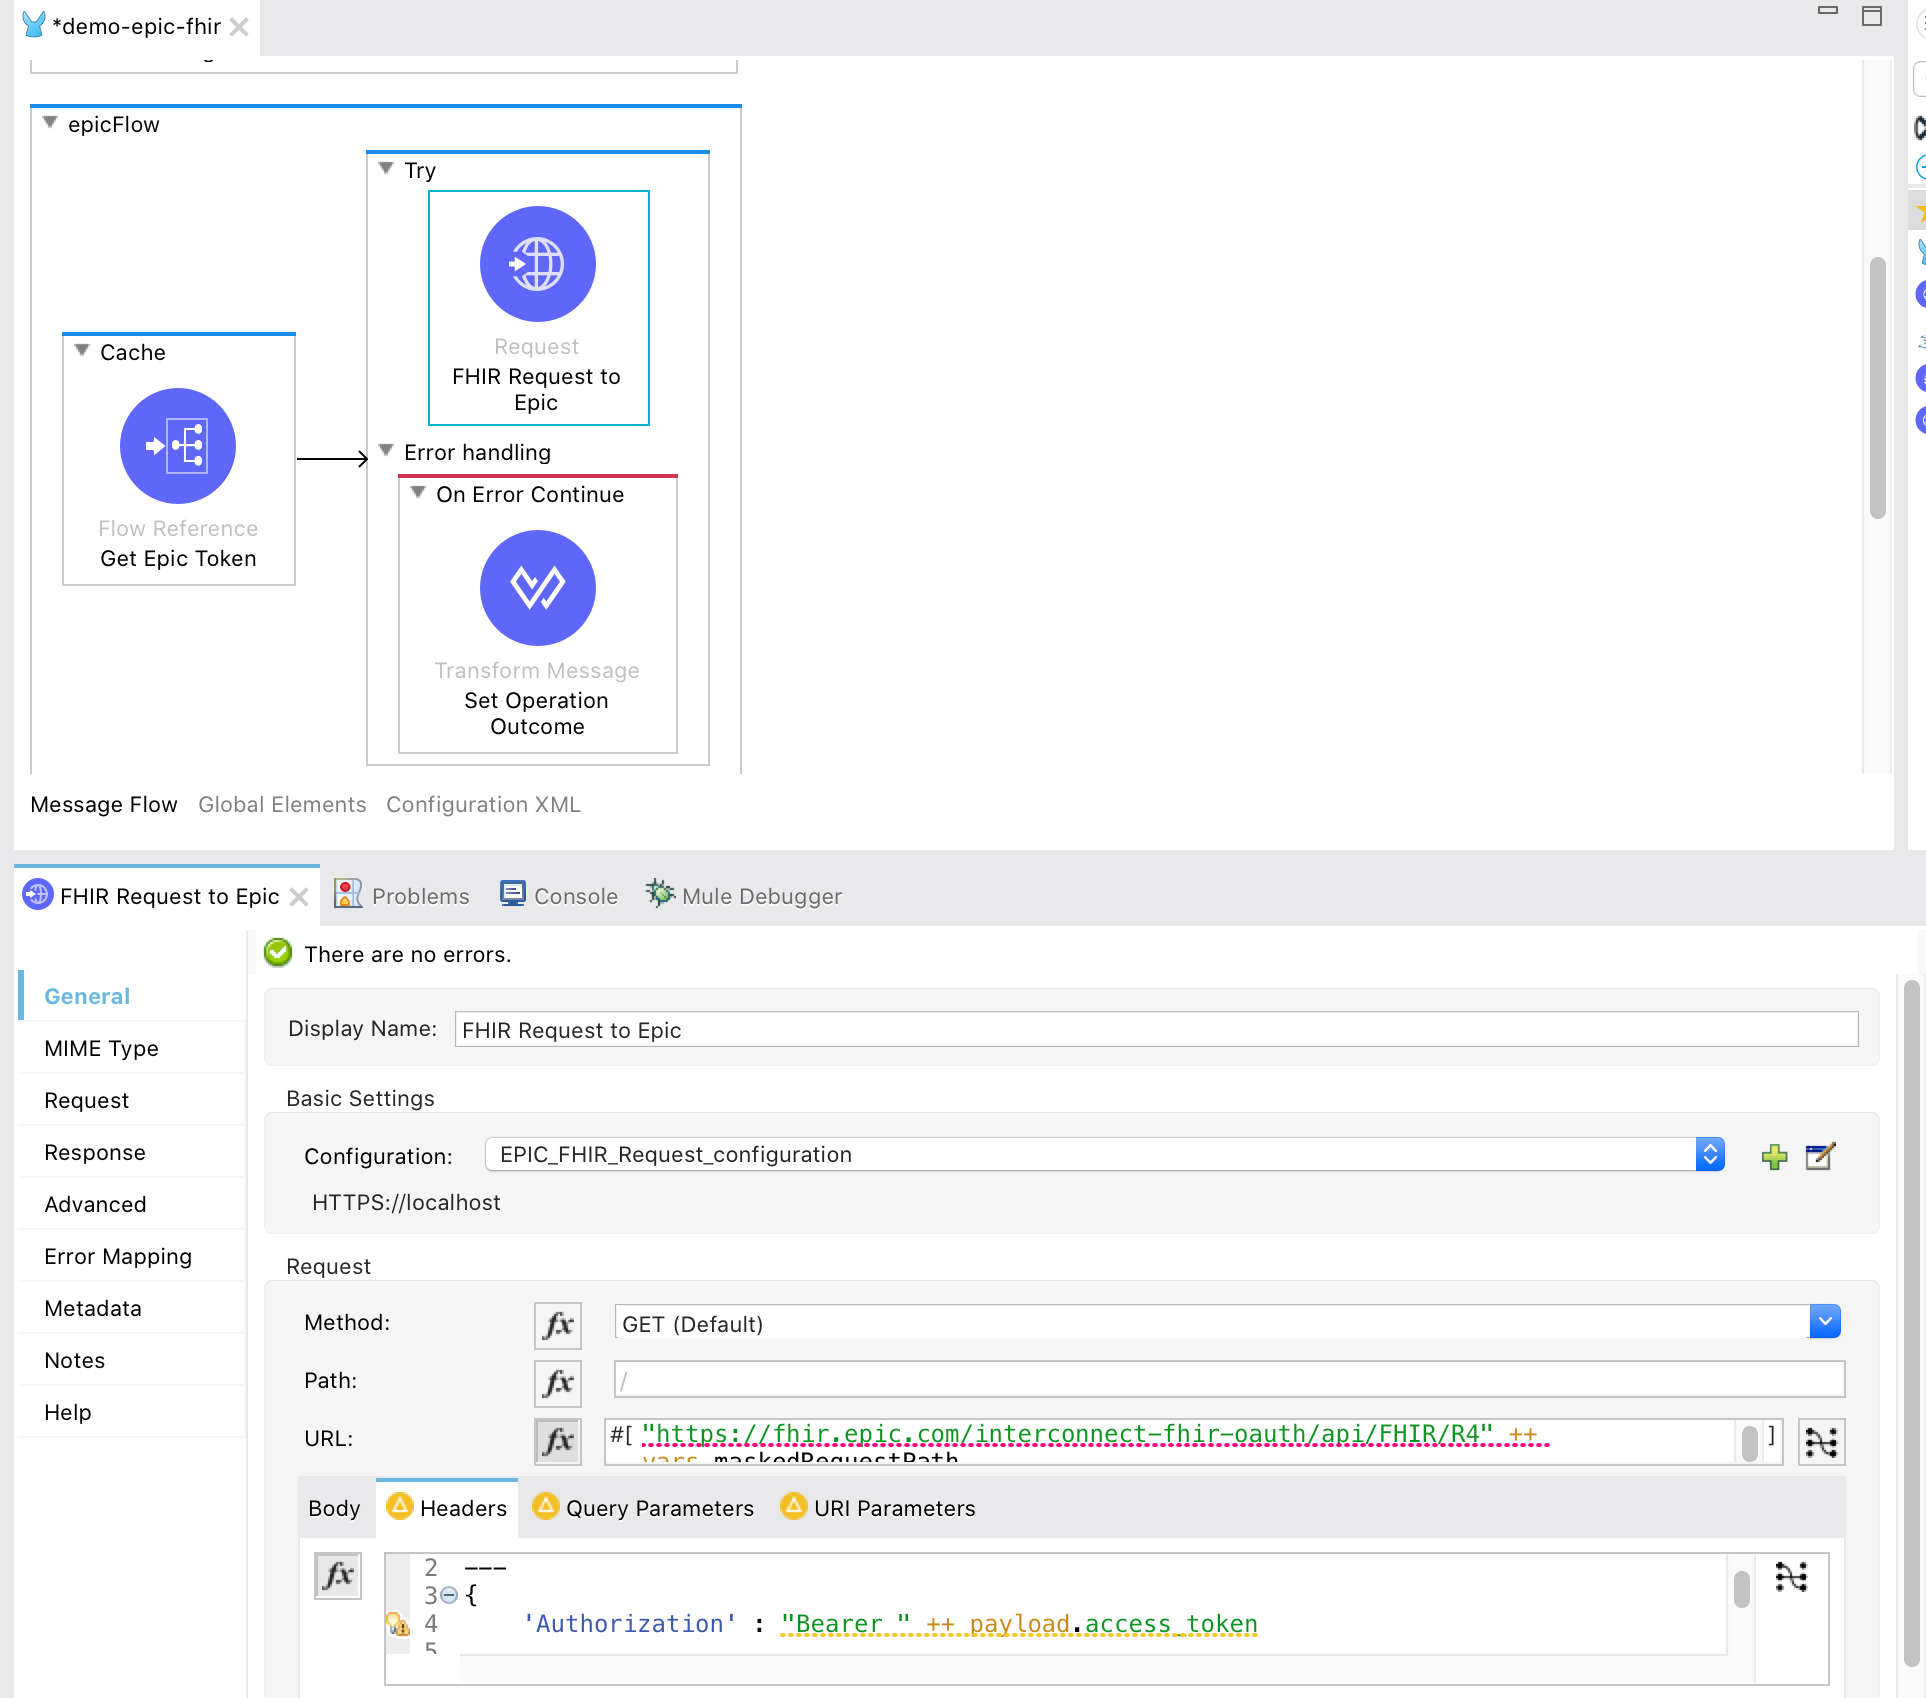
Call FHIR API to get the data
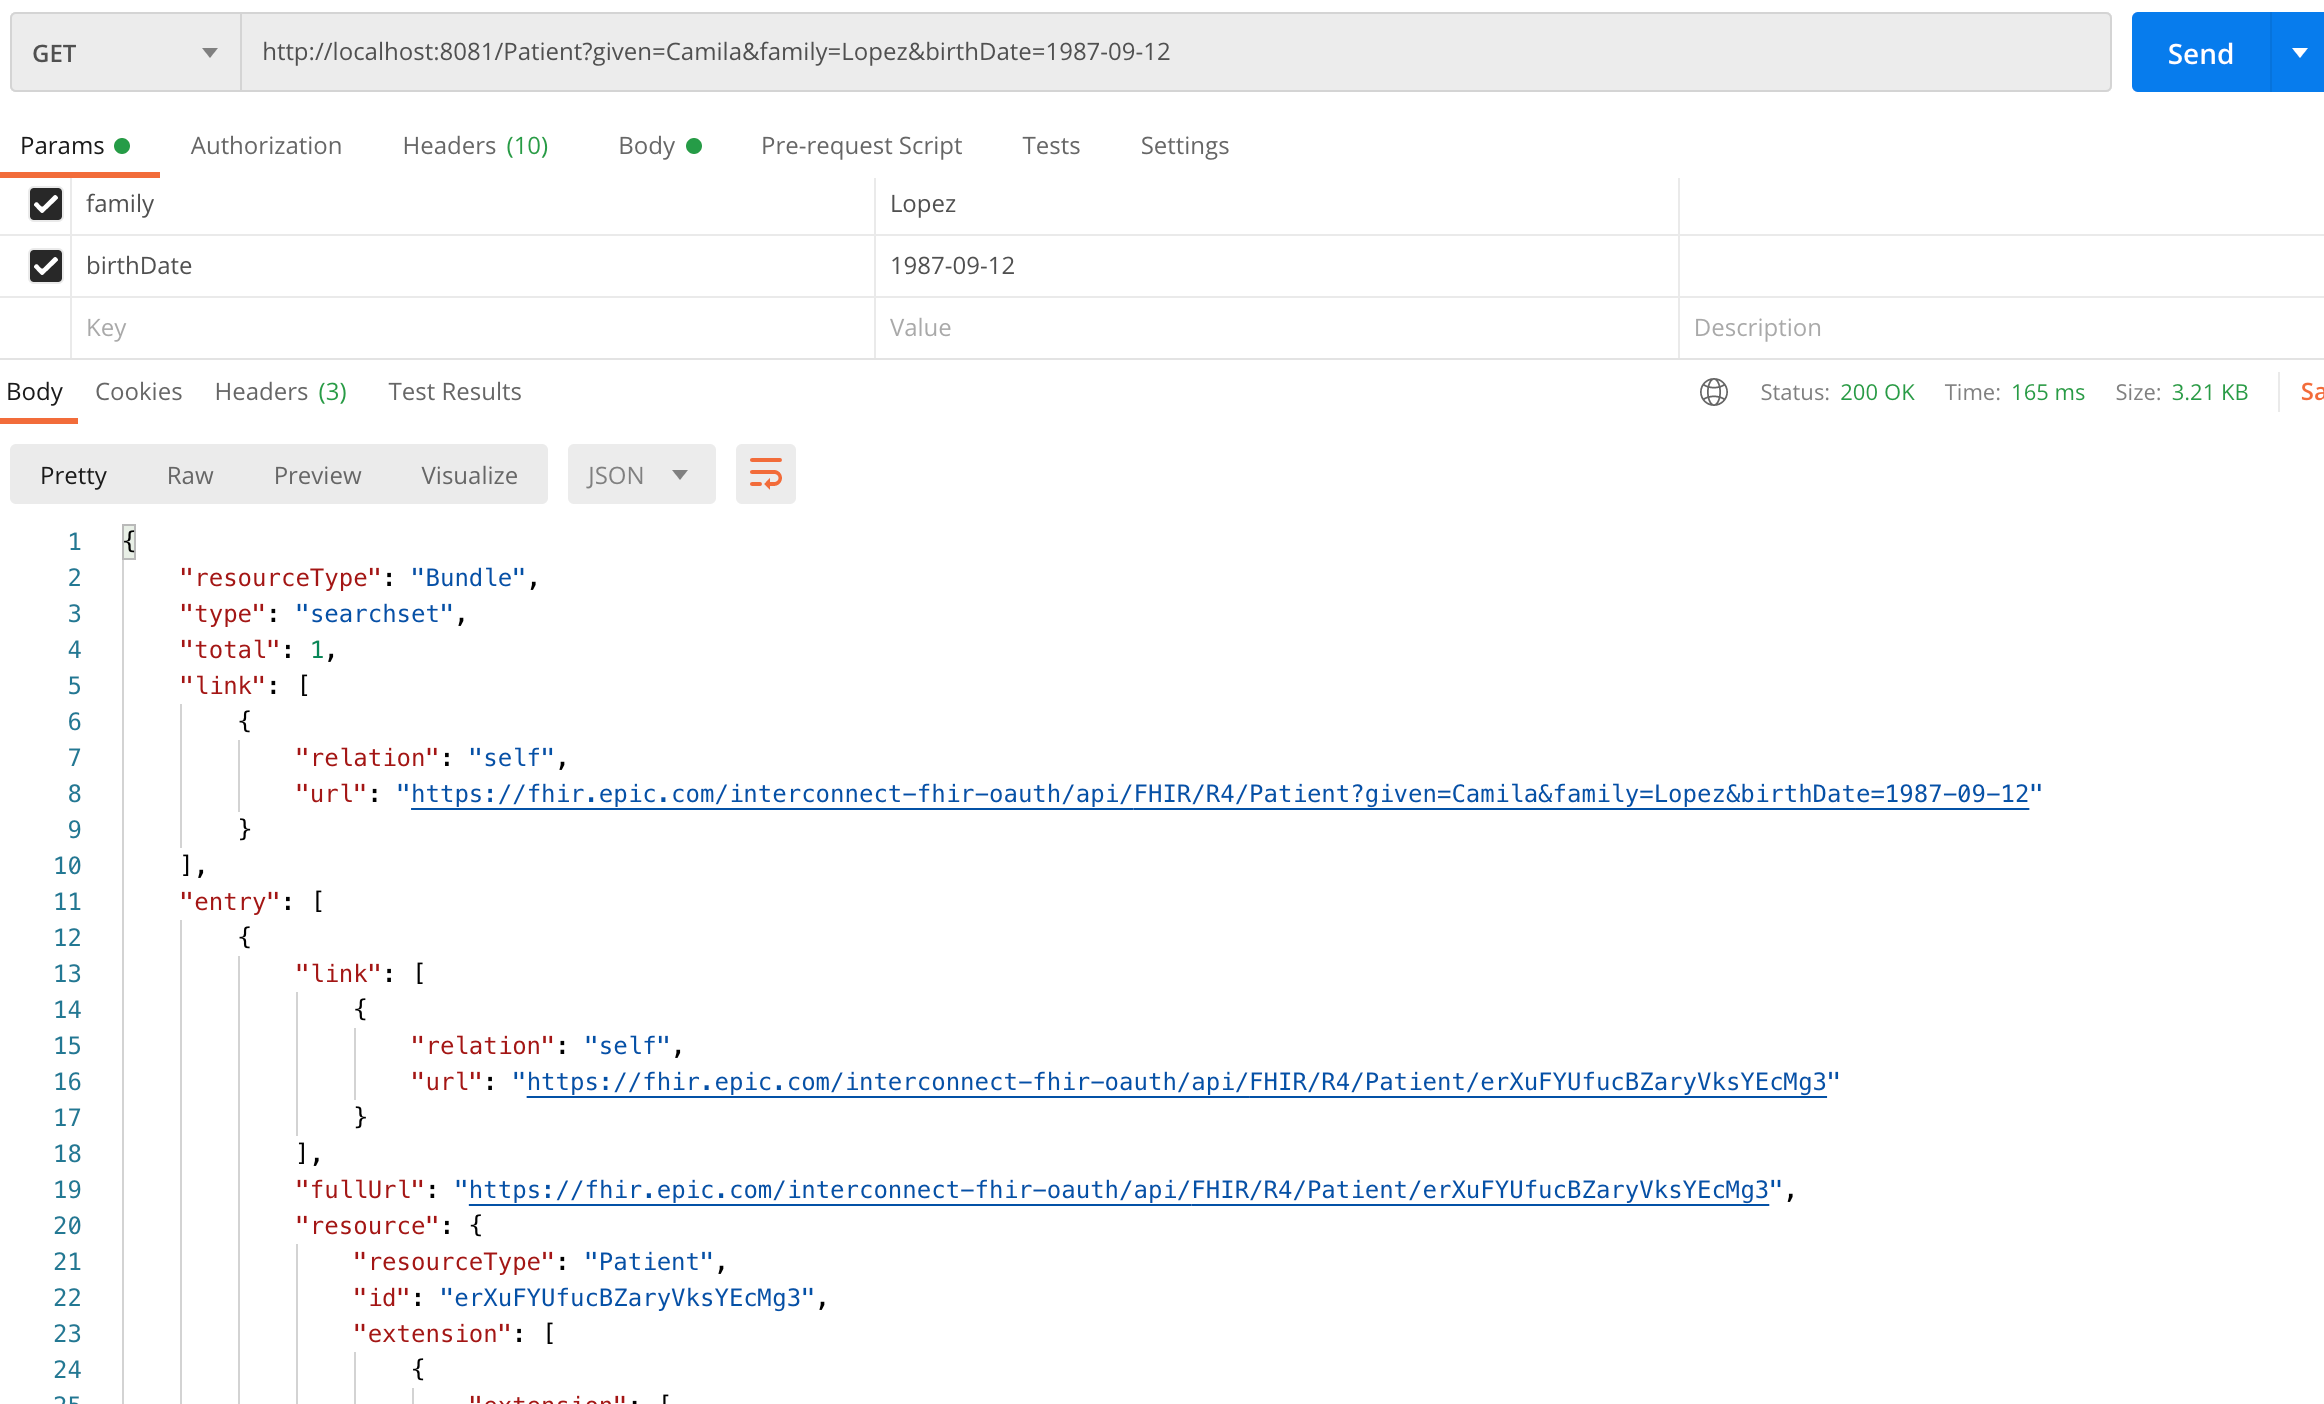
Once this is done, we can add a simple HTTP listener and connect our flow to it to get the data from Epic’s FHIR API. Epic has provided test data in the sandbox. Let’s use it to search for a patient record.
MuleSoft offers multiple connectors for Salesforce integration. This post is about Salesforce Connector for Mule 4. This connector helps in integrating with Sales Cloud, Service Cloud, Salesforce Platform, and Force.com. We will specifically look into different options for authentication with Salesforce.
Software Prerequisites
You need a Salesforce developer account. You can get one for free by signing up here. I have used the following versions for MuleSoft software.
Anypoint Studio 7.7
Salesforce Connector 10.8.0
Configuration
Security Token in Salesforce
Salesforce security token is an alphanumeric code associated with your password. You do not need a security token if you are trying to authenticate from an IP address that is inside your Salesforce org’s trusted IP range, or your Salesforce profile’s login IP range. When you sign up for a new developer account, your Salesforce org does not have trusted IP ranges. You can either set up trusted or login IP ranges in your org, or use the security token for authentication. Generating security token is simple.
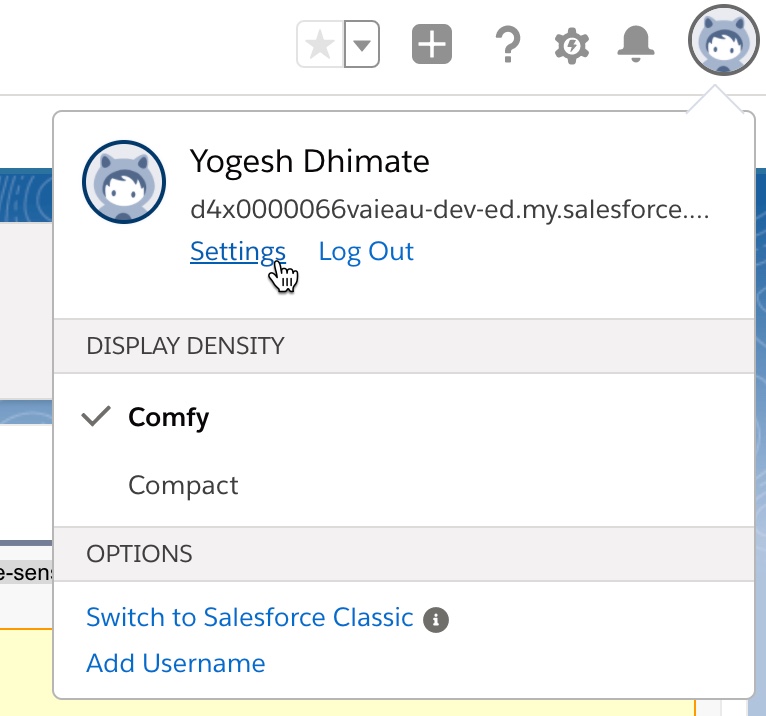
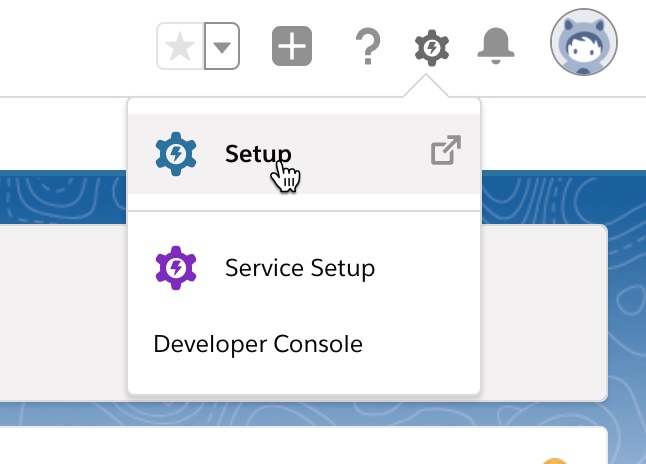
Go to settings
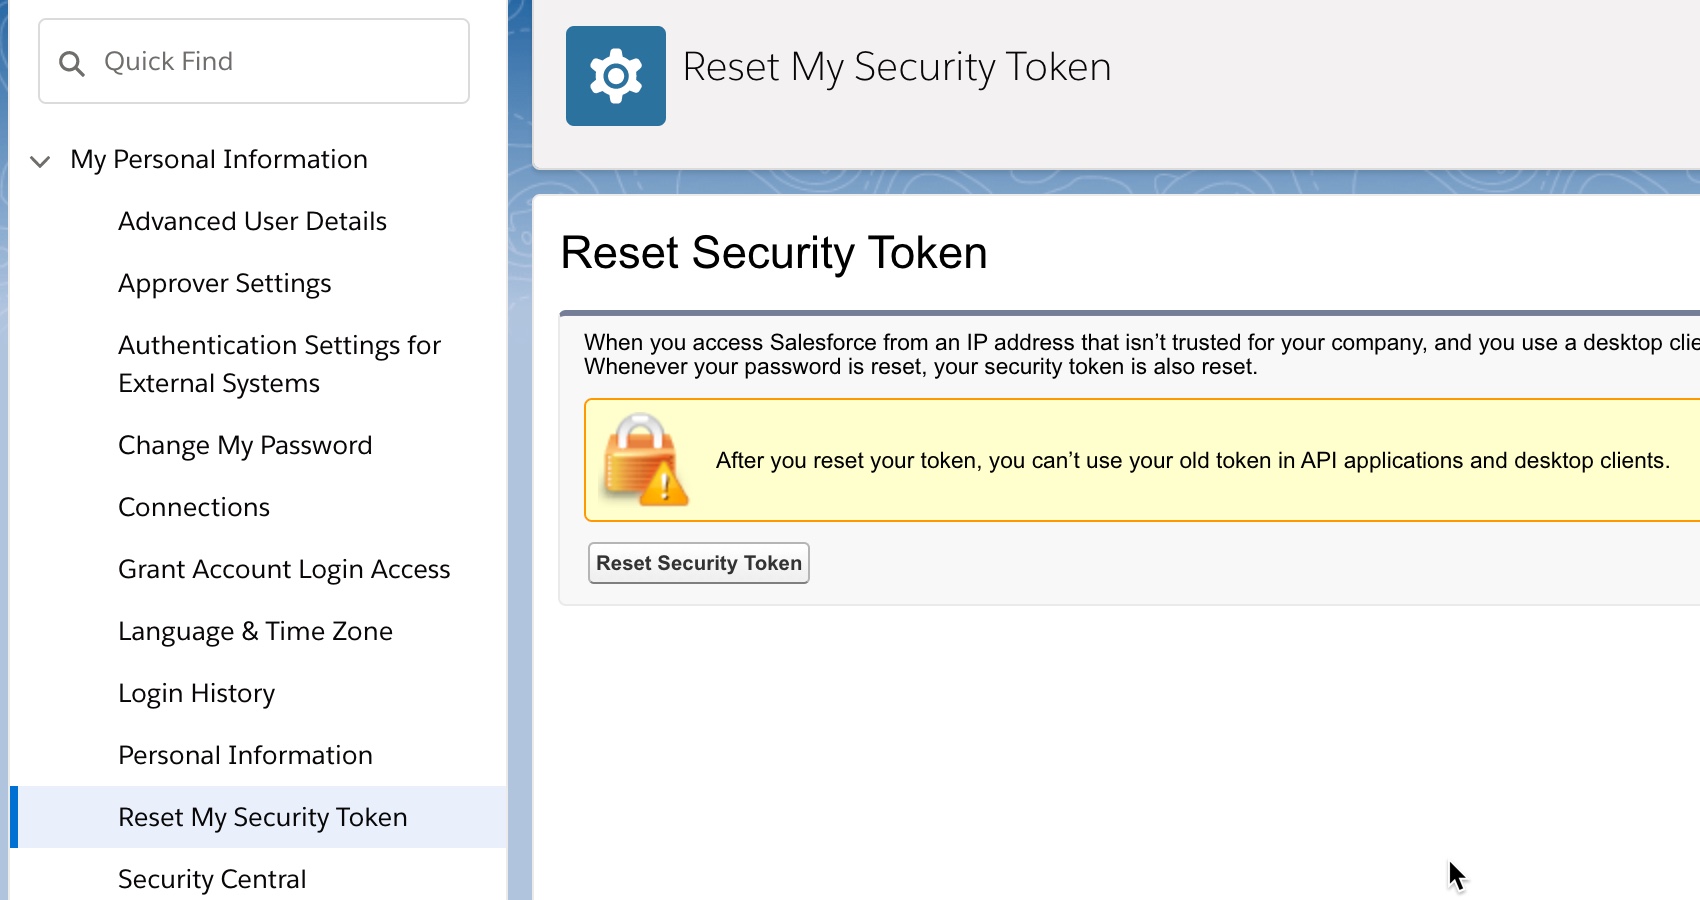
Reset security token by using the ‘Reset My Security Token’ menu and clicking on the ‘Reset Security Token’ button.
You should receive your new security token in your email account that you used to sign up for the Salesforce developer account.
Certificate setup in Salesforce
For certificate-based security, you need to set up a certificate in Salesforce.
Go to setup
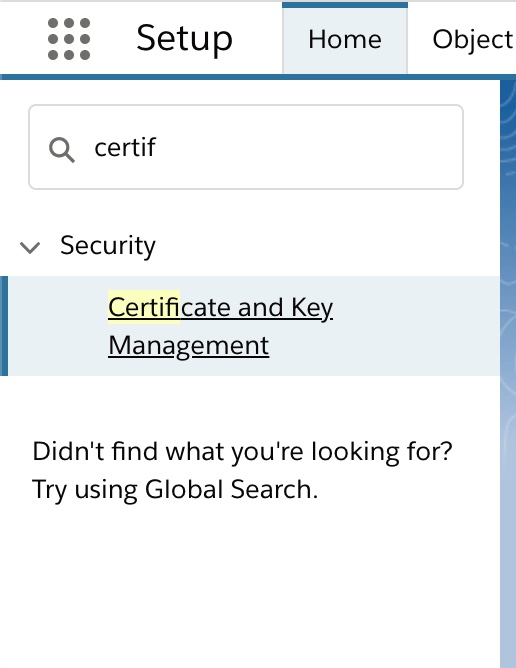
Search for certificate and key management and select the option
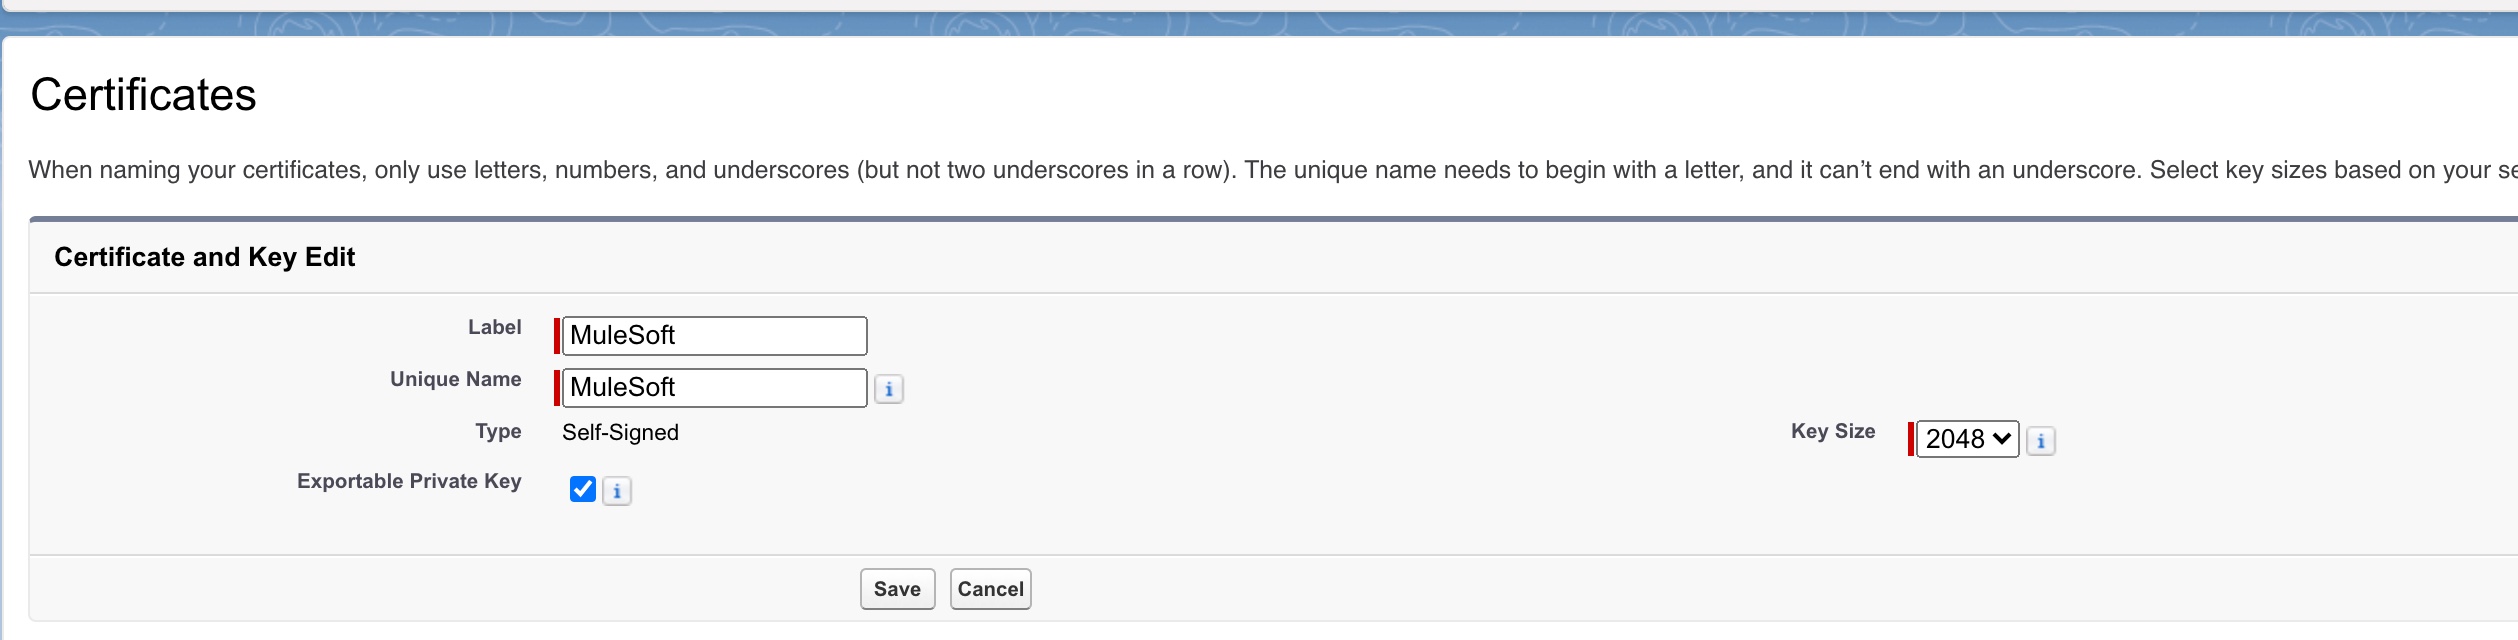
Click on ‘Create Self-Signed Certificate’ button to create a new certificate and enter the information and save it.
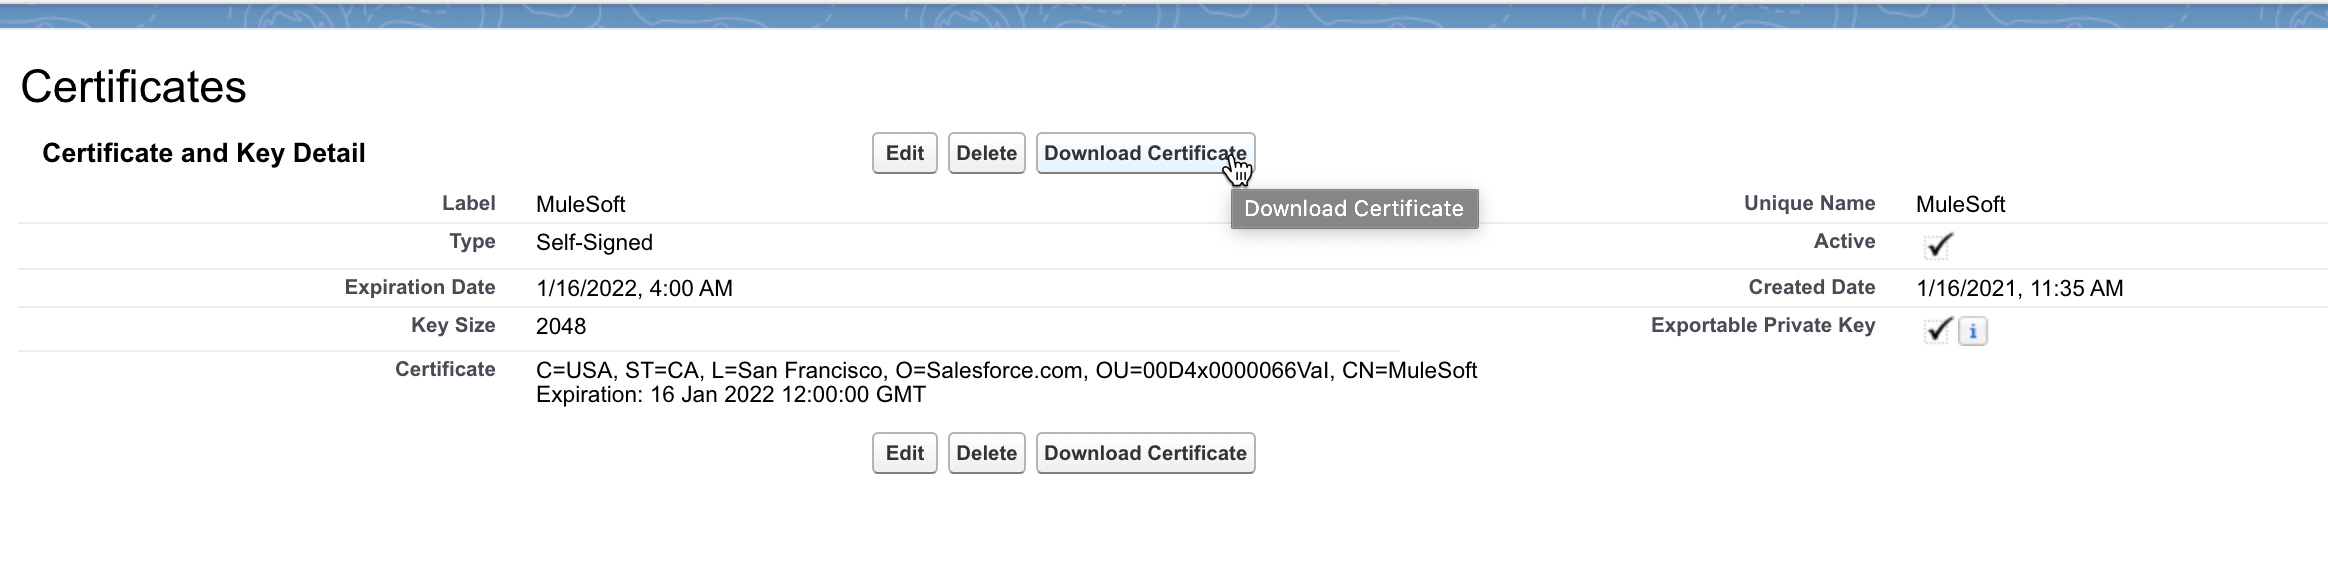
Once certificate is created, download the certificate (.crt) file. We need it for setting up the connected app.
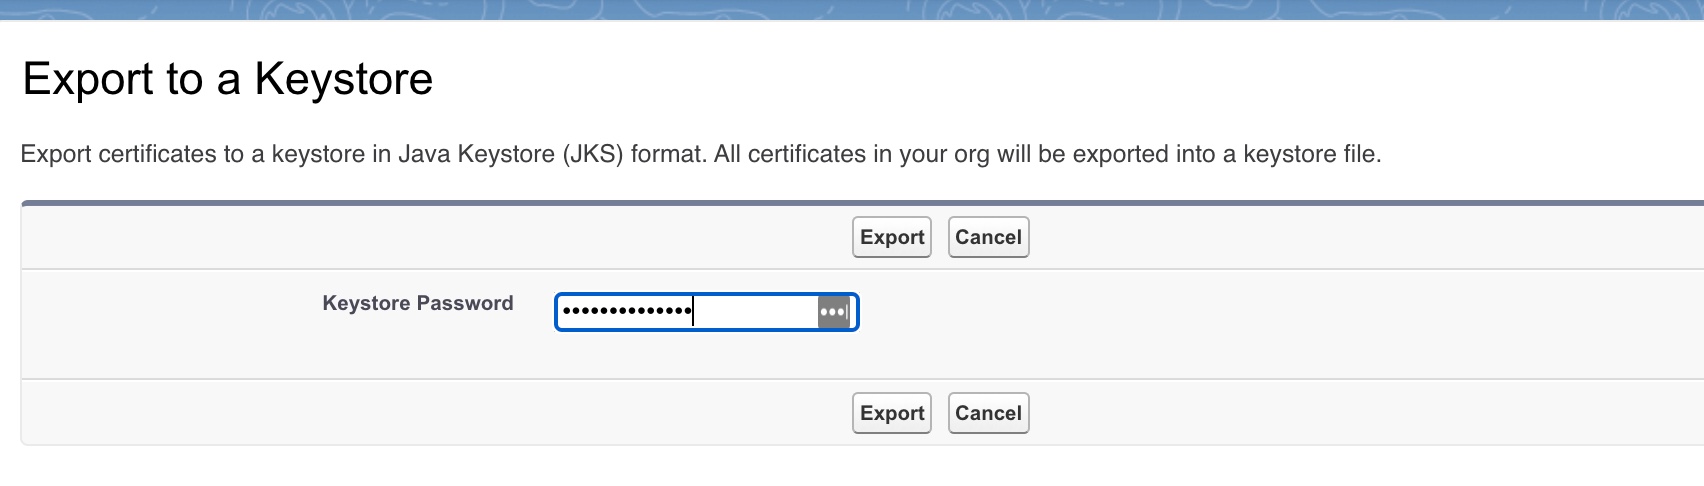
Export the certificate to keystore. We need it to configure the connection information in Mule app.
Enter the password when exporting to keystore
Make sure you save both the .crt file (downloaded in step 4 above) and the .jks file safely on your disk.
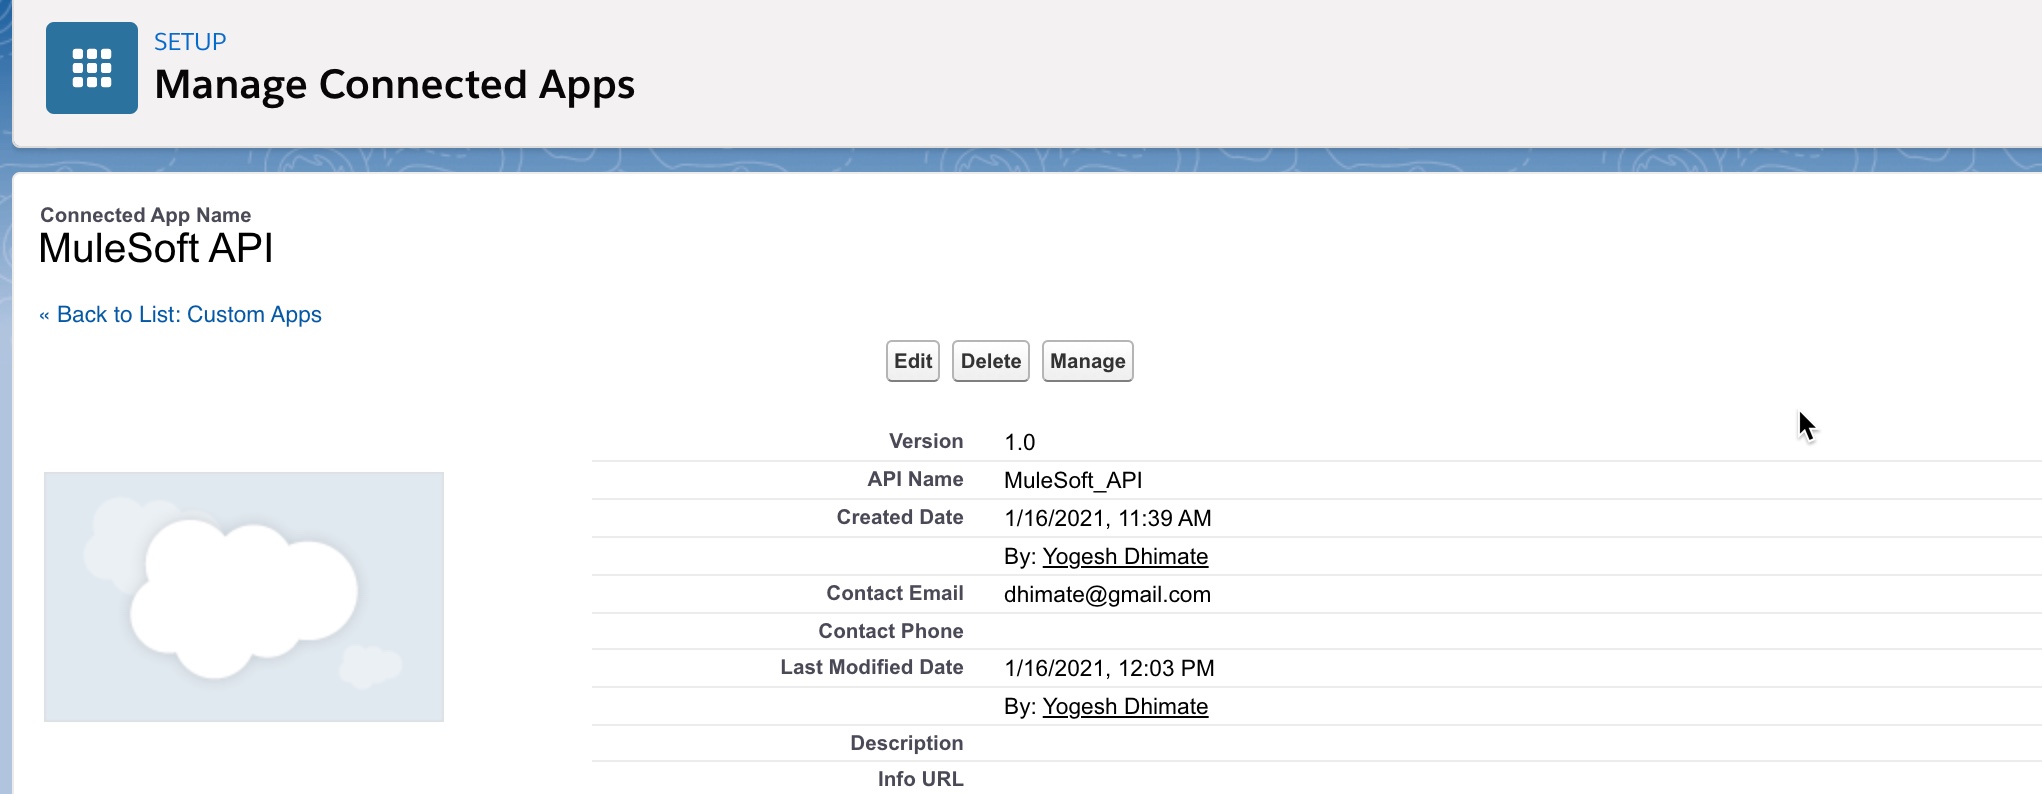
Connected App setup in Salesforce
Go to setup
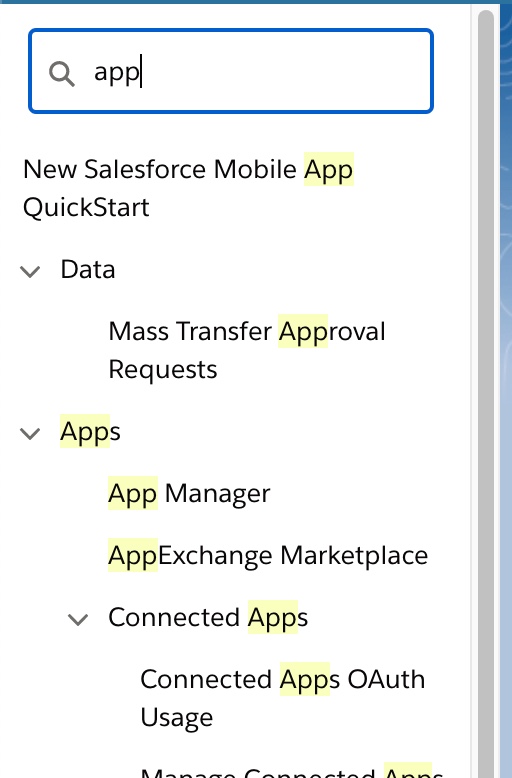
Search for app manager and select the ‘App Manager’ option
Use the ‘New Connected App’ button to create a new connected app.
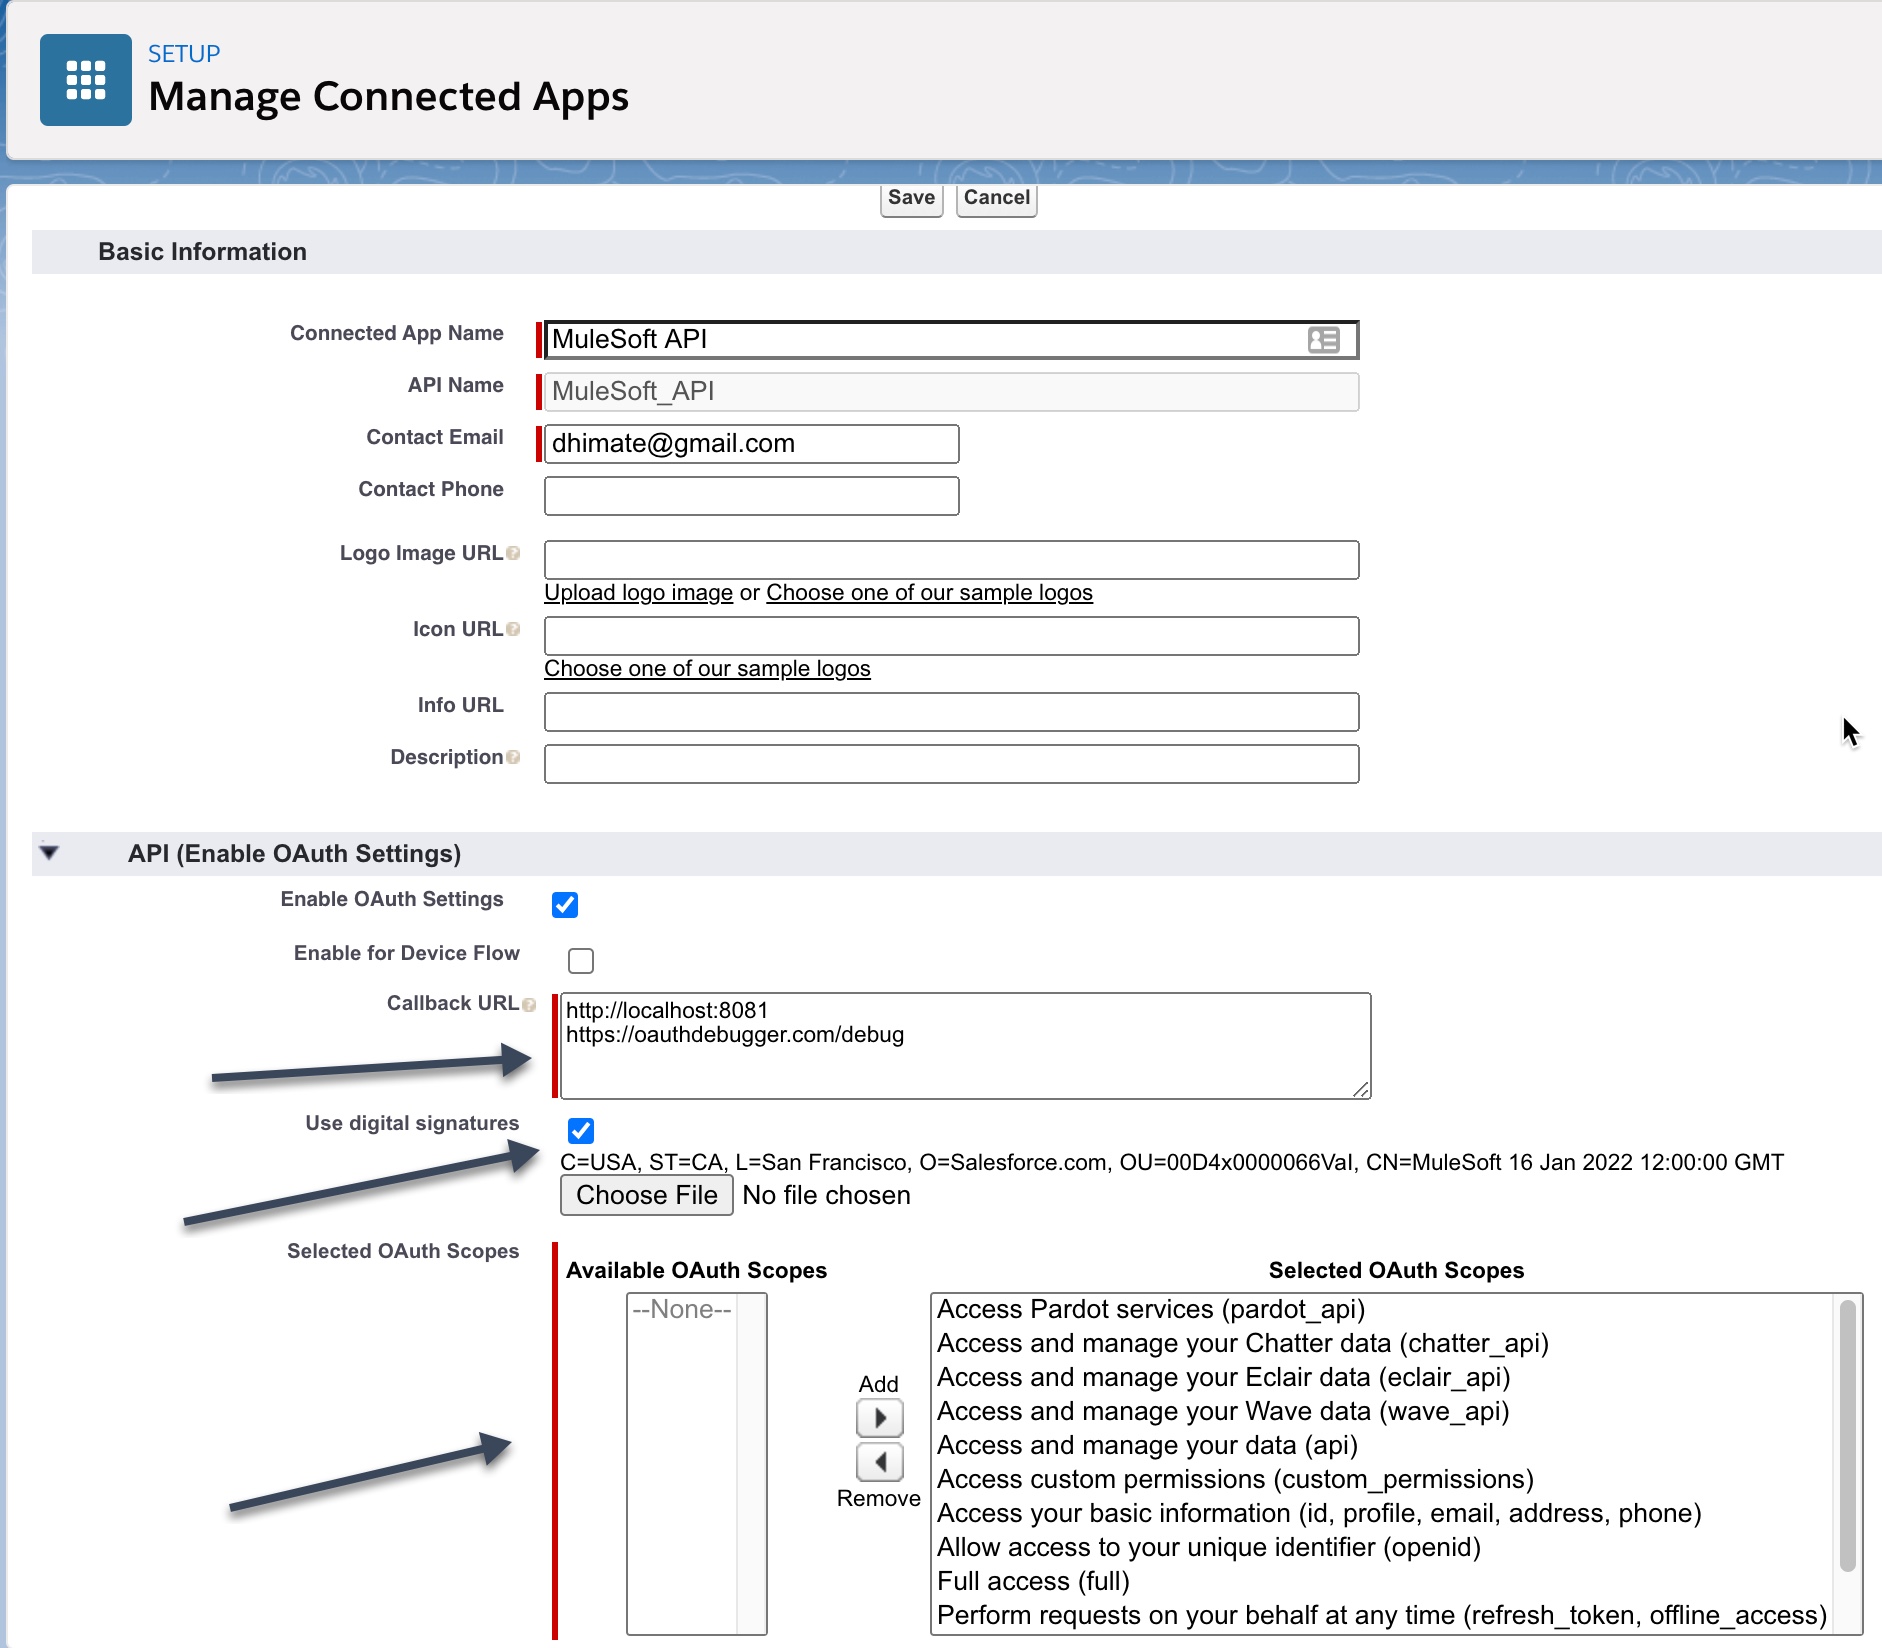
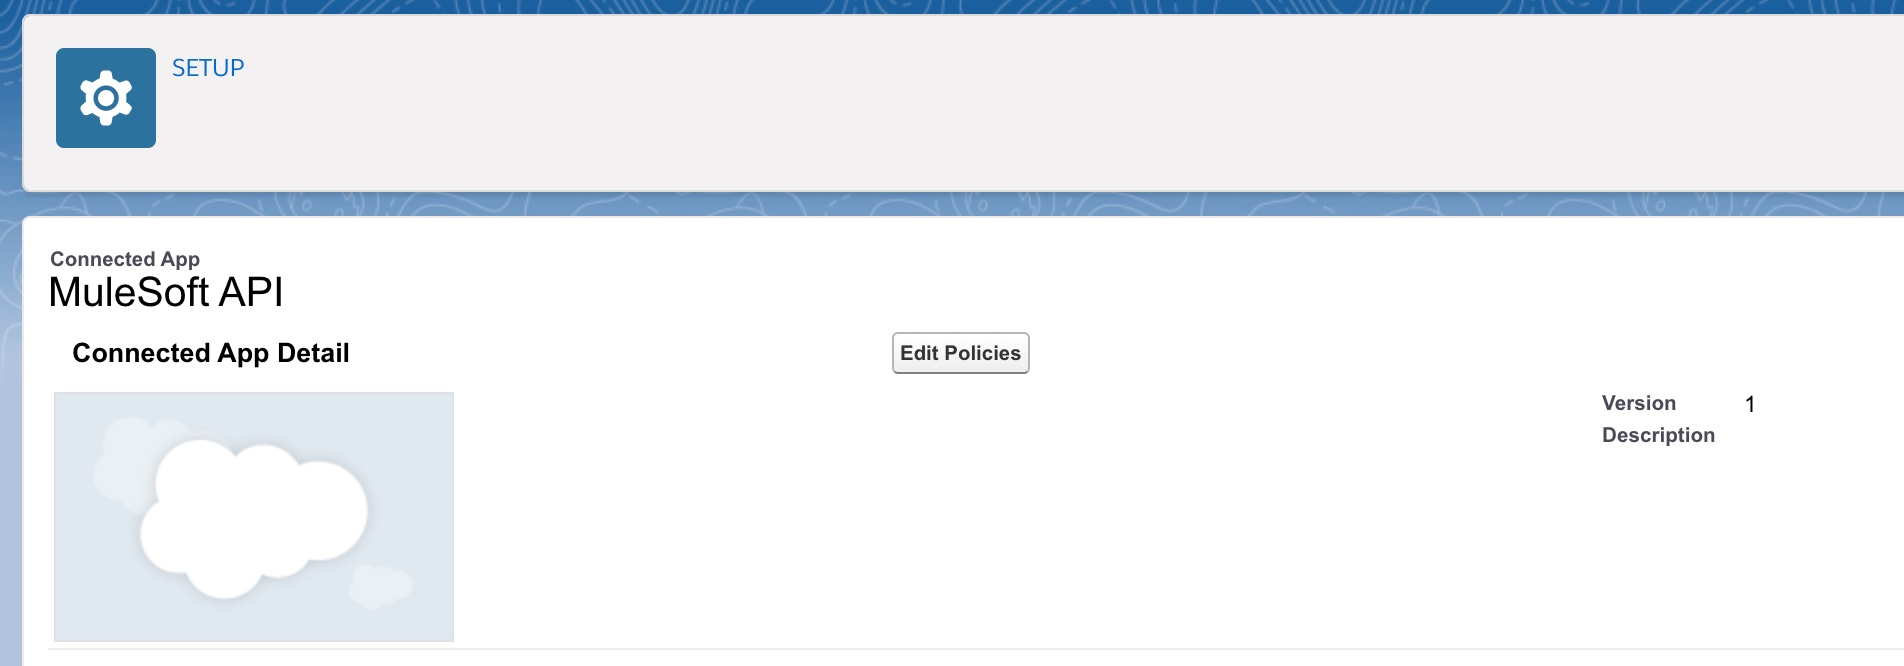
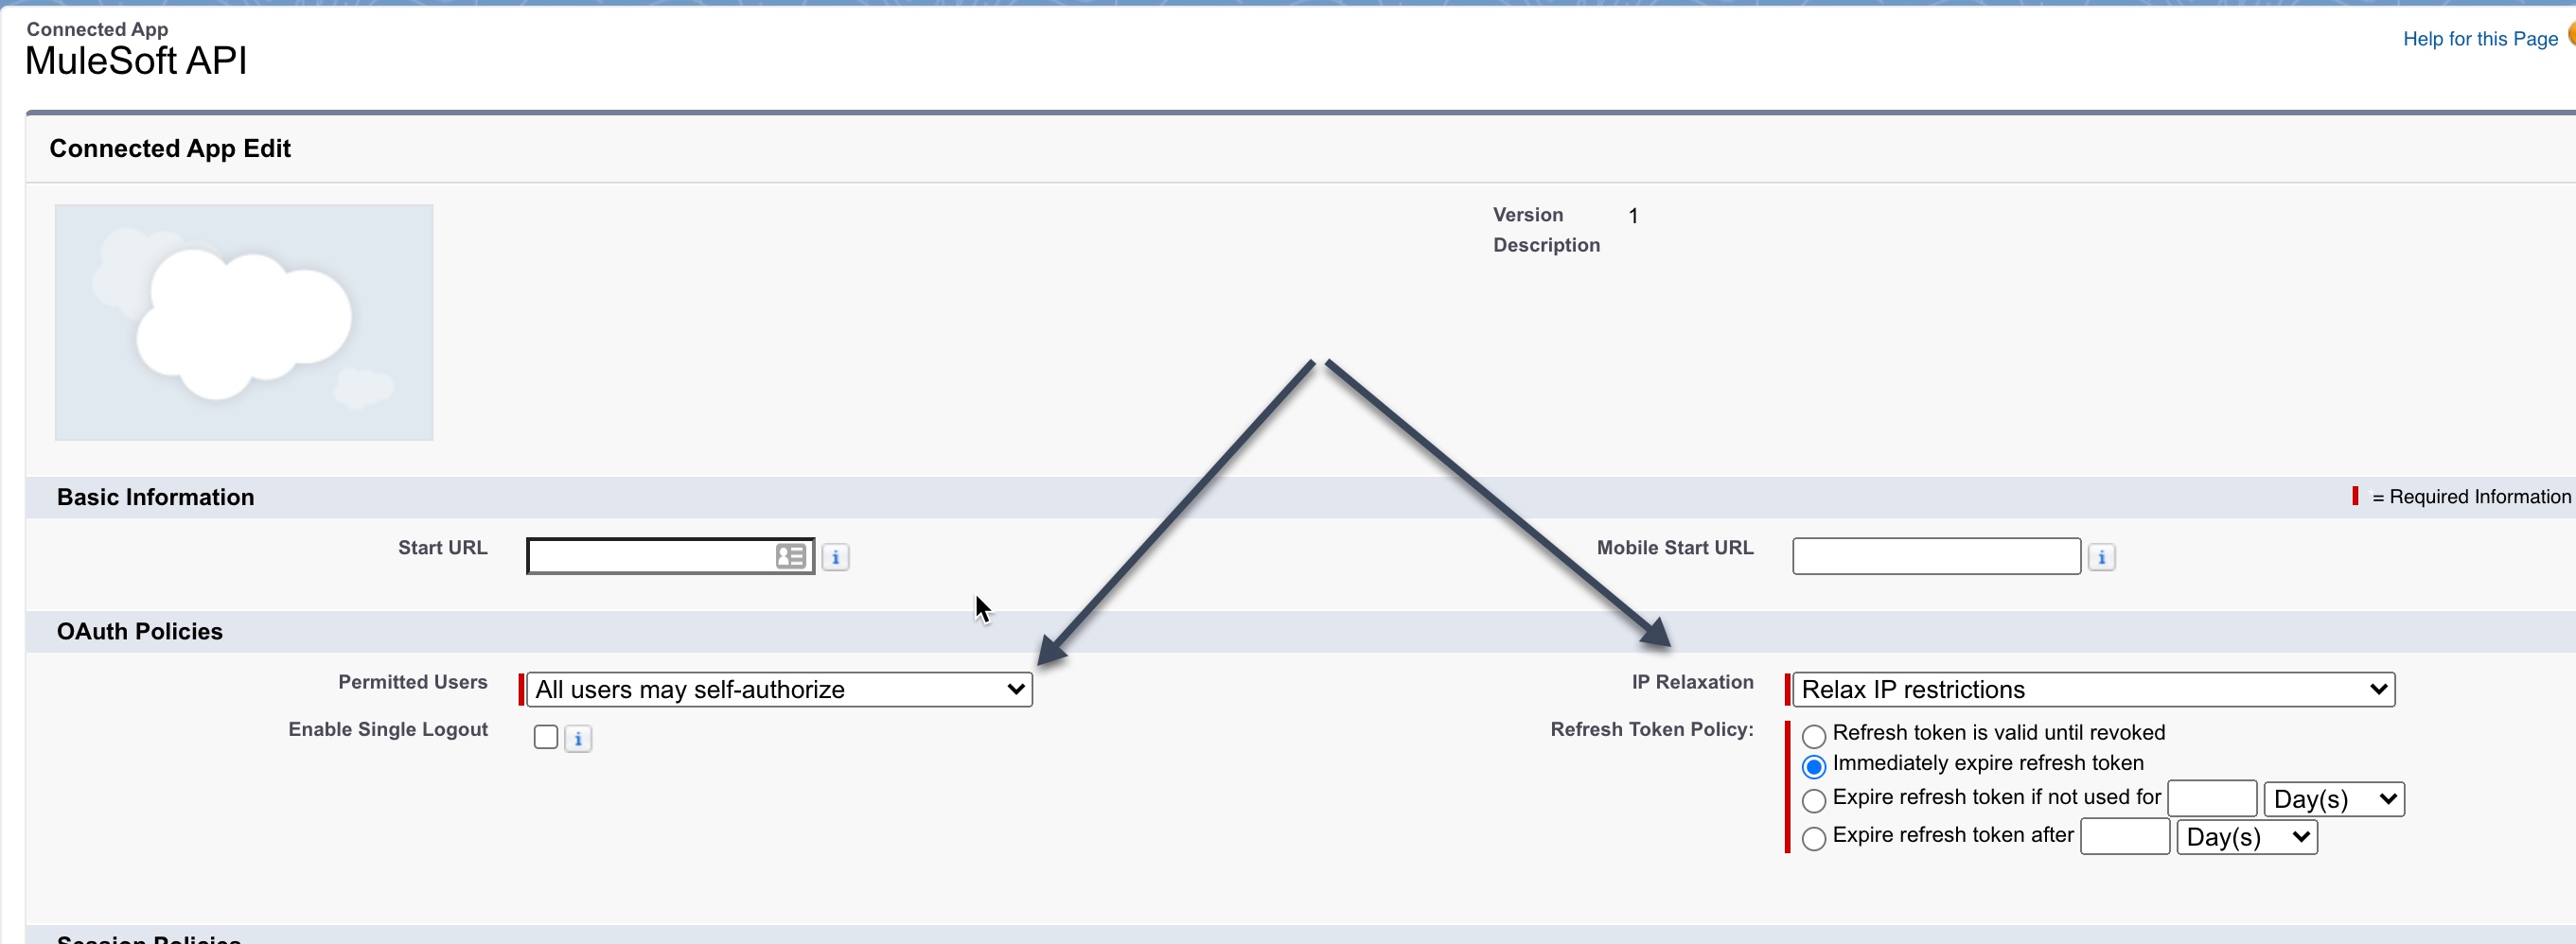
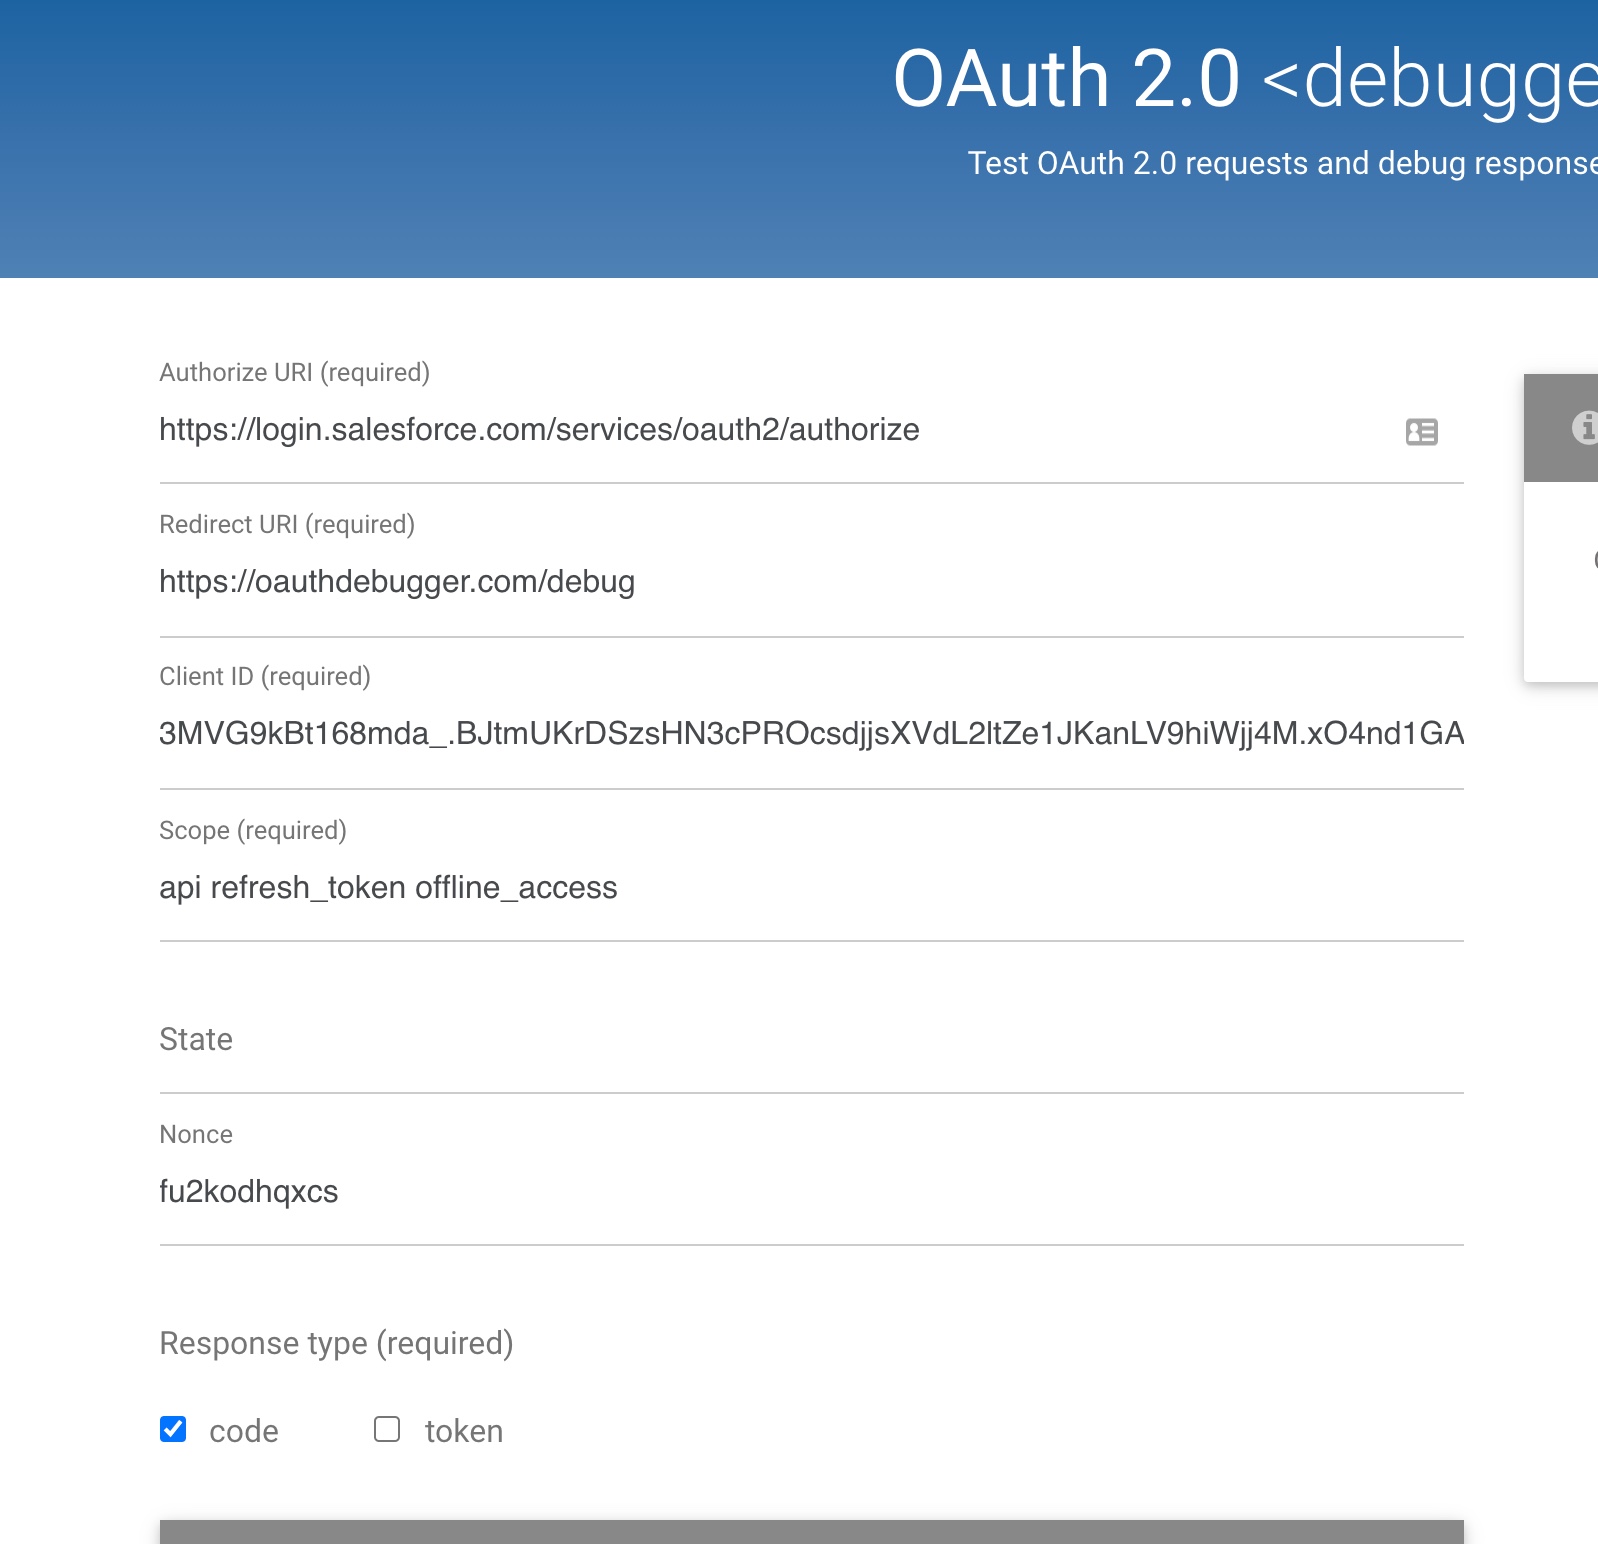
Fill in name and email. Select ‘Enable OAuth Settings’ Enter two Callback URLs
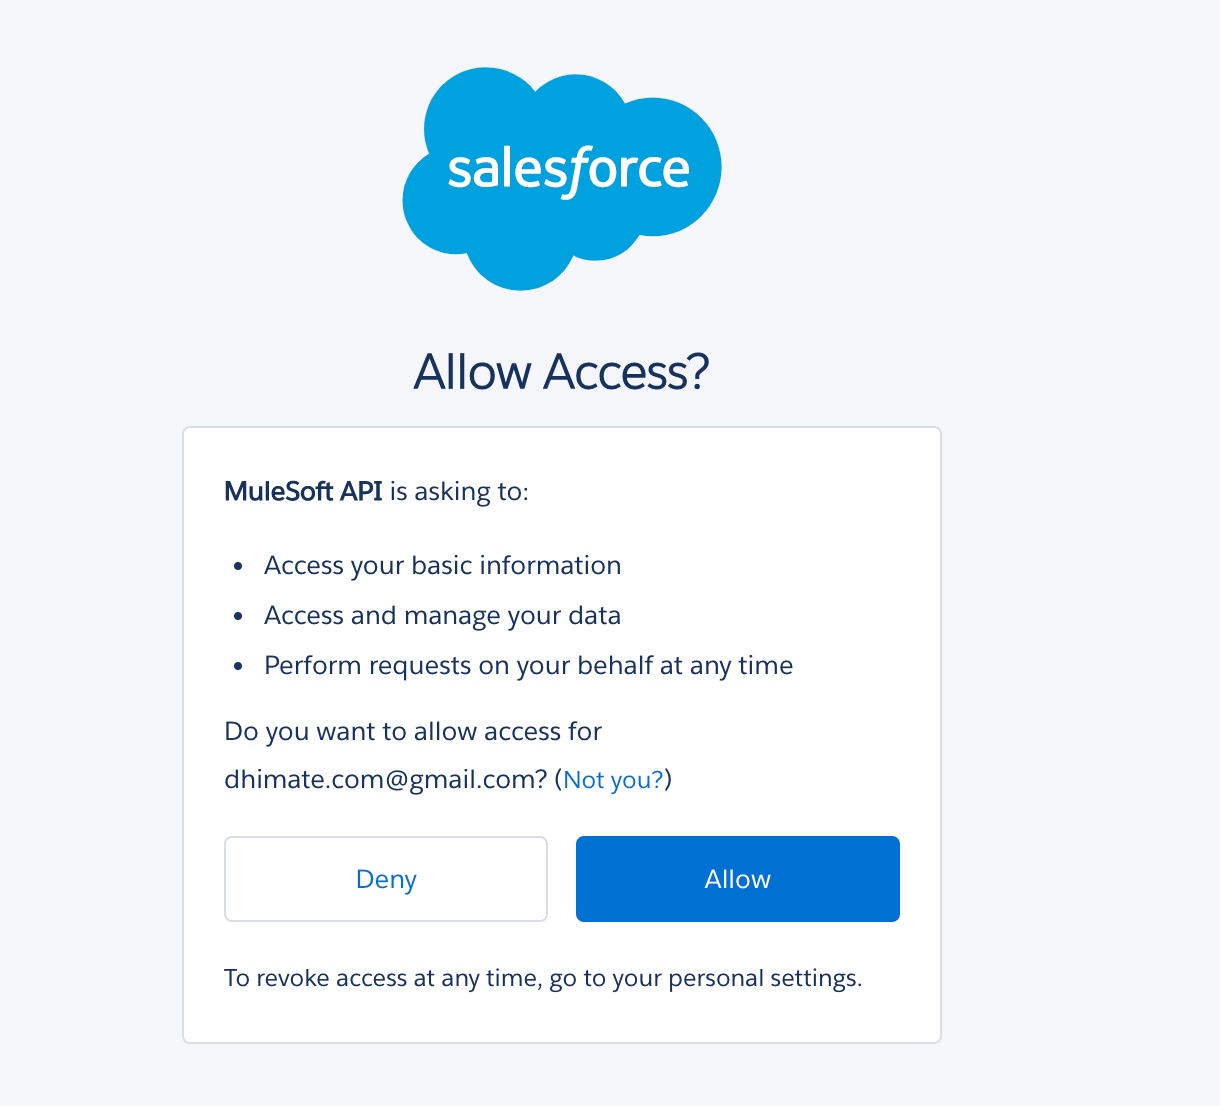
It should redirect you to enter your credentials on Salesforce login screen and you should receive an authorization code.
This will complete the connected app setup.
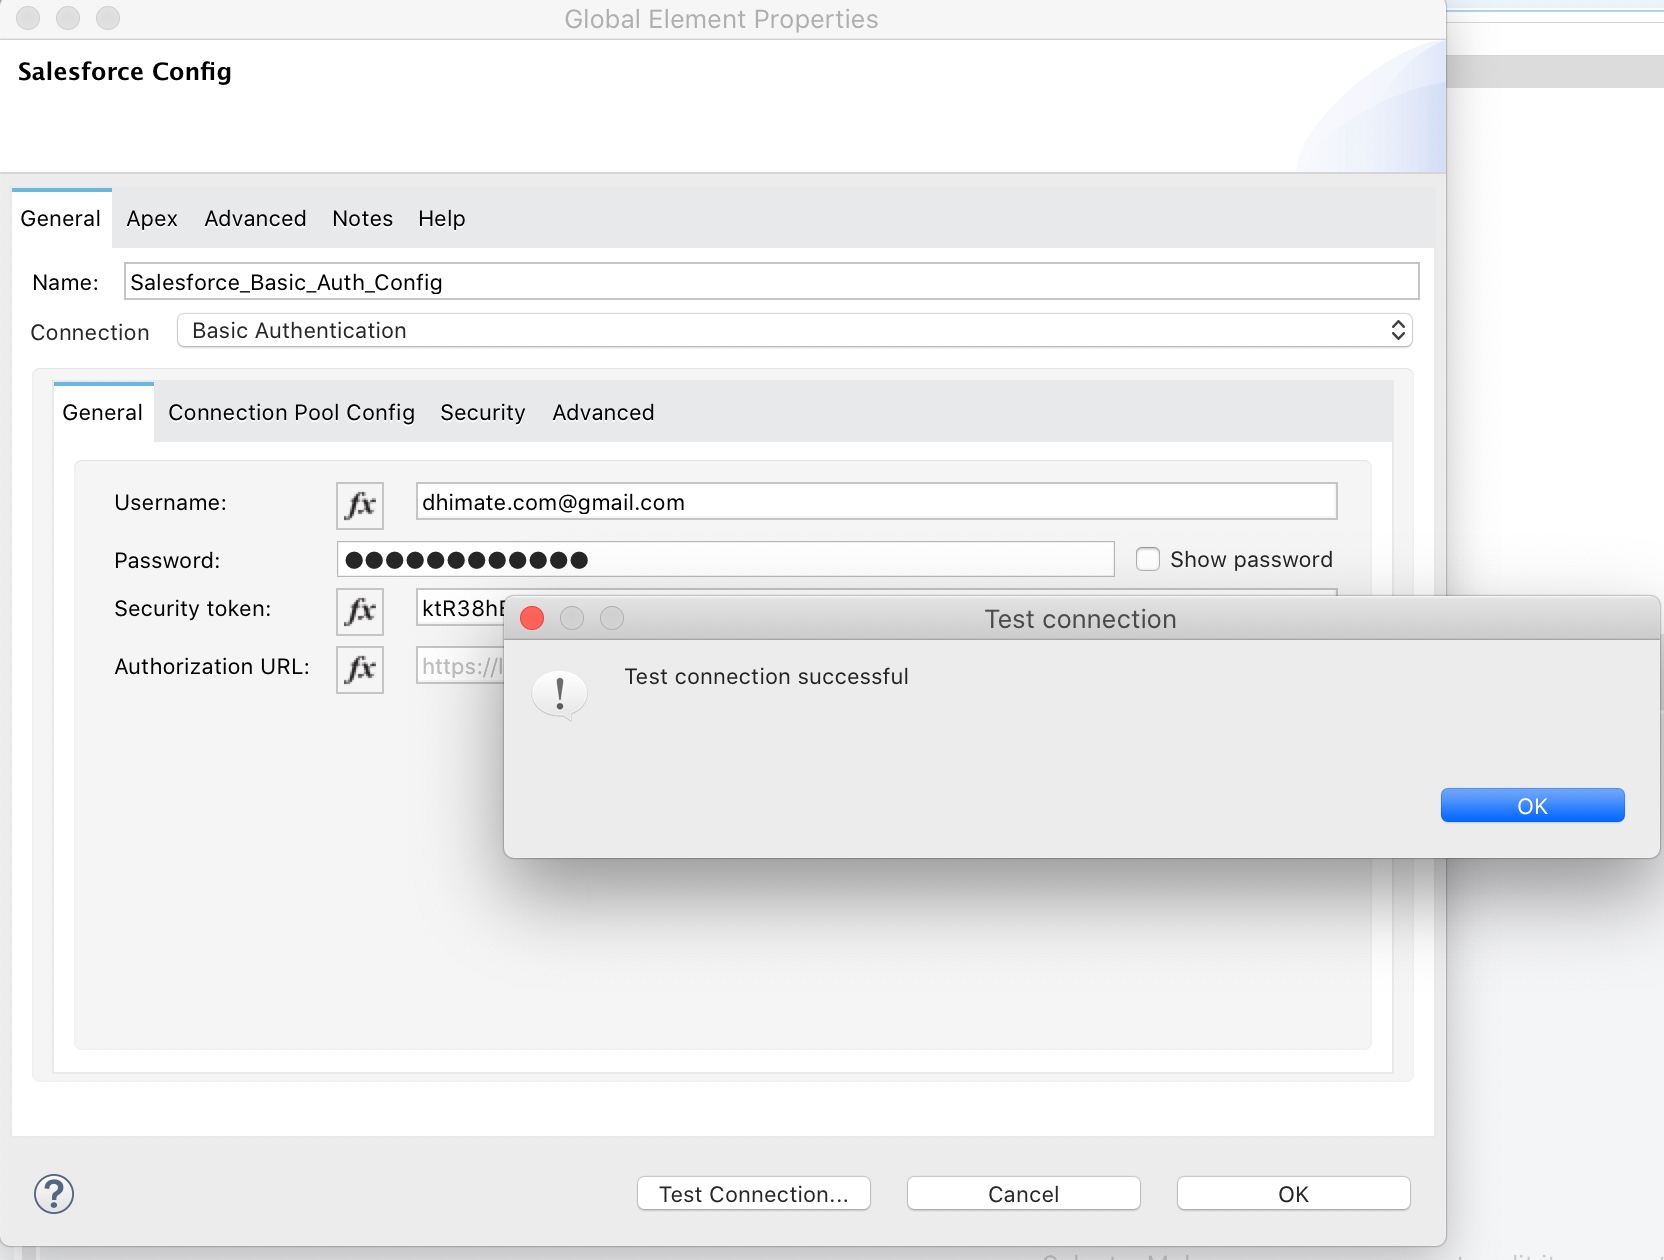
Basic Authentication
Basic authentication is the easiest way to authenticate with Salesforce. For basic authentication you need username and password, and optionally a security token.
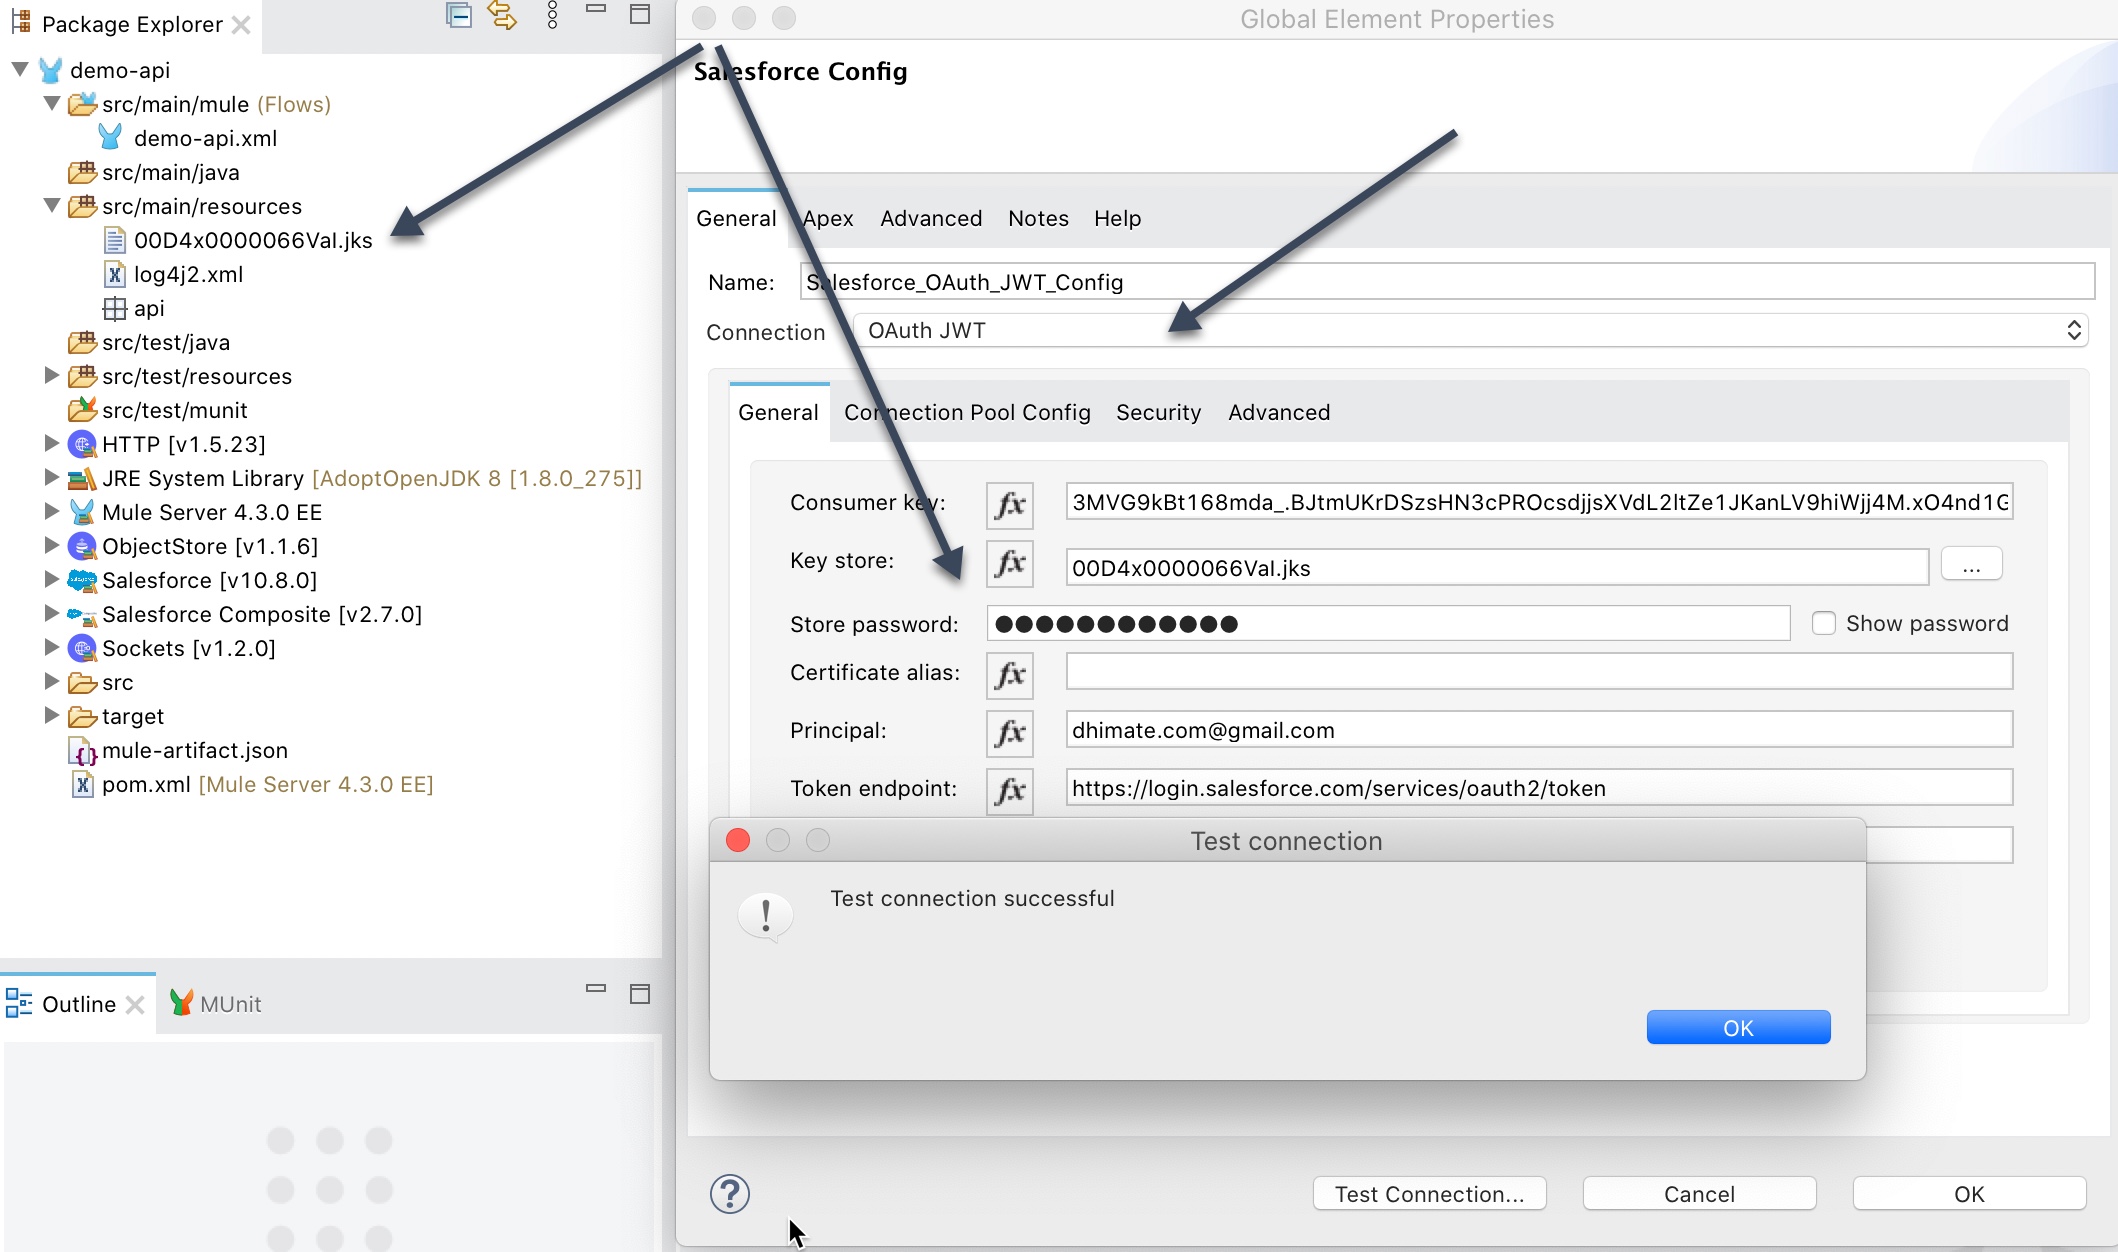
OAuth JWT
For OAuth JWT connection copy and paste the key store file (.jks) that you created in the certificate setup section into the src/main/resources folder.
Consumer Key – Consumer key of the Connected App that was created in Salesforce
Key Store – Keystore file (.jks) that you downloaded from the certificate setup
Store Password – Keystore password that was created when you generated the key store file
Principal – Salesforce username of the user that was approved against the authorization URL
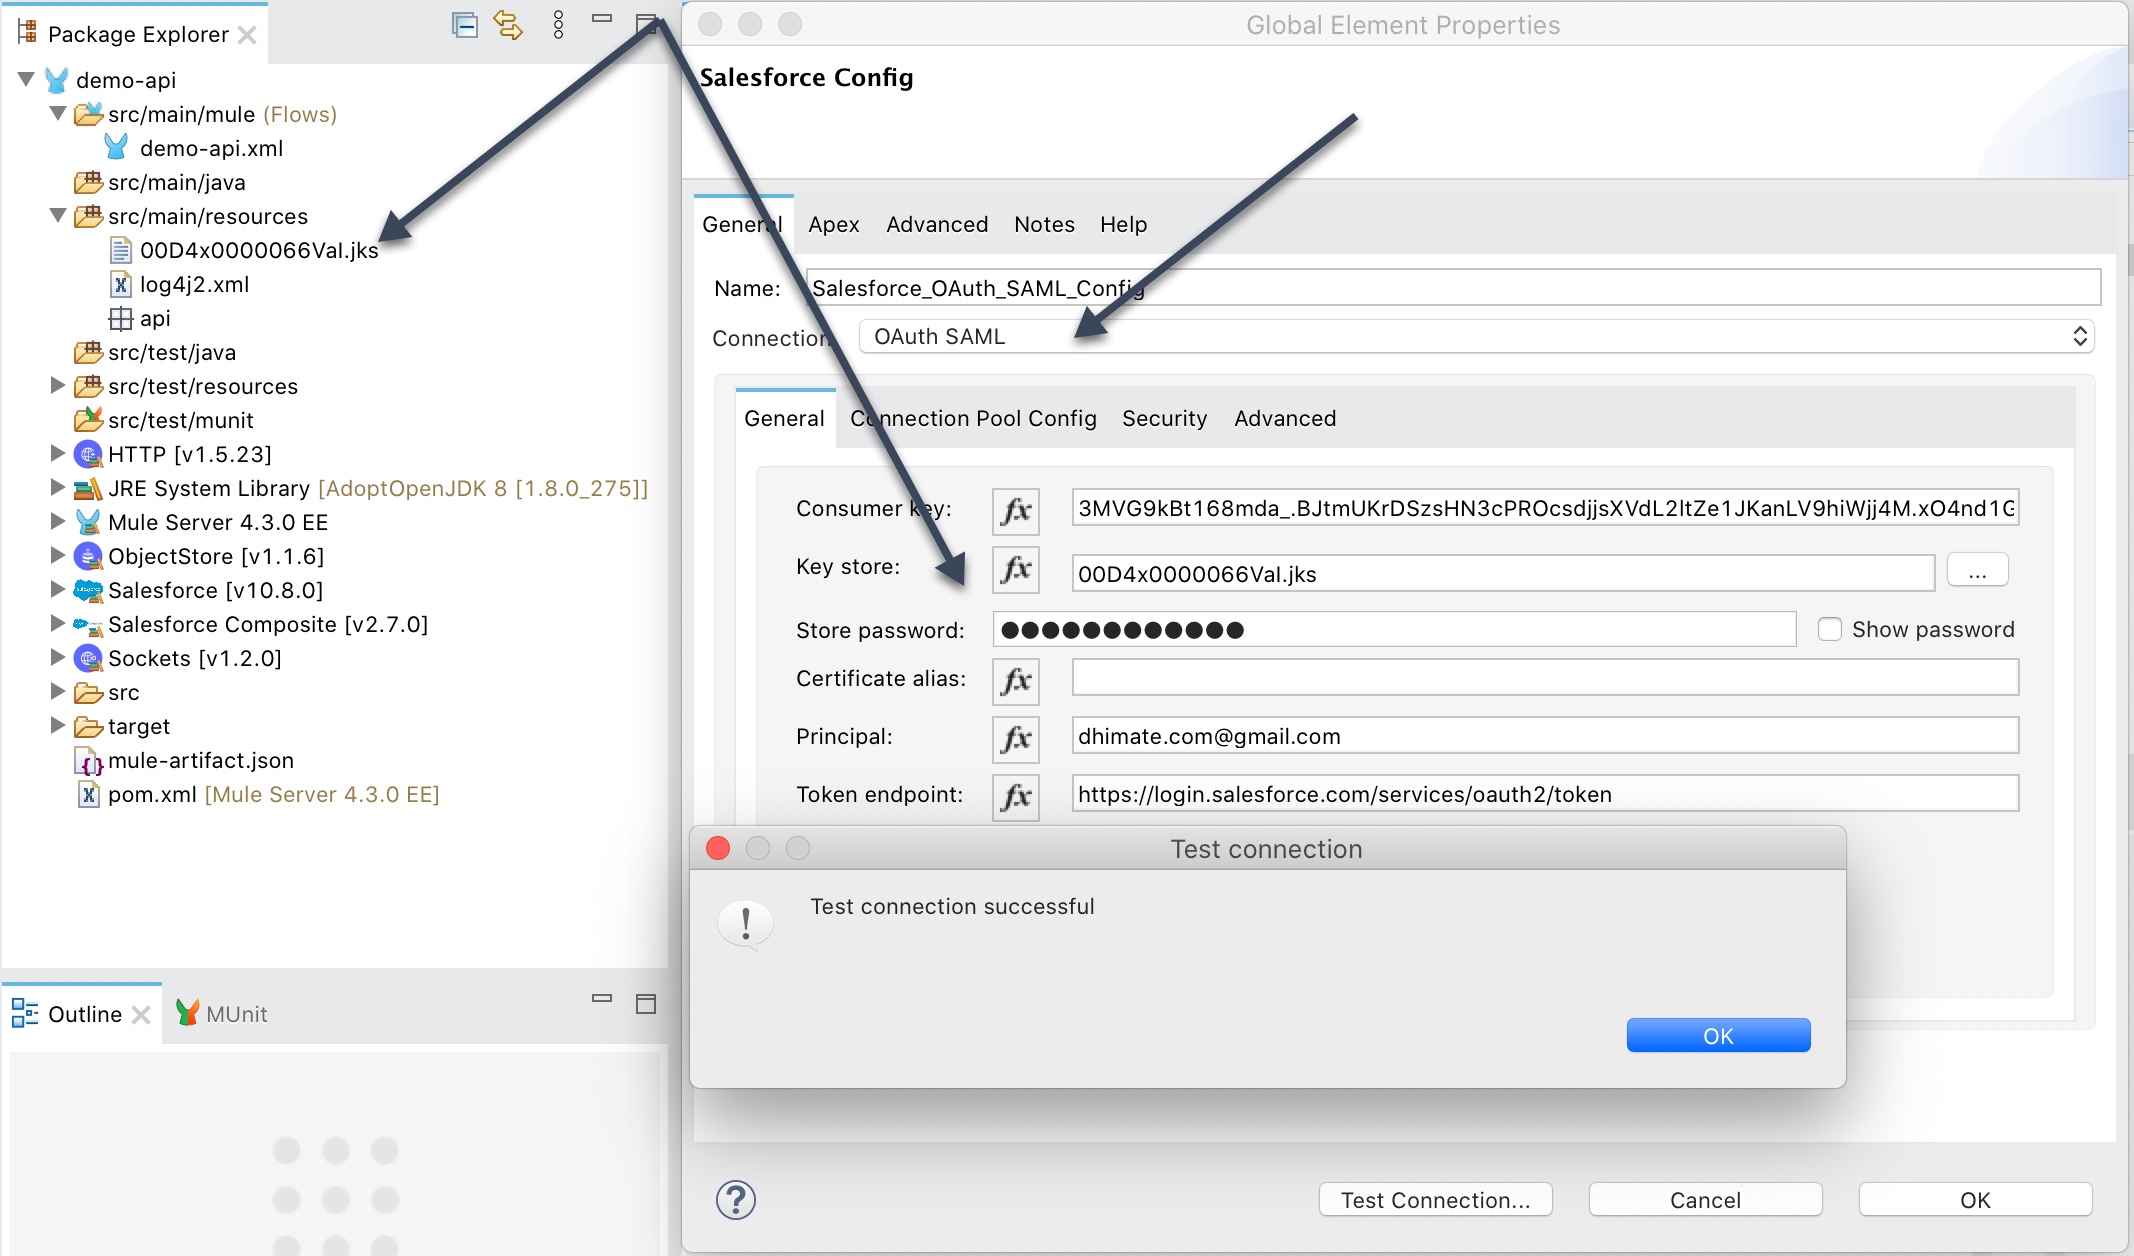
OAuth SAML
For OAuth SAML connection copy and paste the key store file (.jks) that you created in the certificate setup section into the src/main/resources folder.
Consumer Key – Consumer key of the Connected App that was created in Salesforce
Key Store – Keystore file (.jks) that you downloaded from the certificate setup
Store Password – Keystore password that was created when you generated the key store file
Principal – Salesforce username of the user that was approved against the authorization URL
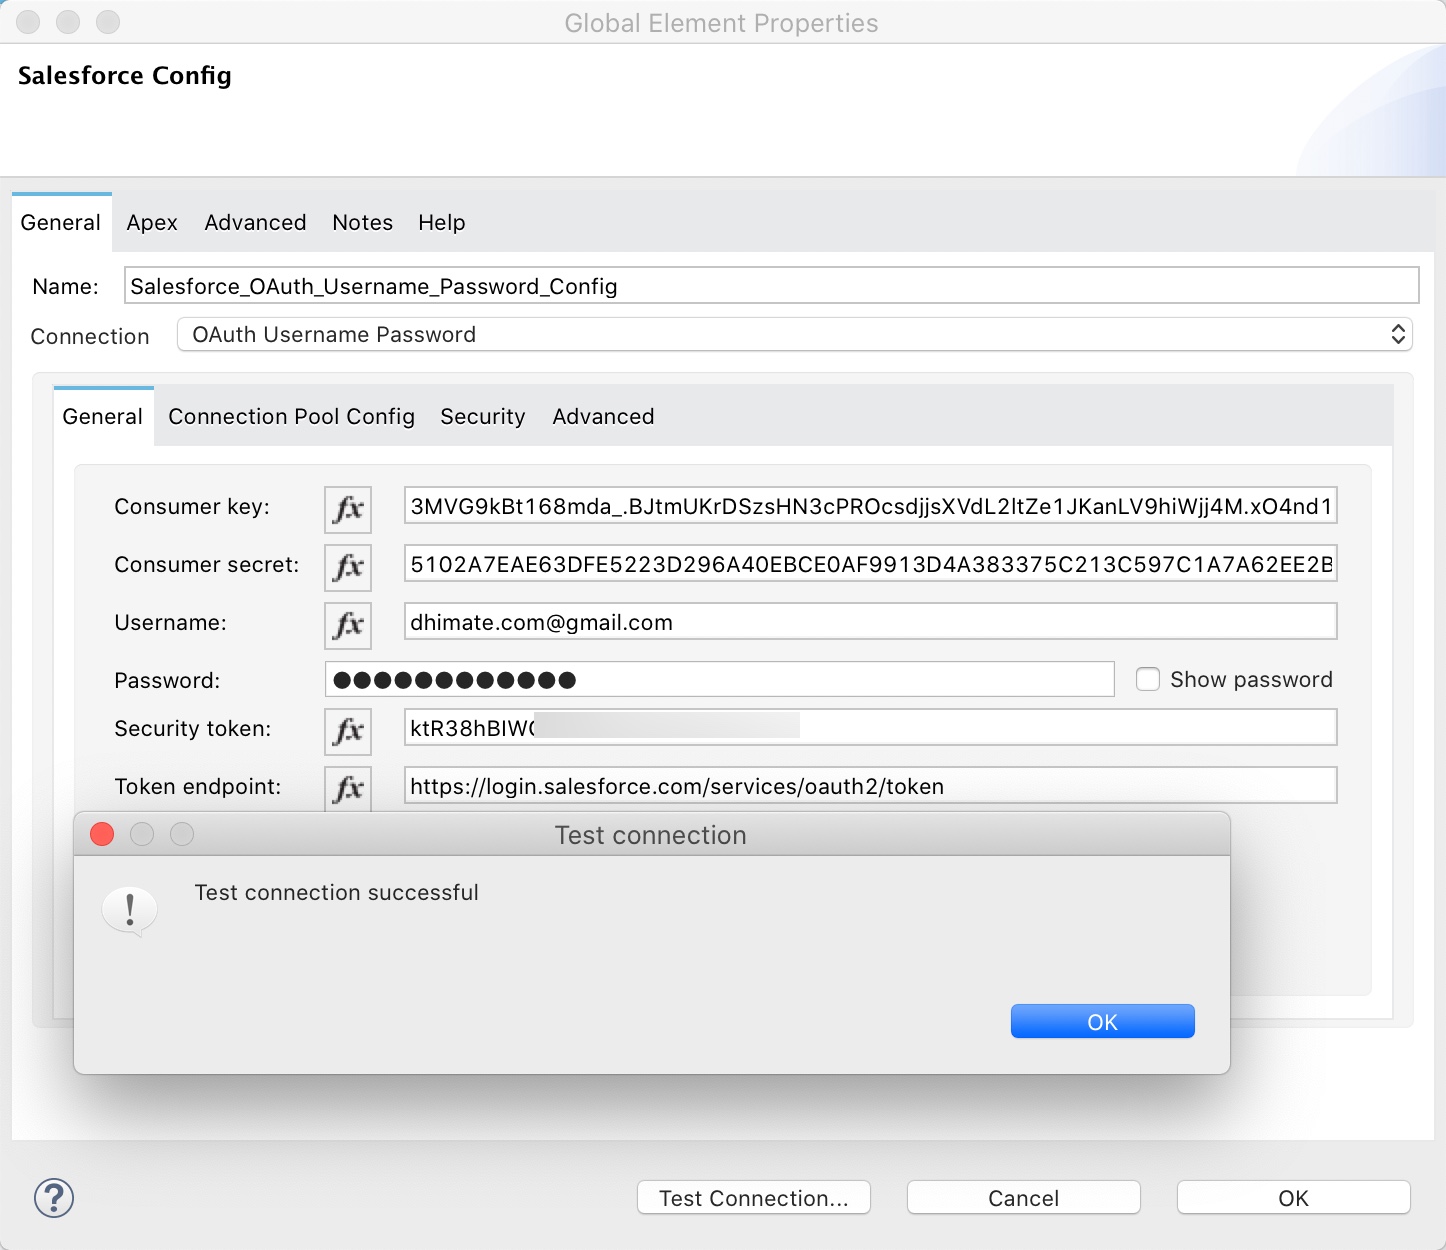
OAuth Username Password
For OAuth Username Password configure the following properties
Consumer Key – Consumer key of the Connected App that was created in Salesforce
Consumer Secret – Consumer secret of the Connected App that was created in Salesforce
Username – Salesforce login id
Password – Salesforce password
Security Token - Security token associated with the username